2. Configuration
PI JDBC Client Overview
This guide describes how to configure and use an Edge One™ PI JDBC Client. PI JDBC provides data access to the OSISoft PI System through the use of SQL queries to read data tags.
The Edge One™ PI JDBC Client includes support for the following Drivers:
- PI JDBC 2010
- PI JDBC 2012
- PI JDBC 2014
- PI JDBC 2016
- PI JDBC 2018
- PI JDBC 2019
This guide describes how to configure the Edge One™ PI JDBC Client module and it includes the following sections.
- Requirements for installation of the PI JDBC Client.
- Creating the PI JDBC Client indicates the steps for creating the PI JDBC Client project.
- Configuring the Project indicates the initial steps for configuring the PI JDBC Client project.
- Configuring the Server Access describes how to configure the access to an PI JDBC Server.
- Configuring Data & Event Exchange Methods describes the options to configure data and event information exchange with the PI JDBC Server.
- Configuring Groups indicates how to configure PI JDBC Groups.
- Selecting Tags for the Client indicates on how to select the Tags to use on the Client.
- Managing Tags describes how to manage Tags on the Client.
- Importing Tags describes how to import Tags from a CSV file.
- Exporting Tags describes how to export Tags on a CSV file.
- Viewing Real Time Tag Data
Once the project is configured and Saved you must create a Message Router project and configure the cloud access parameters to connect uni-directionally or bi-directionally to CloudPlugs or a supported IoT cloud service.
Requirements
Here are the first few things you need to find out to configure the Edge One™ PI JDBC module:
- IP Address of the PI Server hosting the database whose data is to be retrieved by the client.
- TCP Port used by the PI JDBC Server.
- The Database to be used.
- The PI-JDBC driver required.
- Authentication type used by the PI Server.
- Any credentials and/or certificates used by the PI Server.
Creating an PI JDBC Project
The following steps are required to connect and configure PI JDBC devices on the Edge One™ platform.
- Login to the Edge One™ platform.
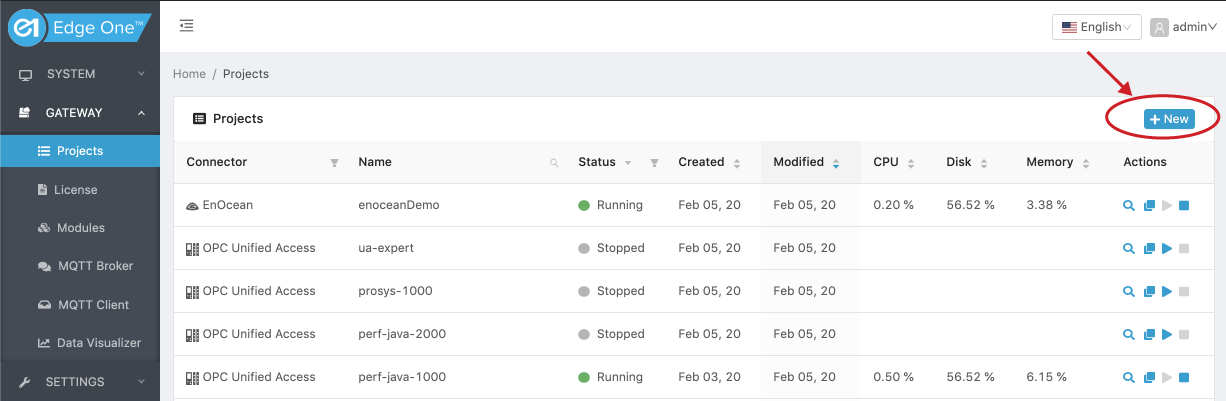
- Select “Gateway” then Projects on the left panel navigation bar.
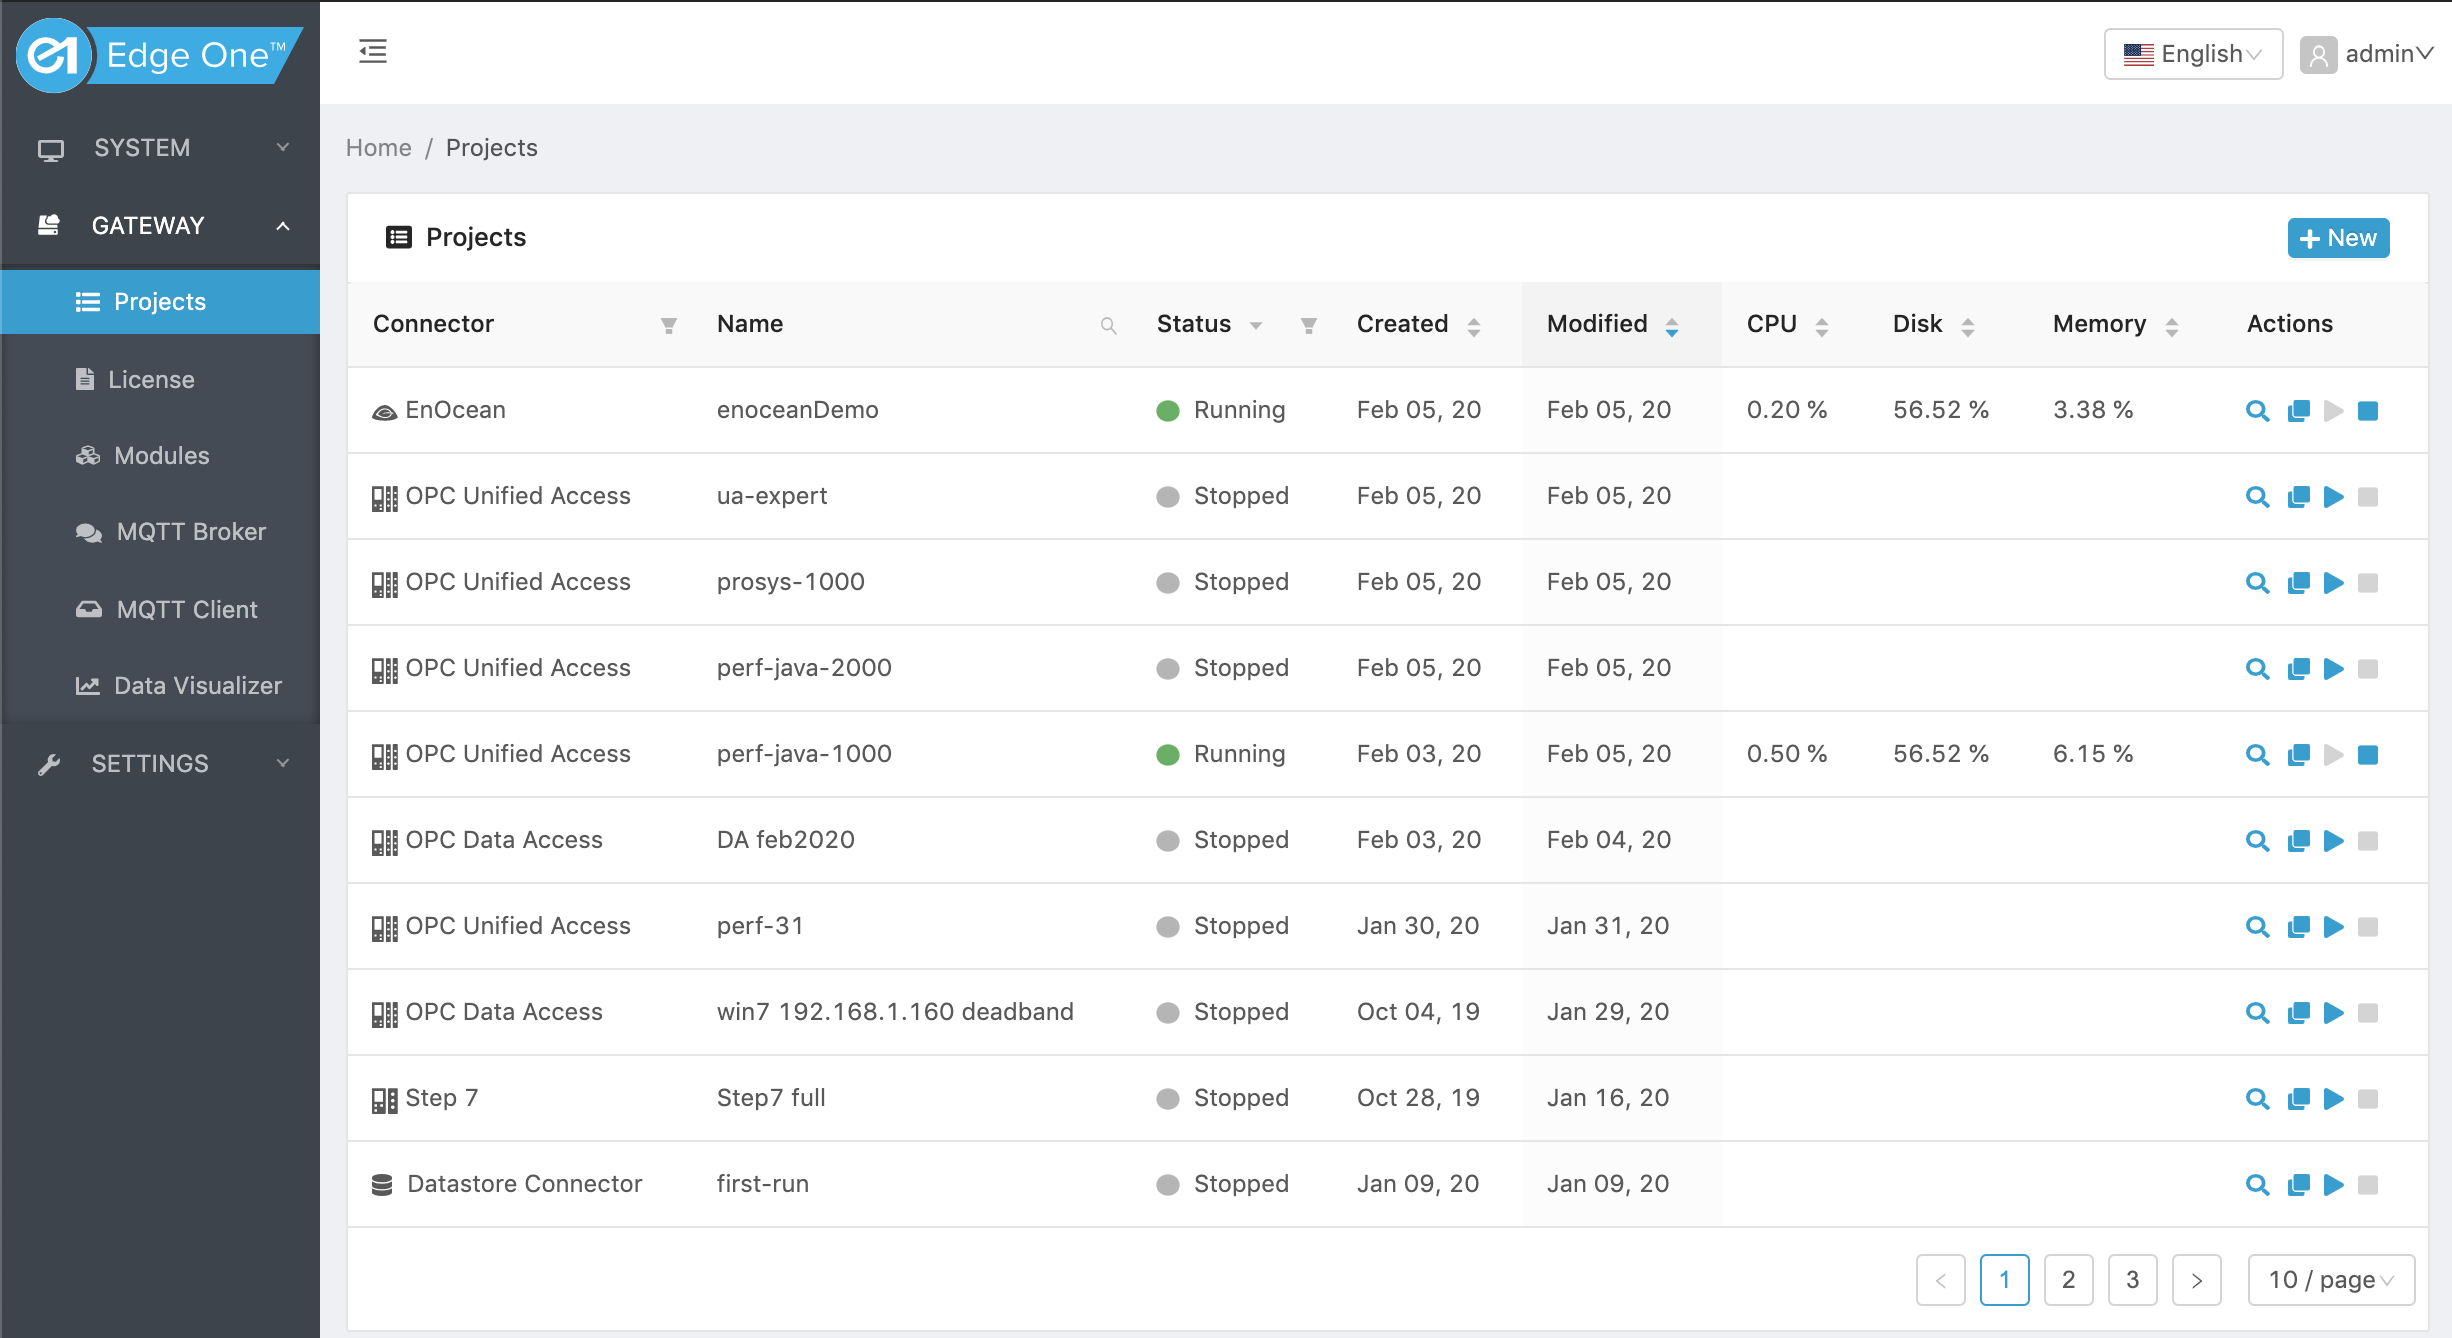
- Click ( ) on the Projects title bar to create a new project.
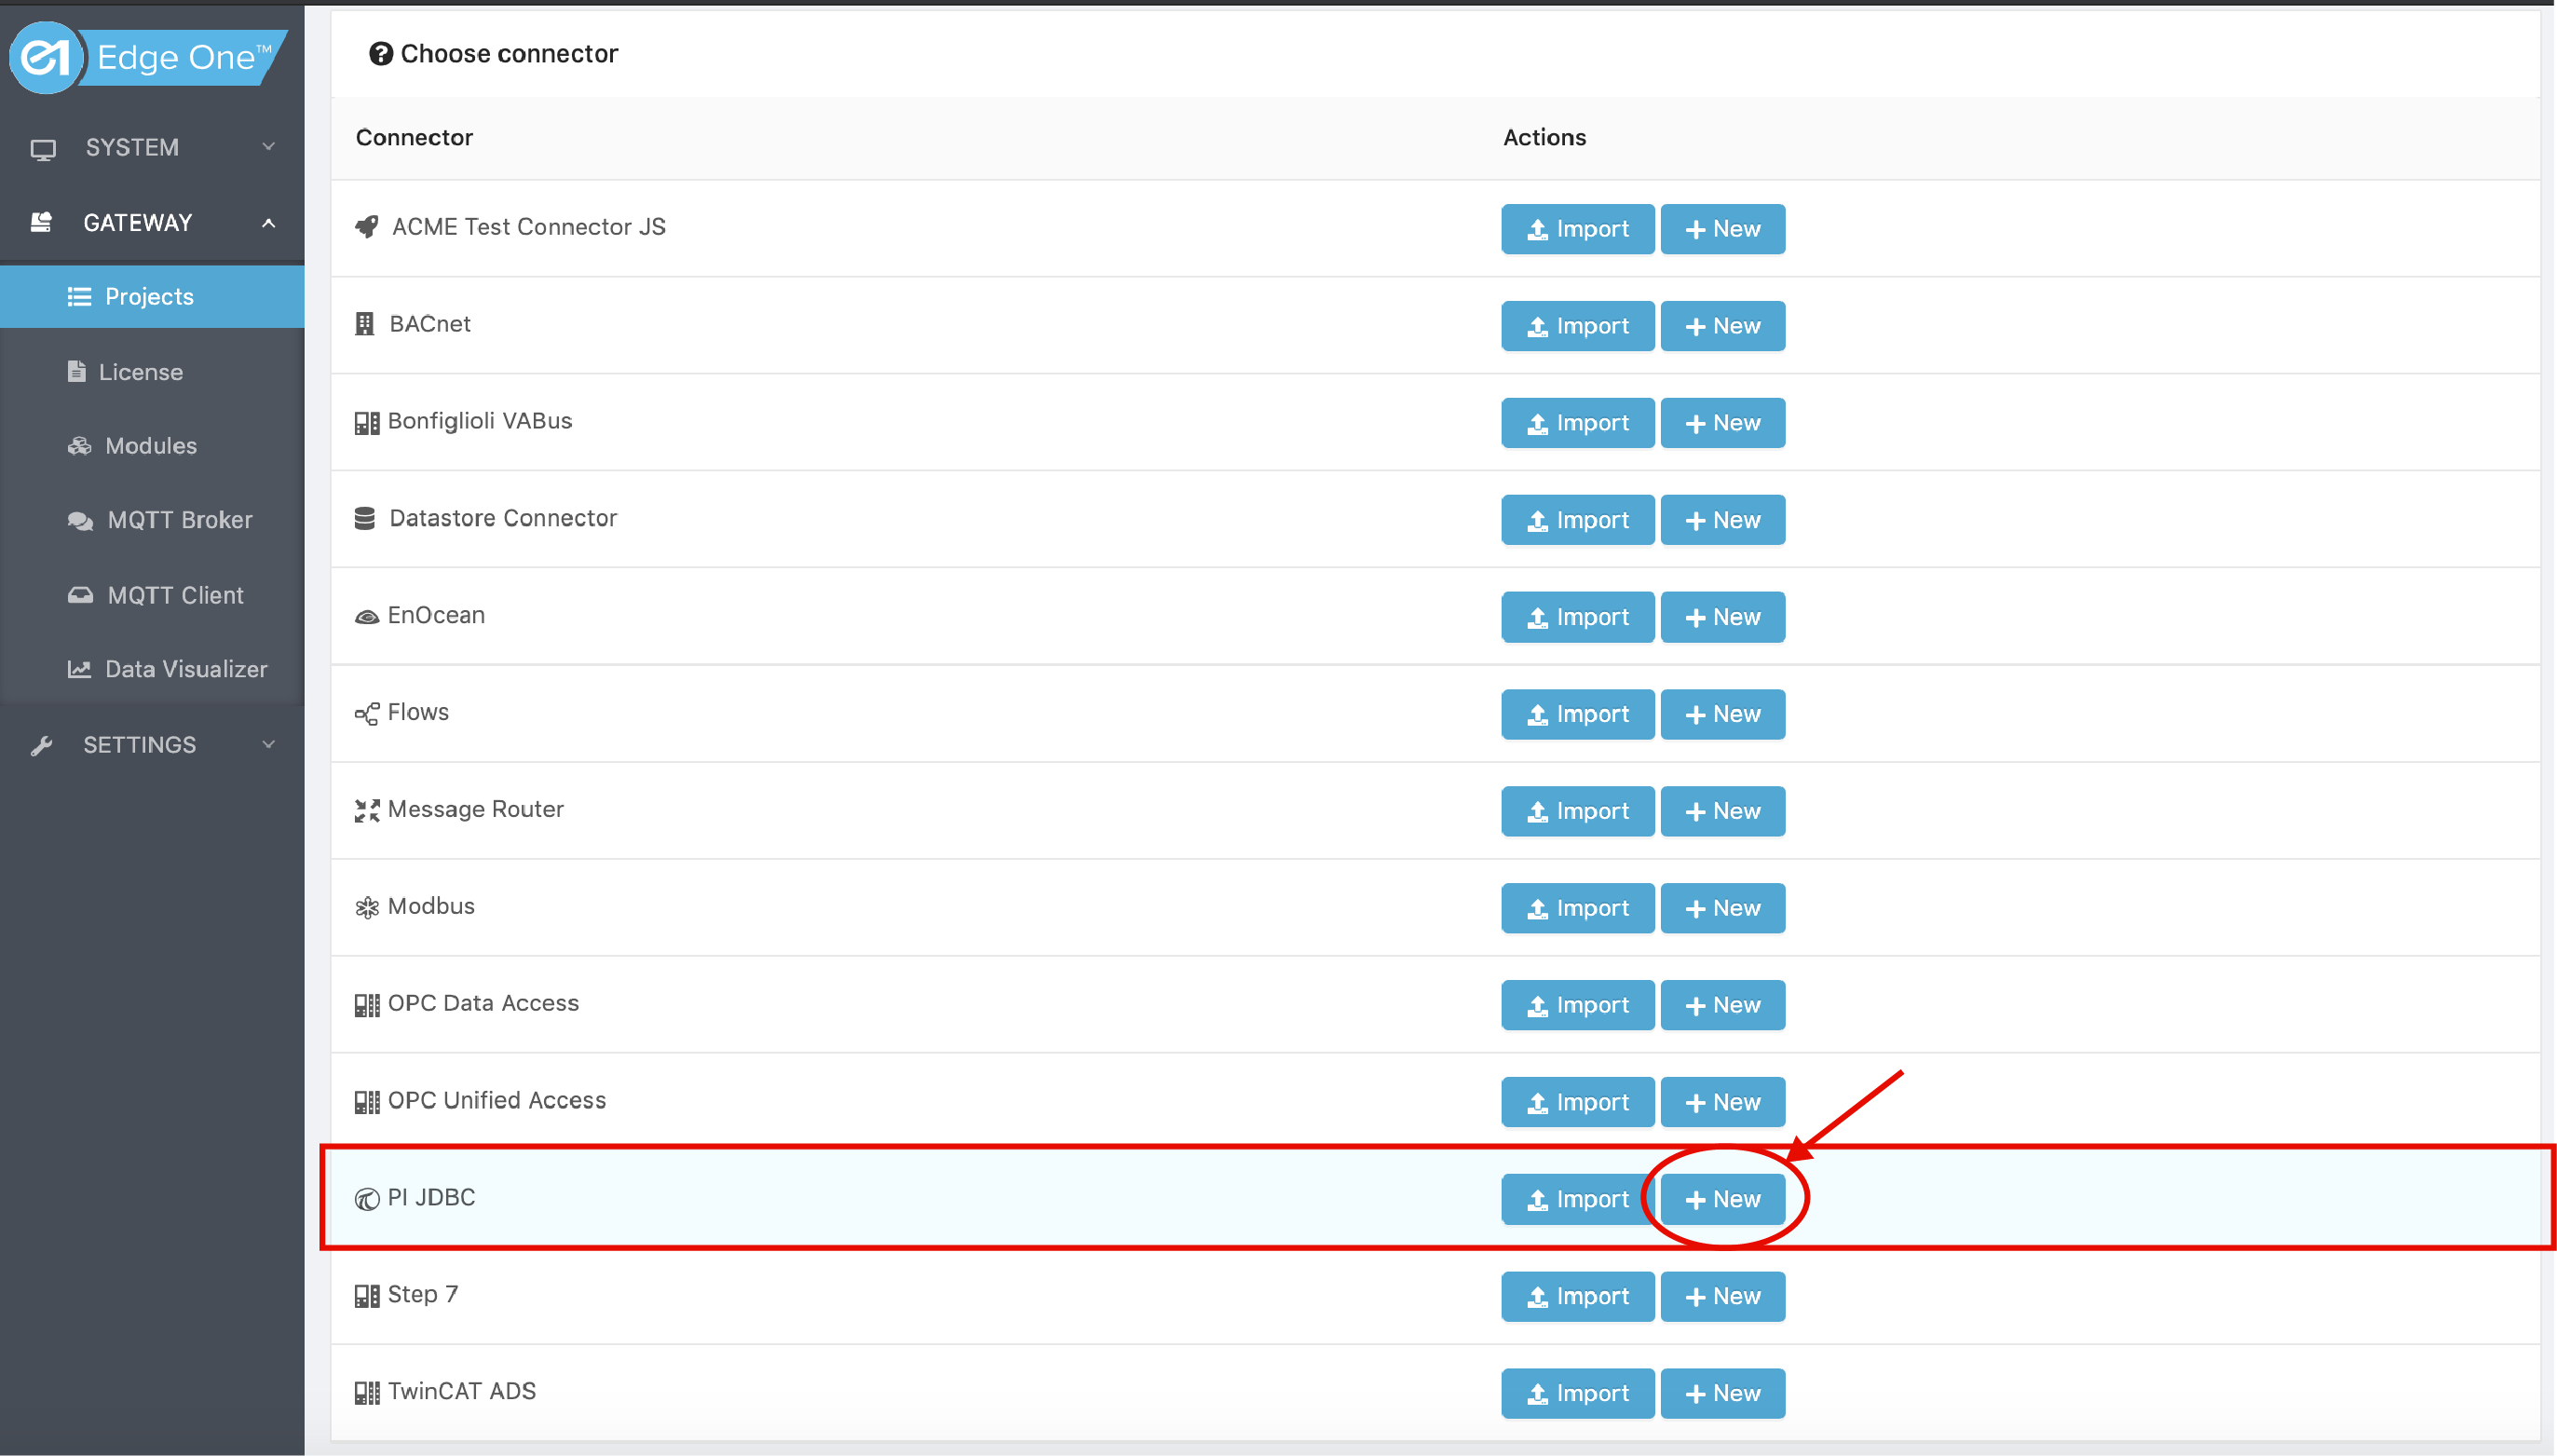
- Click on New on the PI JDBC module row.
- Configure your PI JDBC Client.
Configuring the PI JDBC Client Project
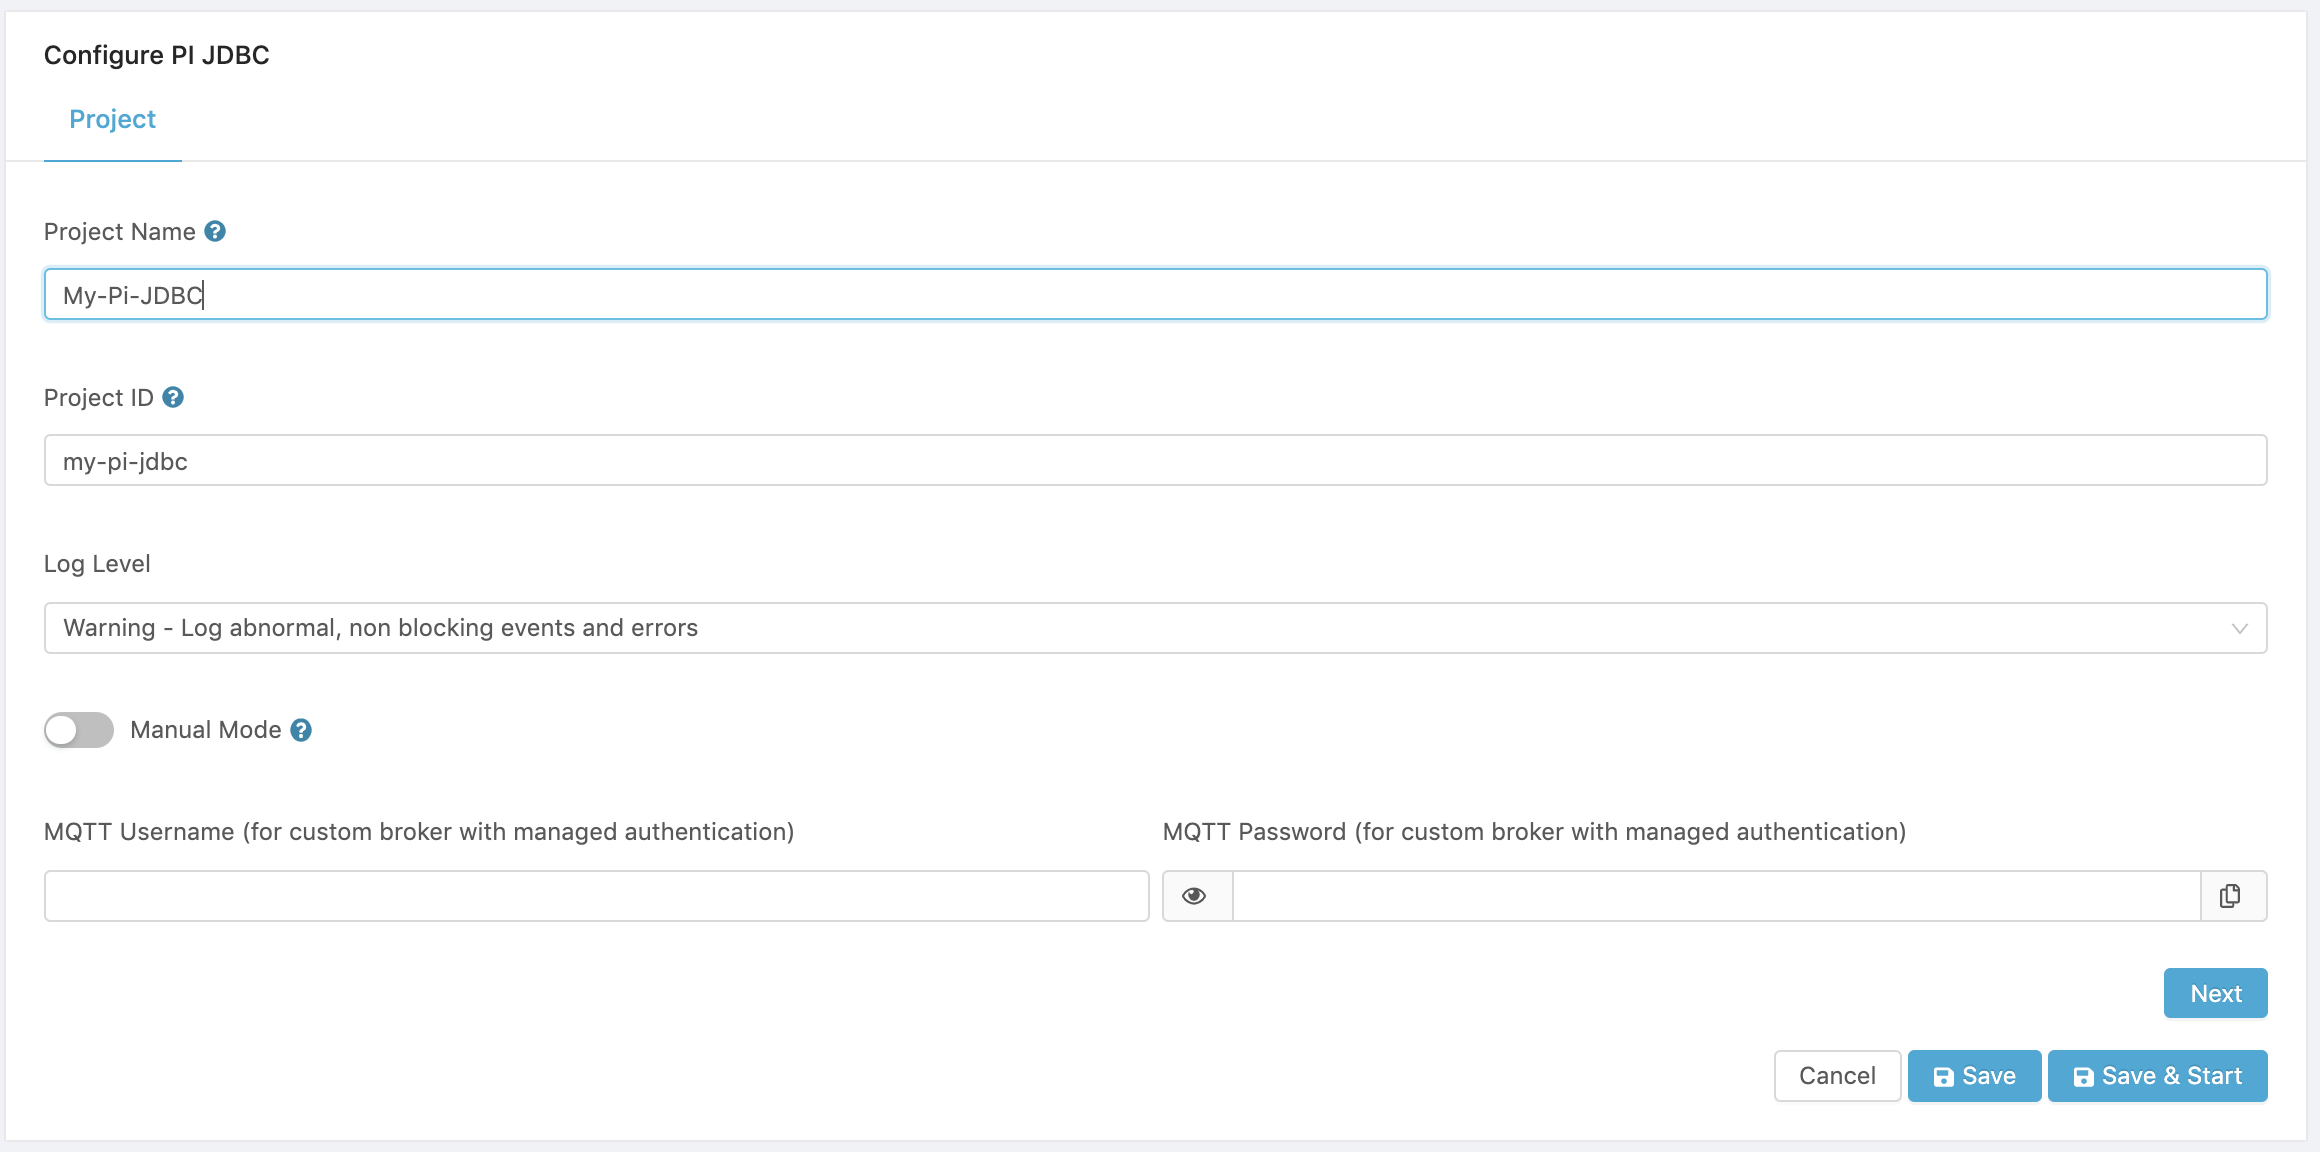
- In the Project tab:
- Enter a Project Name for the project.
- Optionally, enter a Project ID for the project. This ID is used to identify the root topic to which data will be written by the project. It is recommended to keep the Project ID (pid) short. It can be a number (e.g., 11), or an alphanumeric string of 16 characters or less with no blank spaces (e.g., pi-server1). If not pid is entered, the project name is used as default.
- Selet the log level. Default is Warning which logs non-blocking events and errors.
- Select whether or not the project will be started automatically when the PI JDBC Client module container is started. To start the project manually using the web interface, set the Manual mode switch to ON.
- If an external or custom MQTT broker configured through the Settings->Server interface will be used, enter the broker access credentials.
- *Click on Next to open the Server tab.
Configuring the PI Server Access
To connect to a PI Server database, follow the instructions below:
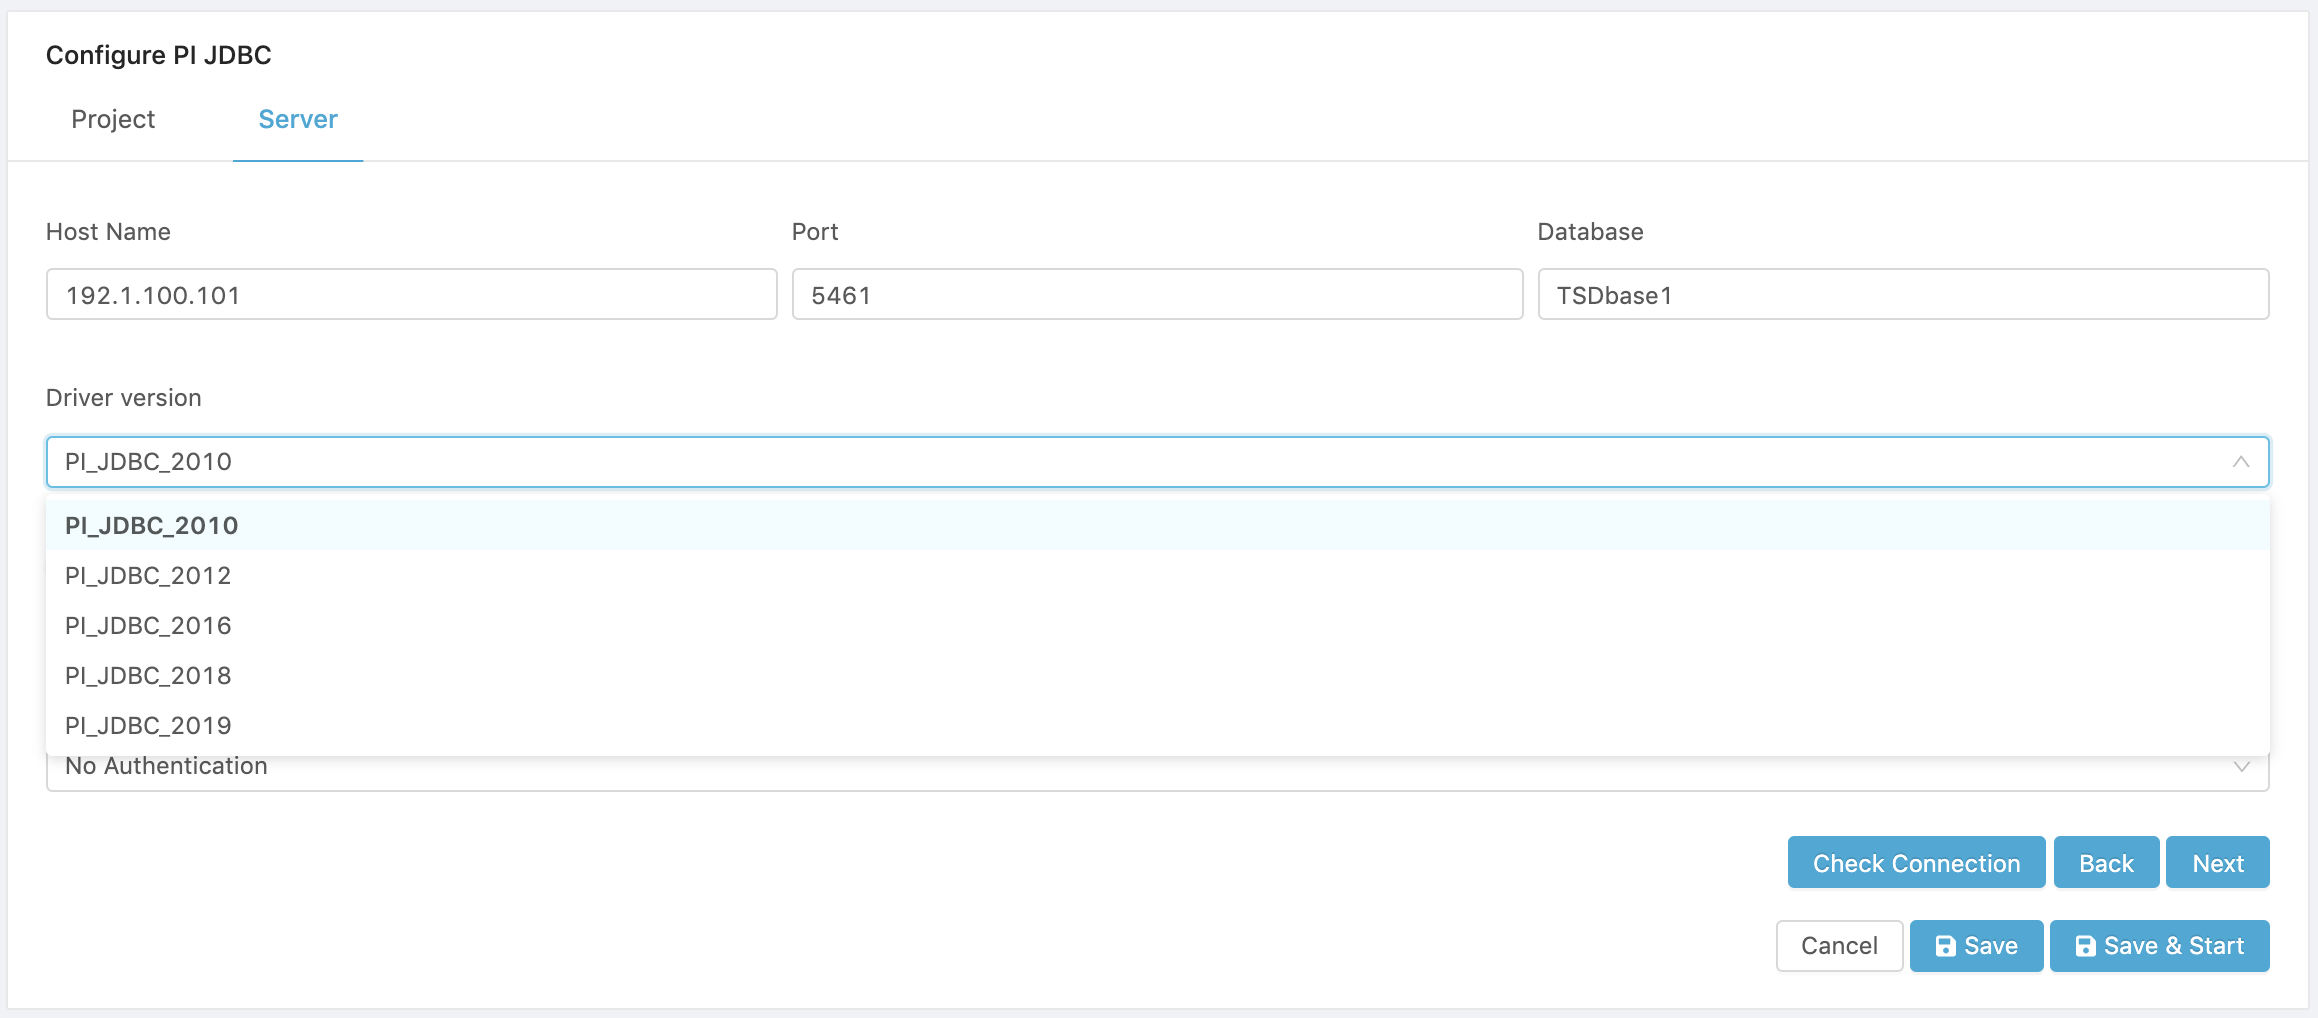
- Enter the Host Name or IP Address of the PI Server host.
- Enter the TCP Port of the PI Server or use the default port 5469.
- Enter the name of the database to which you want to connect.
- Select the driver version to use for the connectivity to the database.
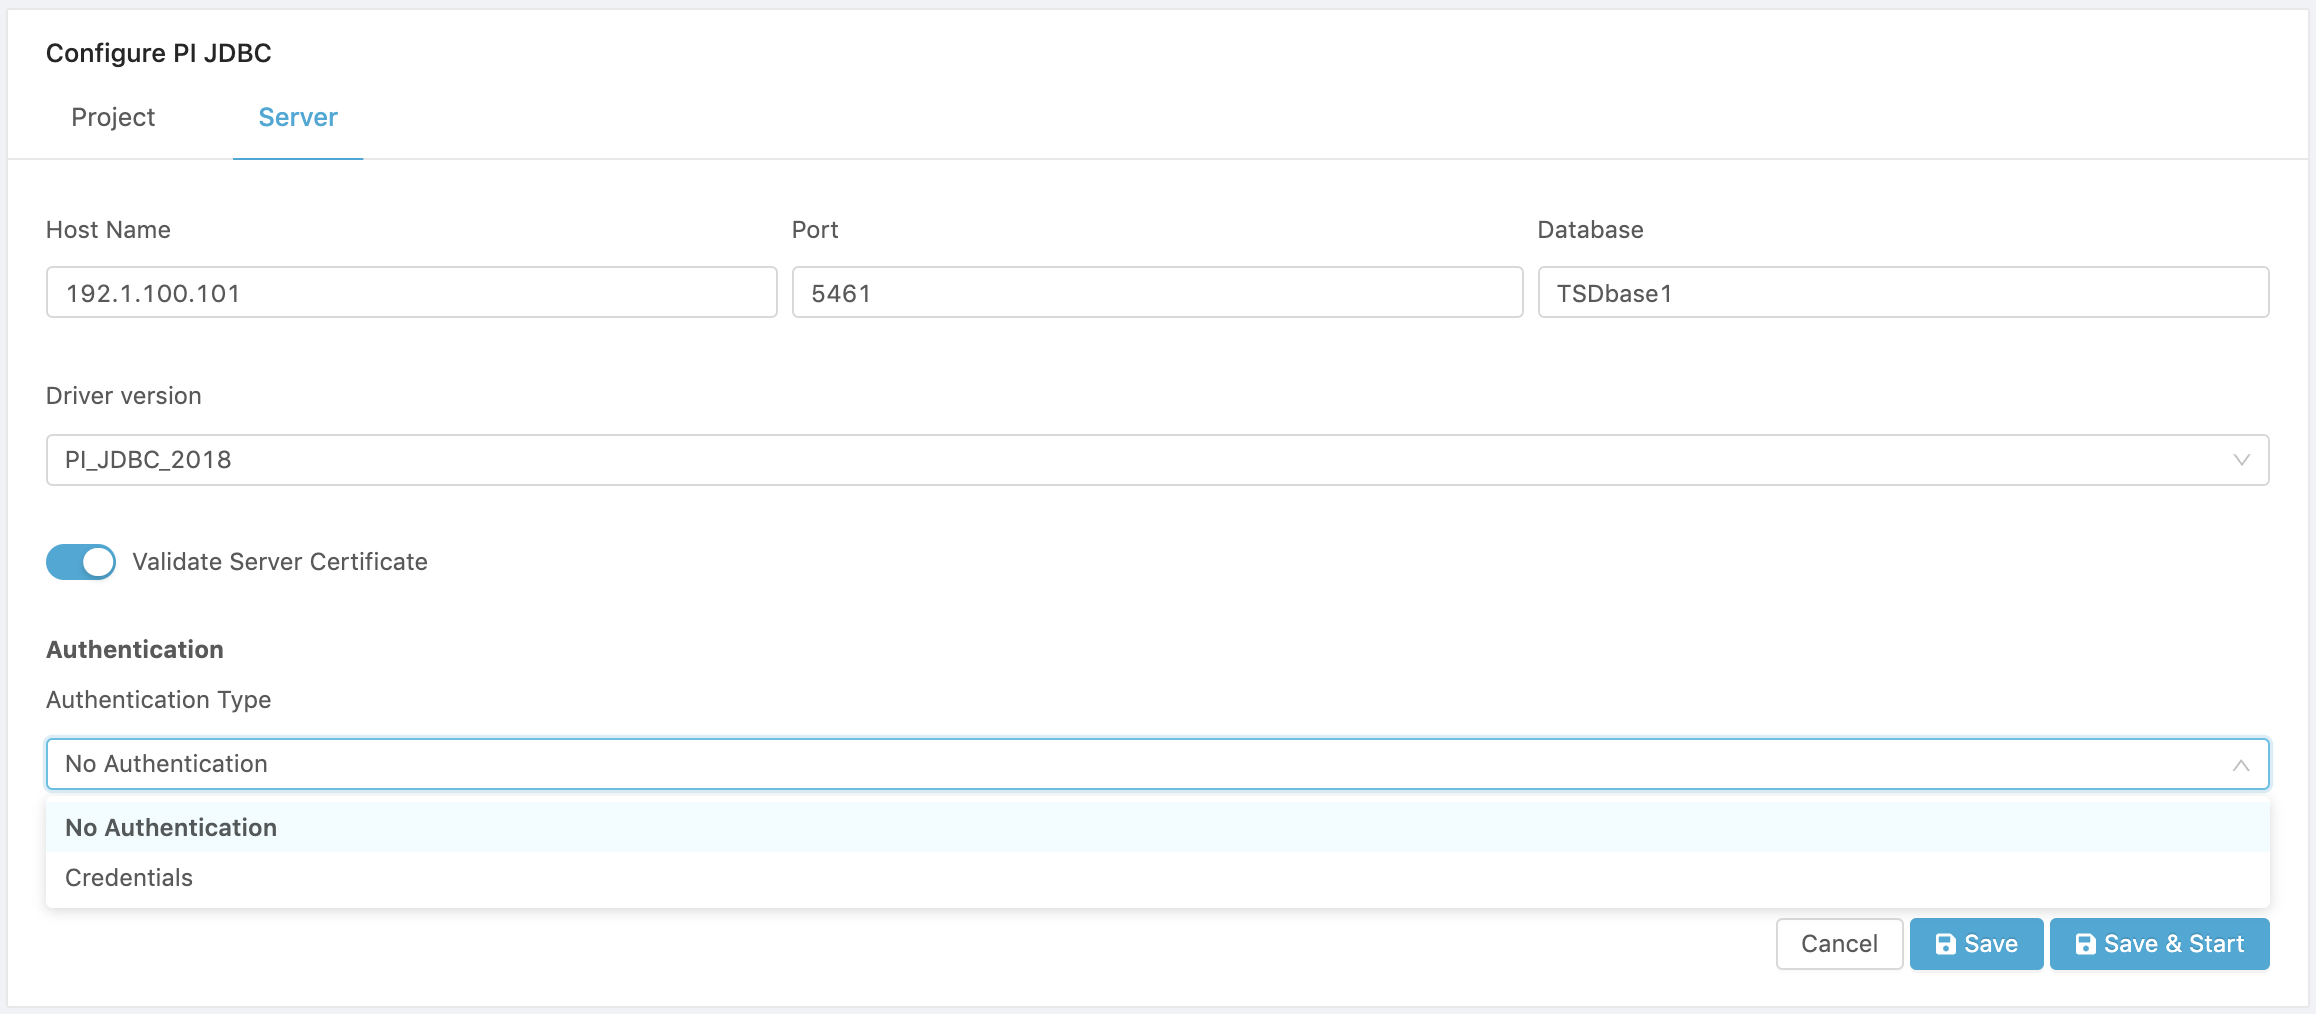
- You can Enable validation of the connection certification by turning-on the Enable Certificate Validation switch.
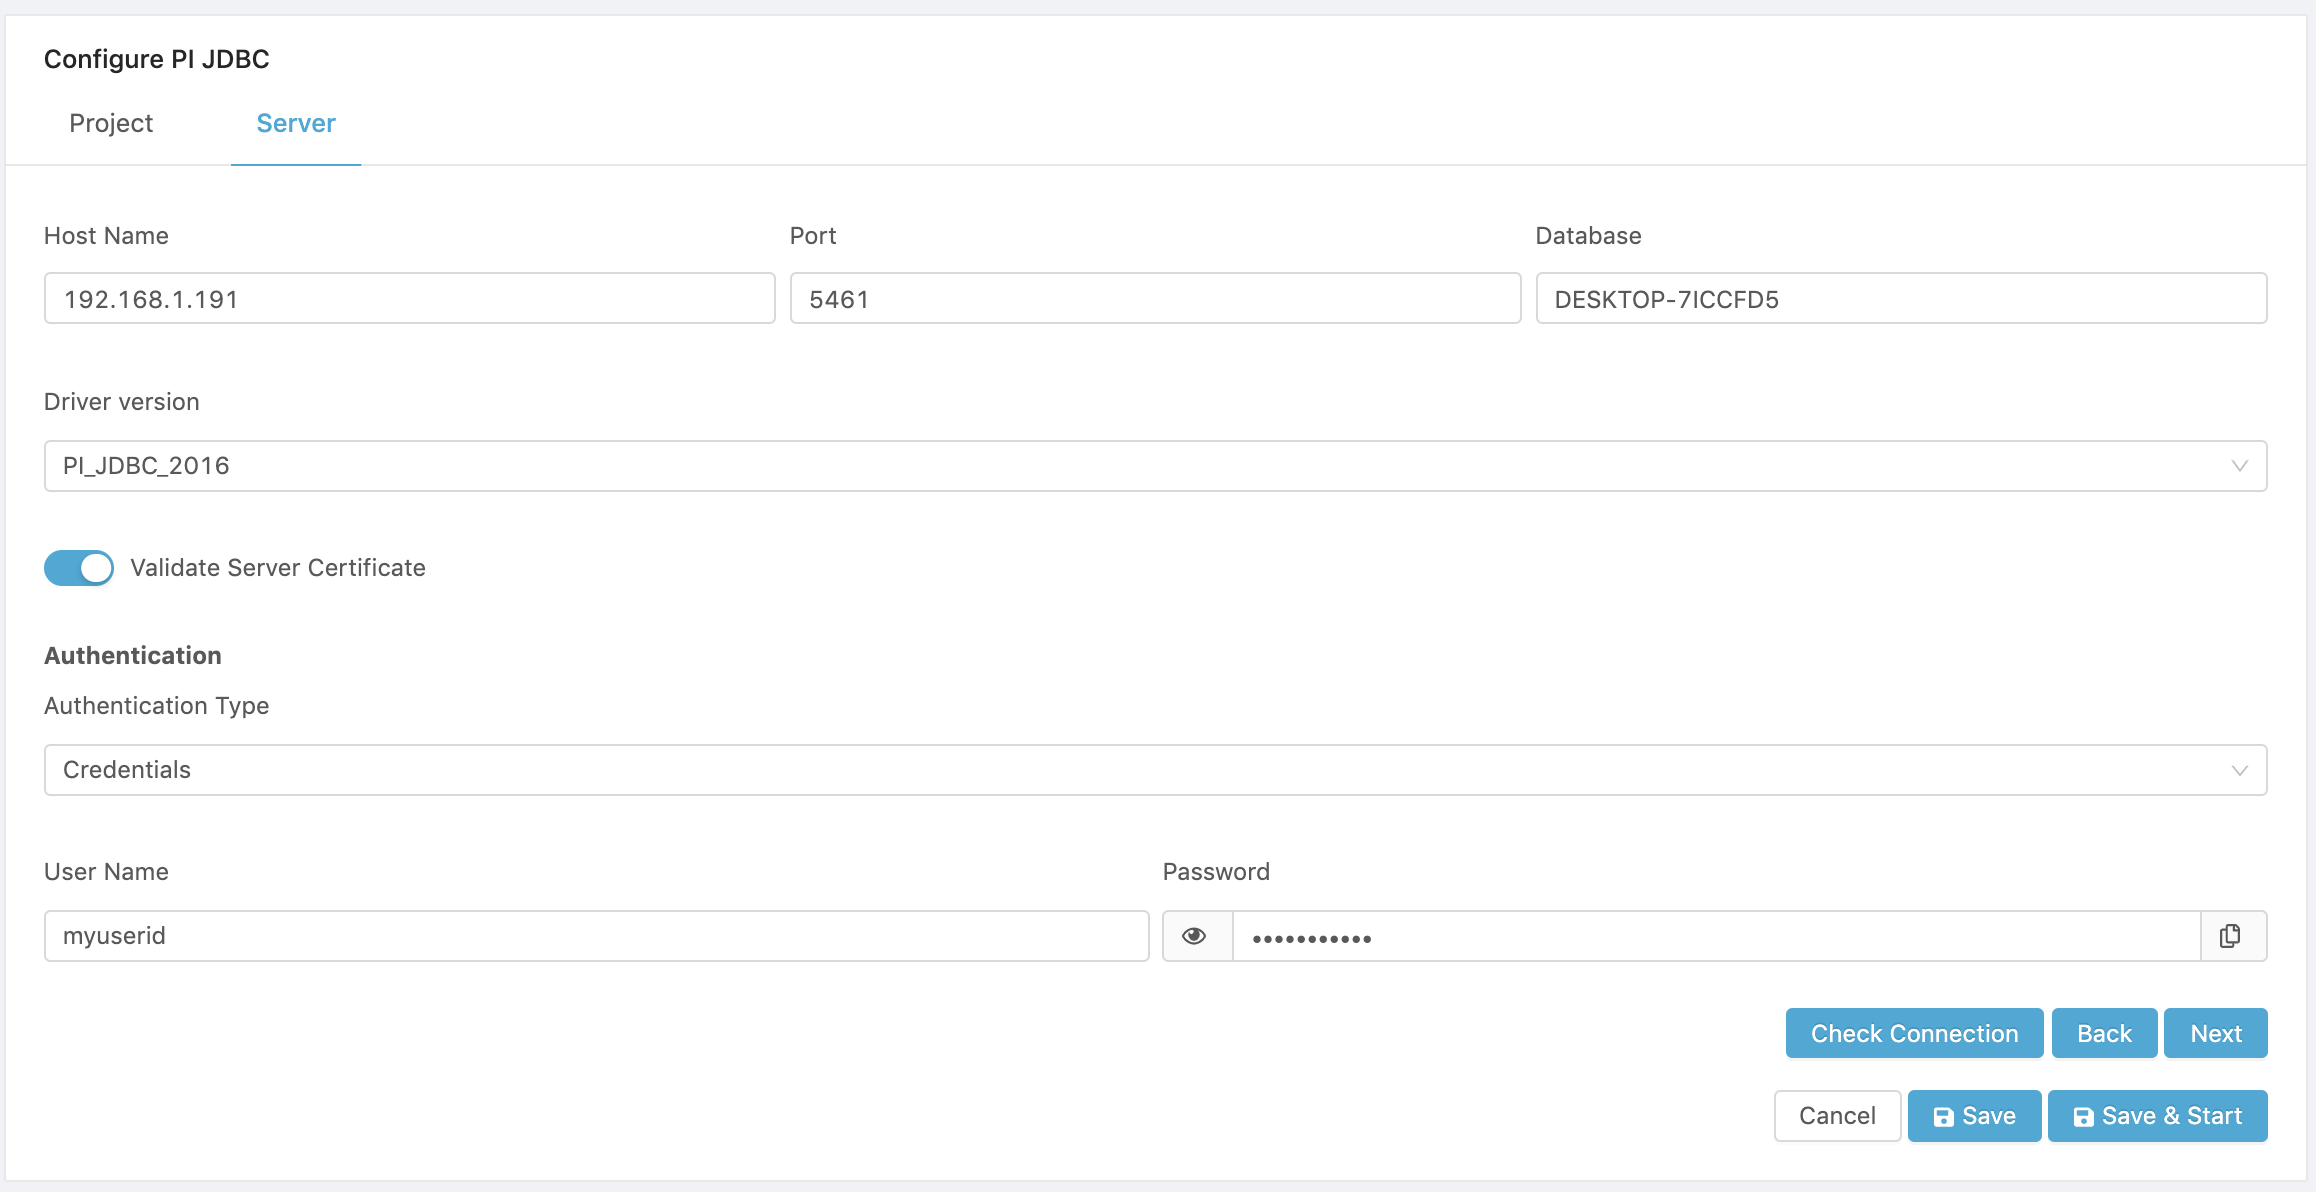
- Select the Authentication Type. You have the option to use no authentication or to enter the login credentials for the server.
The resulting configuration will look something like:
- Click on Check Connection to verify that the parameters match the server connection requirements.
- If the connection is successful continue on 9 below. Otherwise, verify all your parameters.
- Click Next to configure the Data Exchange Options with the server.
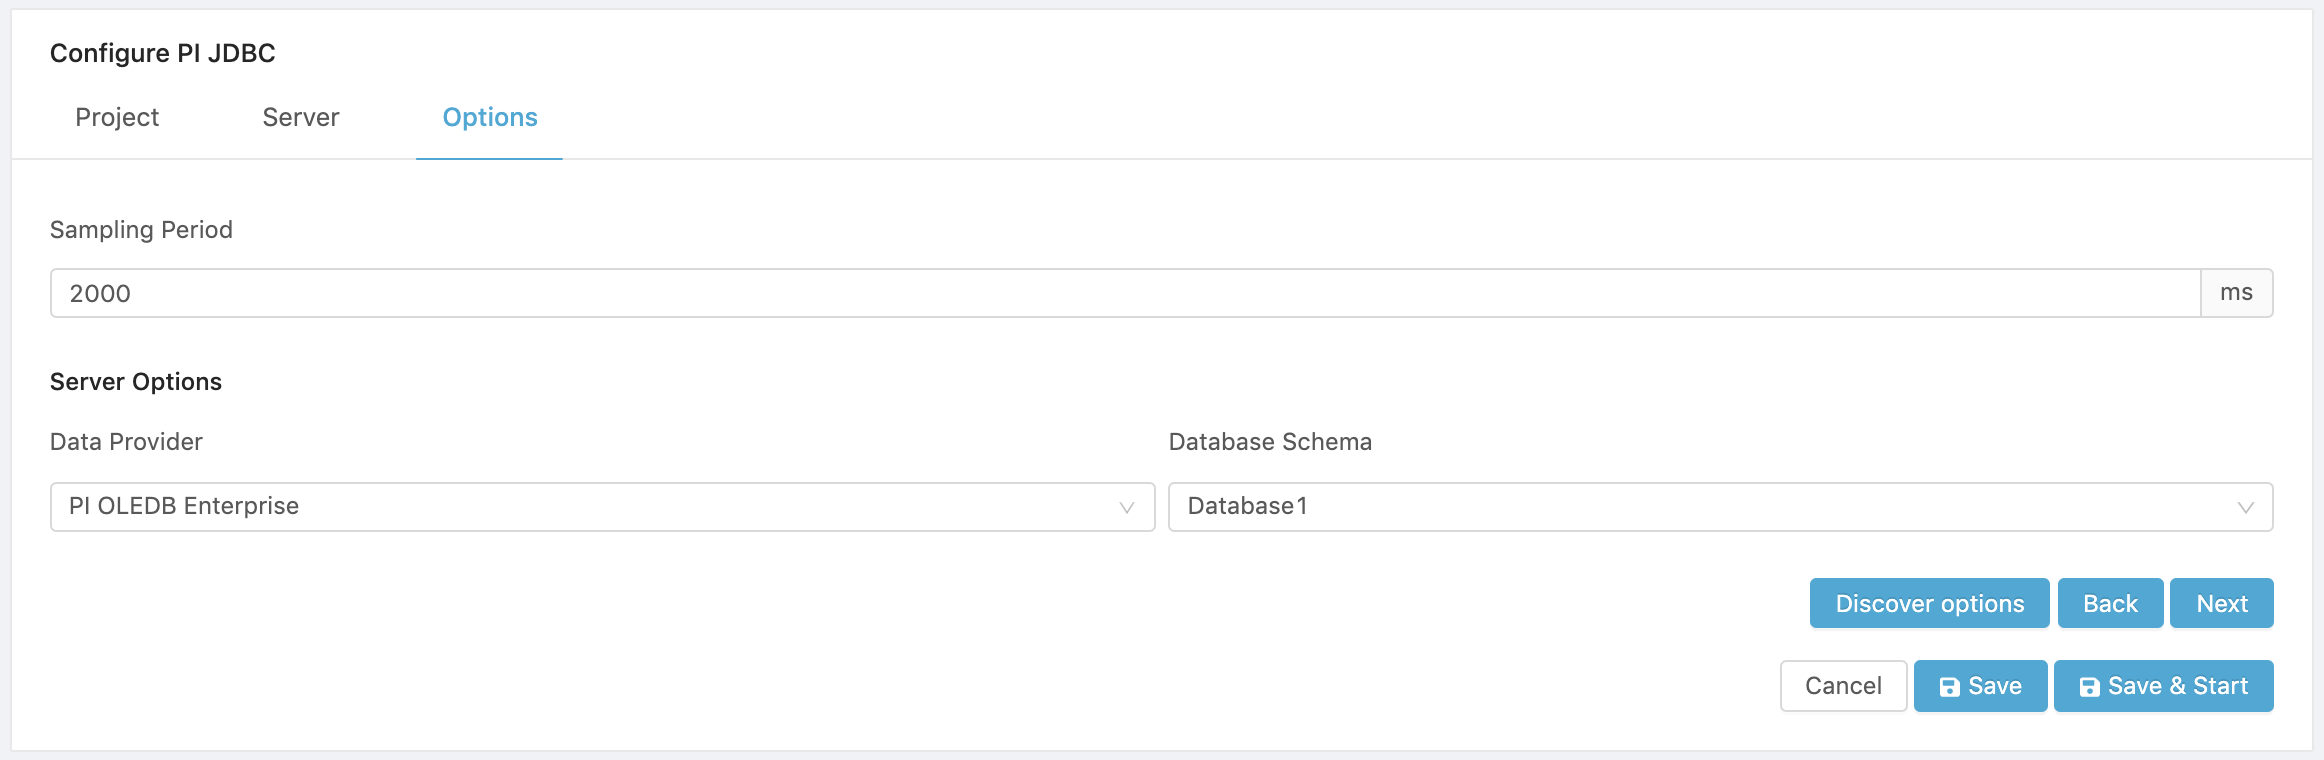
Configure the PI JDBC Server Access Options
To access the PI-JDBC server data, you need to configure the following options:
- Enter a Sampling period which sets the interval to get data. Default is 2,000 milliseconds
- The available options should be automatically loaded. If not, click on Discover options to refresh and discover the options exposed by the PI Server.
- Select a Data Provider exposed by the server such as:
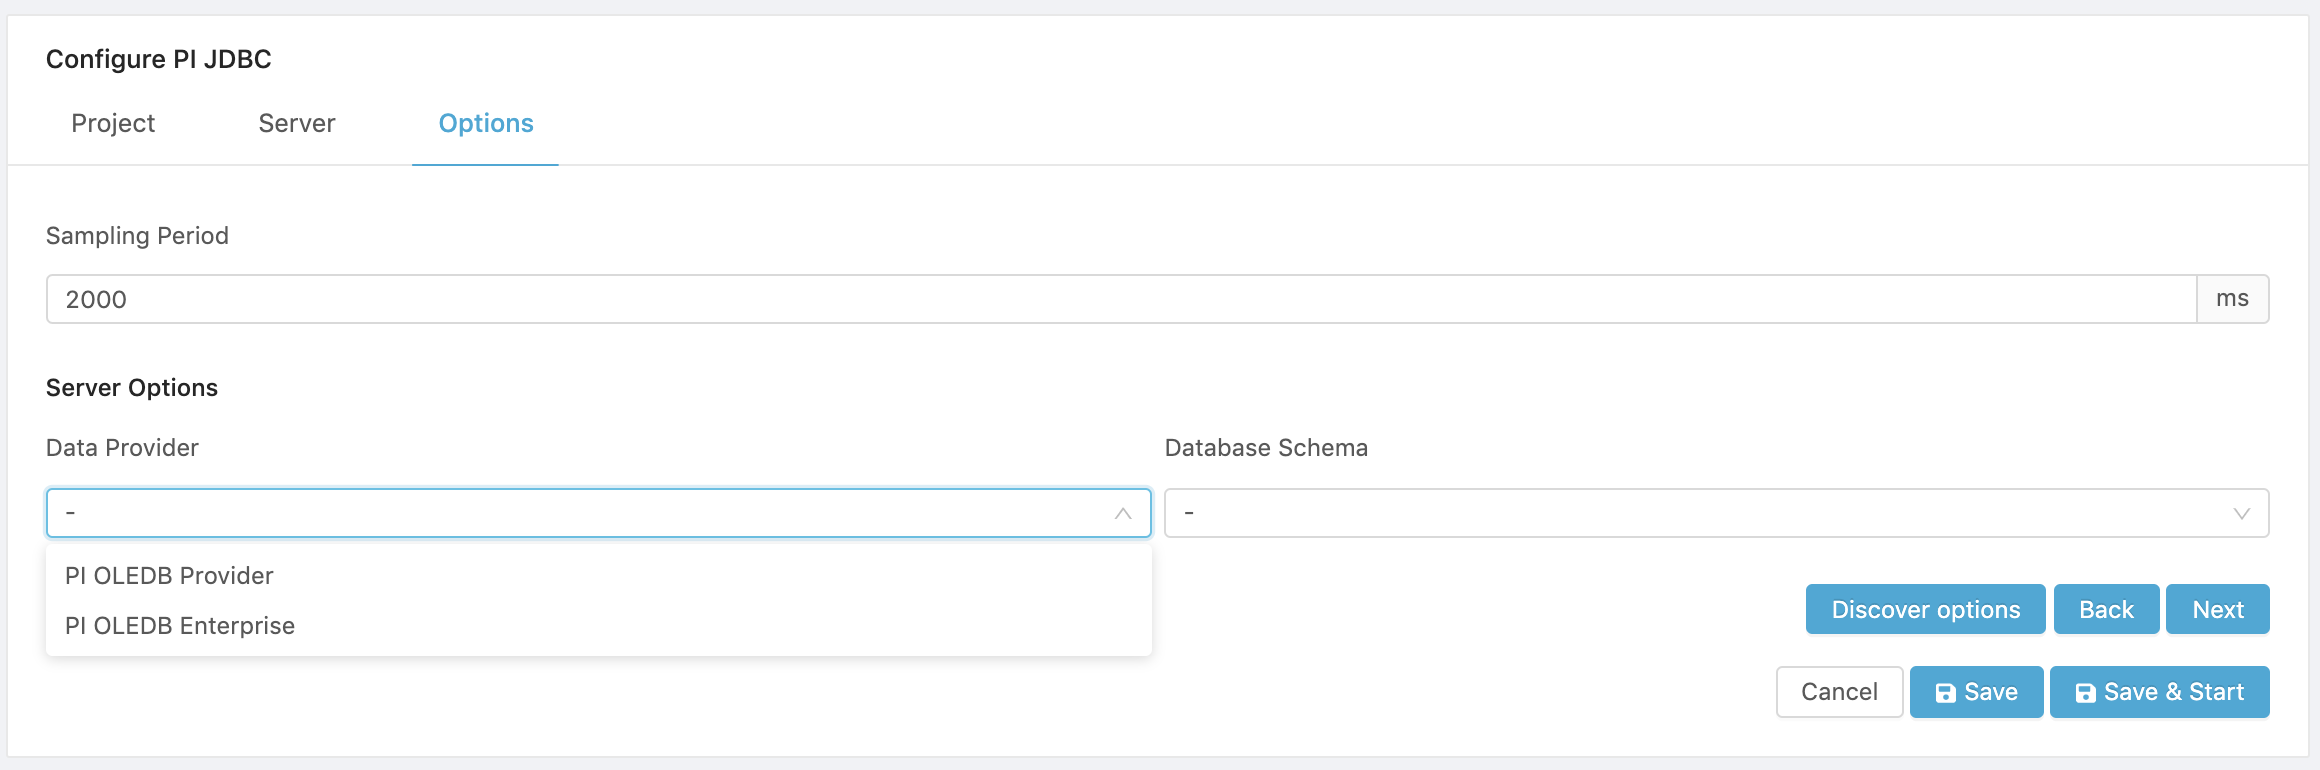
PI OLEDB Provider is the classic provider and Enterprise is the Enterprise Provider.
- Select a Database Schema, available on the server. such as:

- A sample configuration is shown below. Click on Next to configure the groups to ingest data.
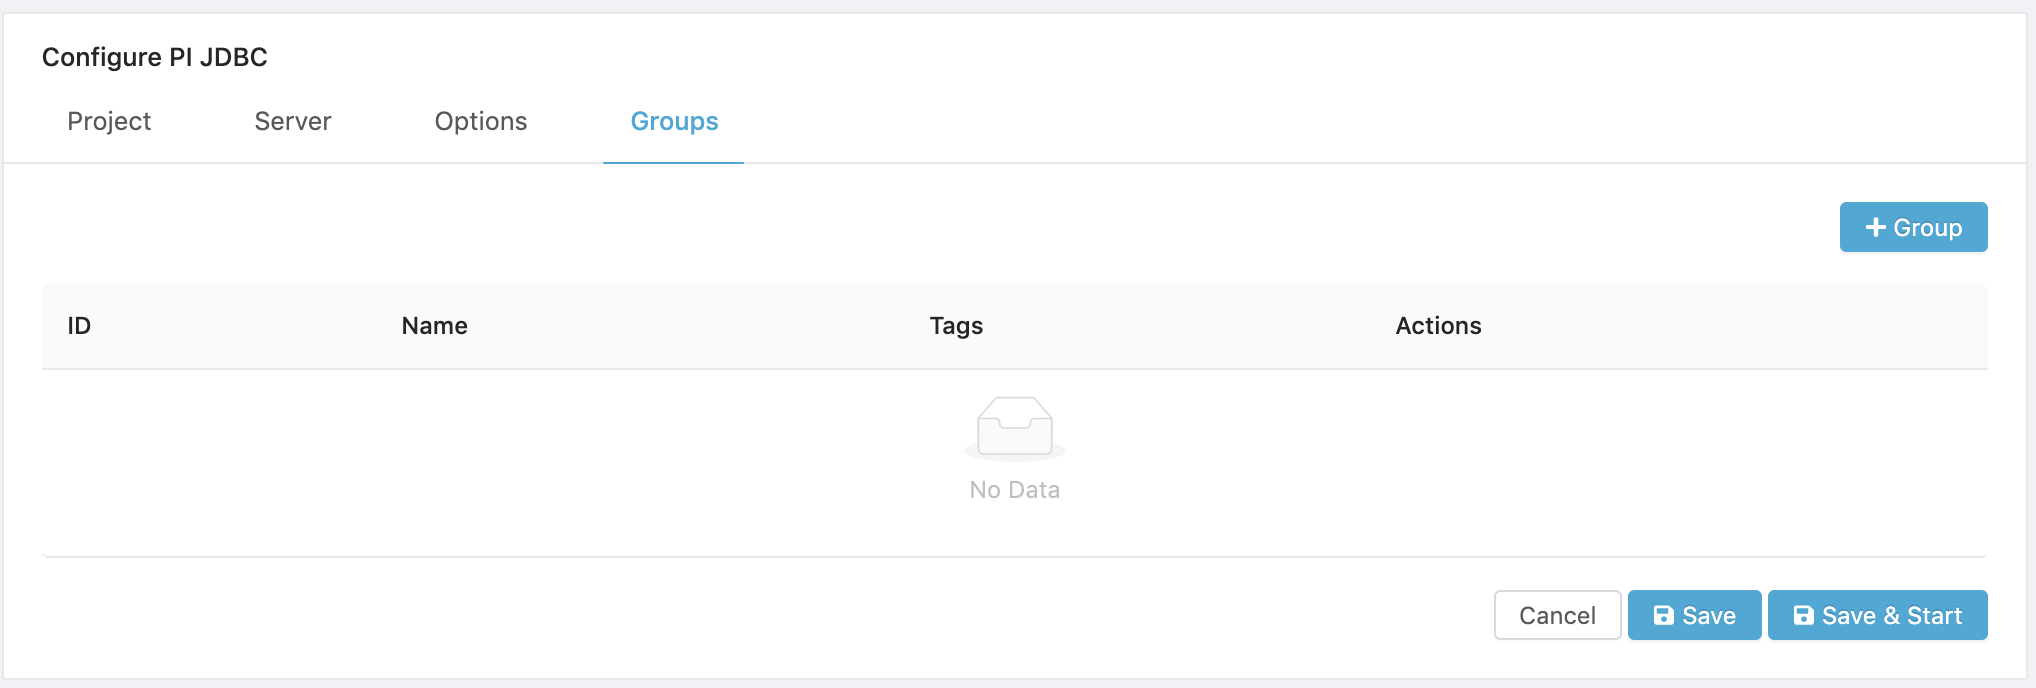
Configure a Group
To configure a Group of Tags, open the Groups tab.
- Click on the Group button to create a new Group.
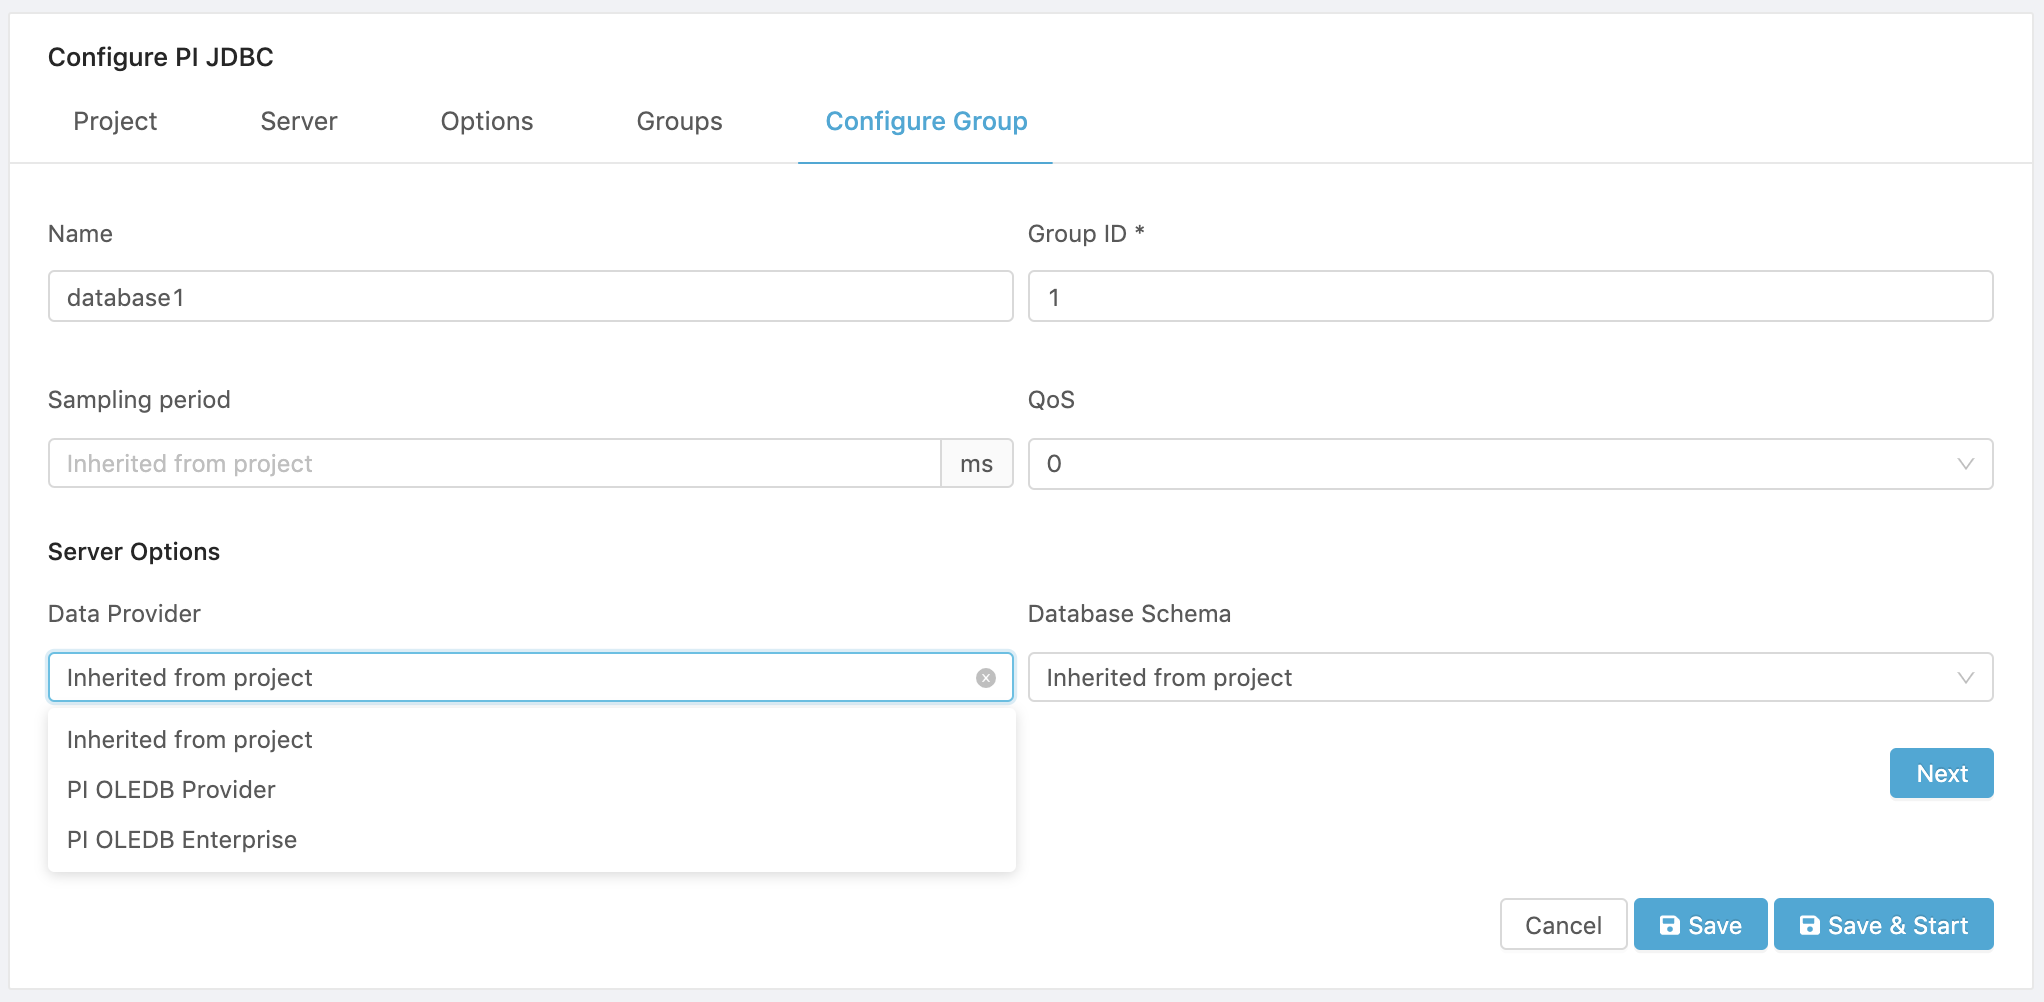
- Enter a reference Name to easily identify the Group.
- Enter the Group ID. This is a required parameter which is used to identify the Group in an MQTT topic or channel. The Group’s Node data is published into MQTT topics, or CloudPlugs IoT channels with the structure Project-ID/Group-ID.
- Optionally, enter a Sampling period in milliseconds. By default, the sampling period used is the one configured for the project options.
- Select a quality of service (QoS) level. This parameter determines the QoS that will be used by the connector to publish messages on the MQTT broker used by your Edge One™ project. The default is QoS 0.
- QoS 0 - at most once is the minimal QoS. This service level guarantees a best-effort delivery. There is no guarantee of delivery.The recipient does not acknowledge receipt of the message and the message is not stored and re-transmitted by the sender. QoS level 0 is often called “fire and forget” and provides the same guarantee as the underlying TCP protocol. Use this level when you require high-throughput and losing messages is not critical.
- QoS 1 - at least once. This service level guarantees that a message is delivered at least one time to the receiver. The sender stores the message until it gets a PUBACK packet from the receiver that acknowledges receipt of the message. It is possible for a message to be sent or delivered multiple times. Use this method when you need a guarantee that the messages are all delivered. The setting sacrifices performance for reliable message delivery.
- Configure the Server options.
- Select the Data Provider:
- Inherited from project uses the data provider configured under the project Options.
- PI OLEDB Provider uses the classic PI OLEDB Provider, which implements SQL to allow relational queries to be run against the PI Data Archive, the PI Point Database and other configuration data.
- PI OLEDB Enterprise is an OLE DB data provider that provides access to the PI System in a relational view, accessible through SQL queries. The provider supports read-only access to asset and event data stored in the PI Asset Framework (AF), such as AF Elements, AF Attributes and PI Event Frames.
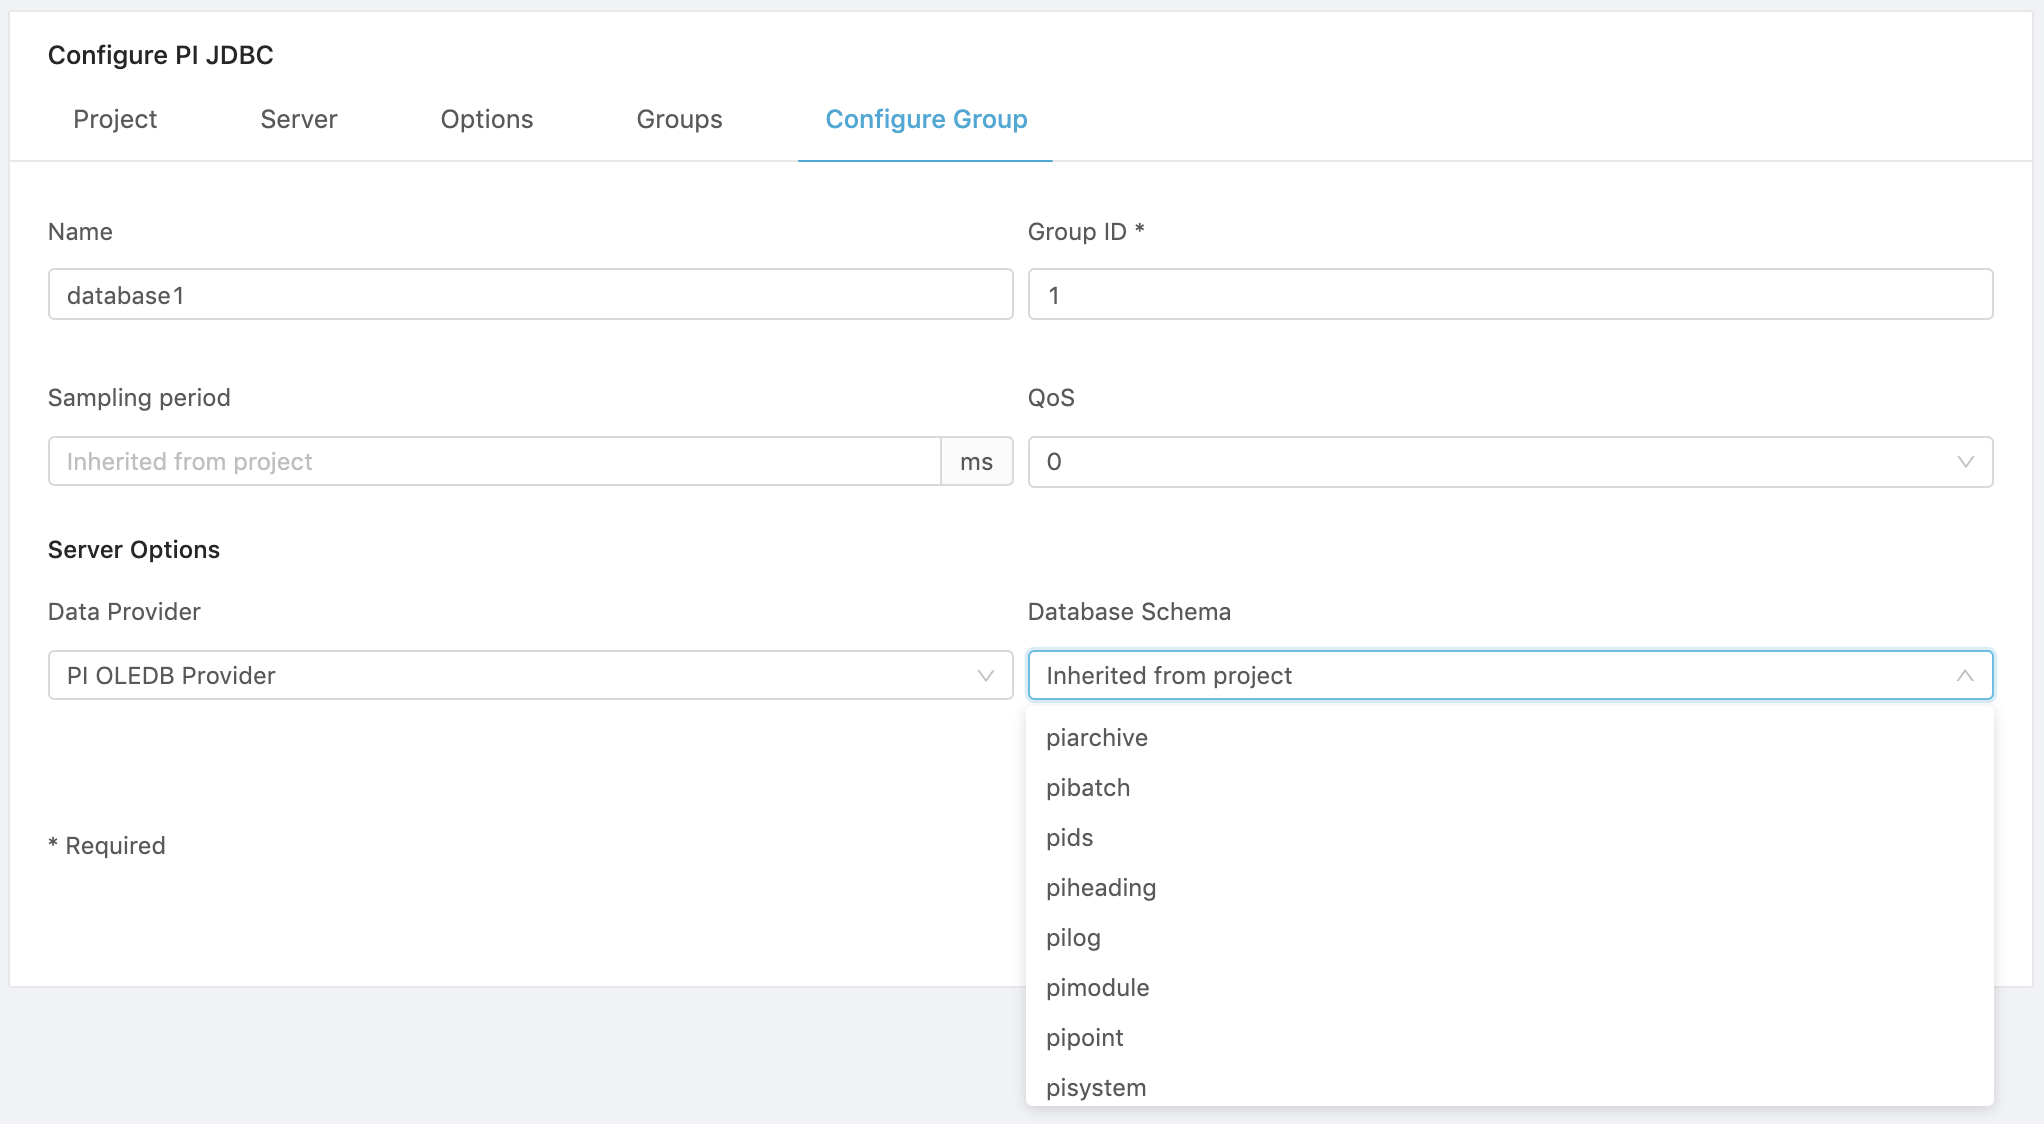
- Configure the Database Schema:
- Inherited from project is the only option available if the Data Provider was inherited form the project. It is also an option if the Data Provider is a classic PI OLDB Provider or a PI OLDB Enterprise provider.
- Additional choices are available if provided by the server based on the type of Data Provider selected.
-
Click Next to complete the Group creation process and to open the Groups tab.
-
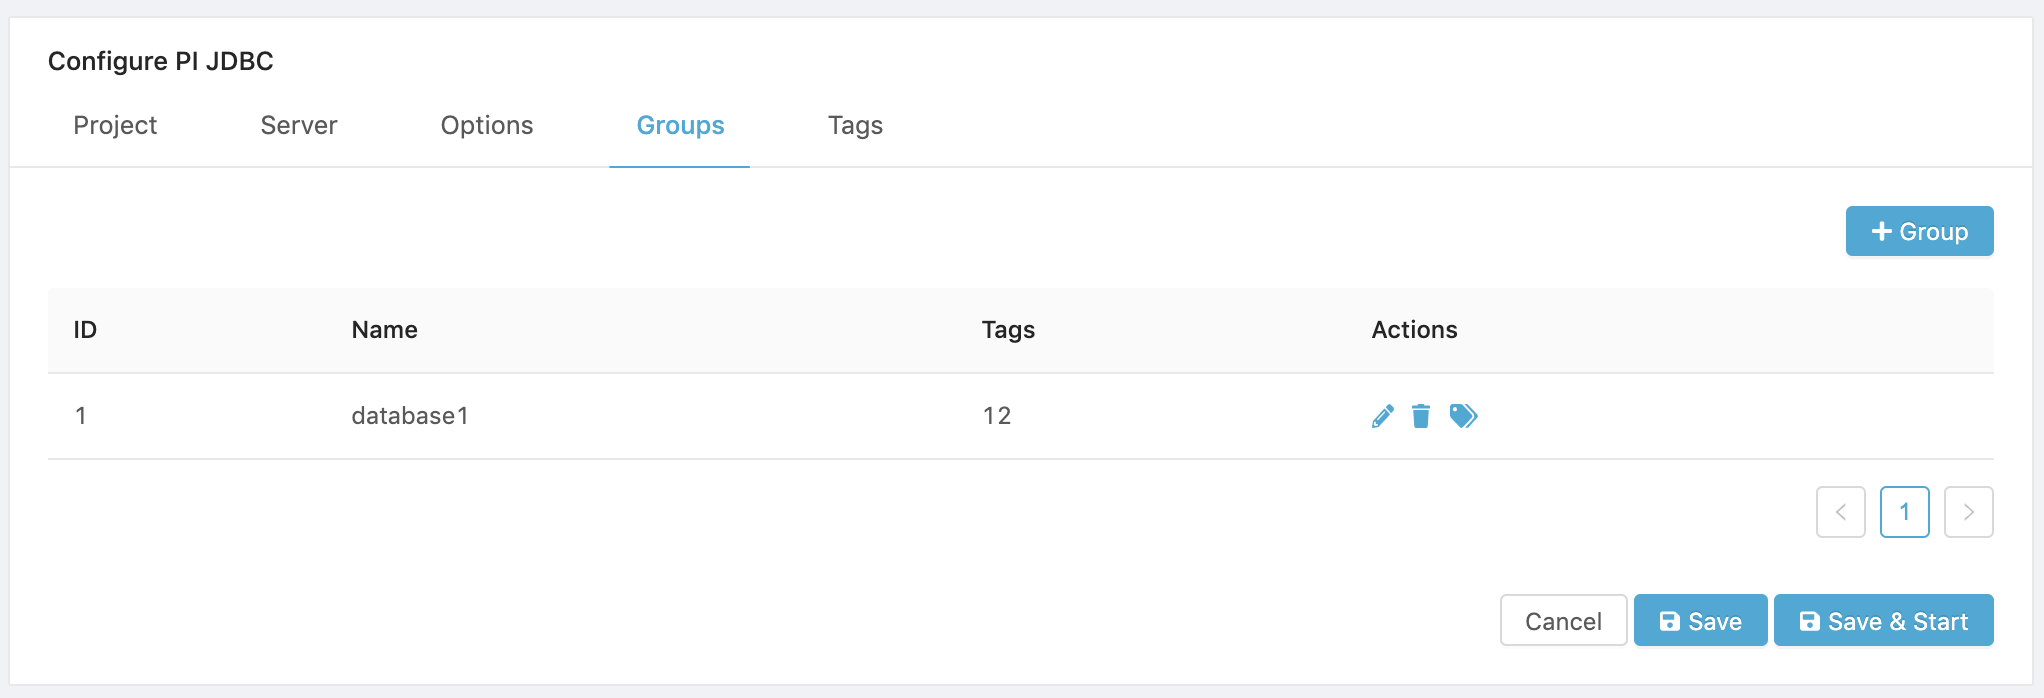
The Groups tab displays the Groups created and allows to select and manage the Group’s Tags.
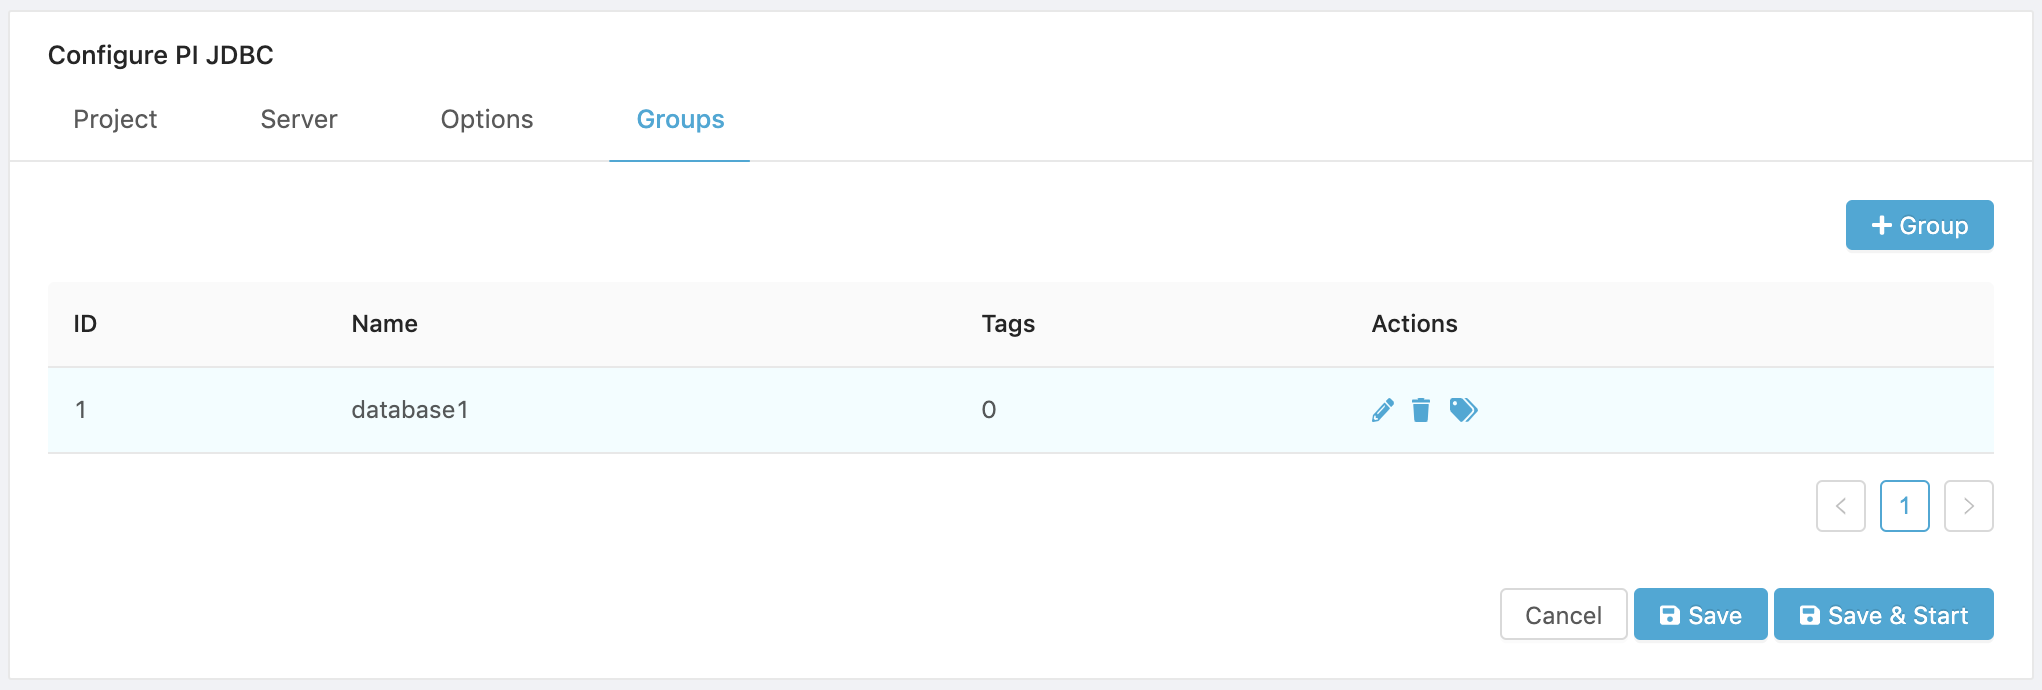
Configure the Group’s Tags
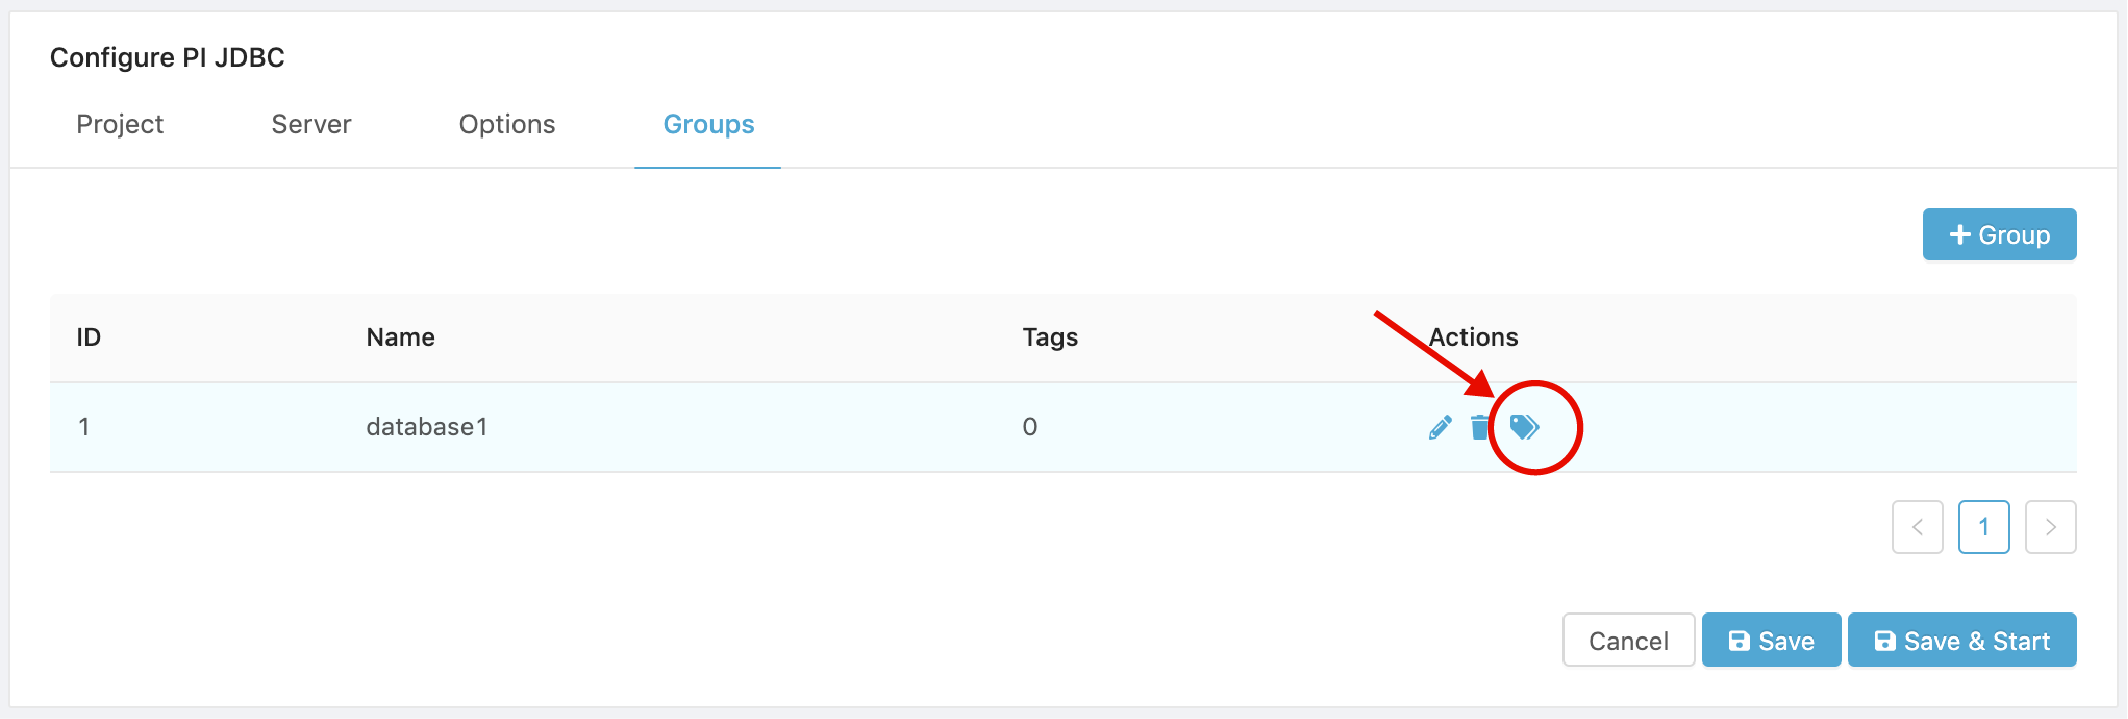
To configure a Group’s Tags, open the Groups tab.
- Click on the View Tags ( ) icon. This will fetch and display the tags available in the Pi Server for the Group selected.
- There are three options to add tags to a Group:
- Select individual Tags with their respective Add to Group switch.
- Select all Tags. Selects all data tags available.
- Import TXT. Allows the import of valid Tags from a CSV file. Valid Tags will show as selected so they can be saved on the Group.
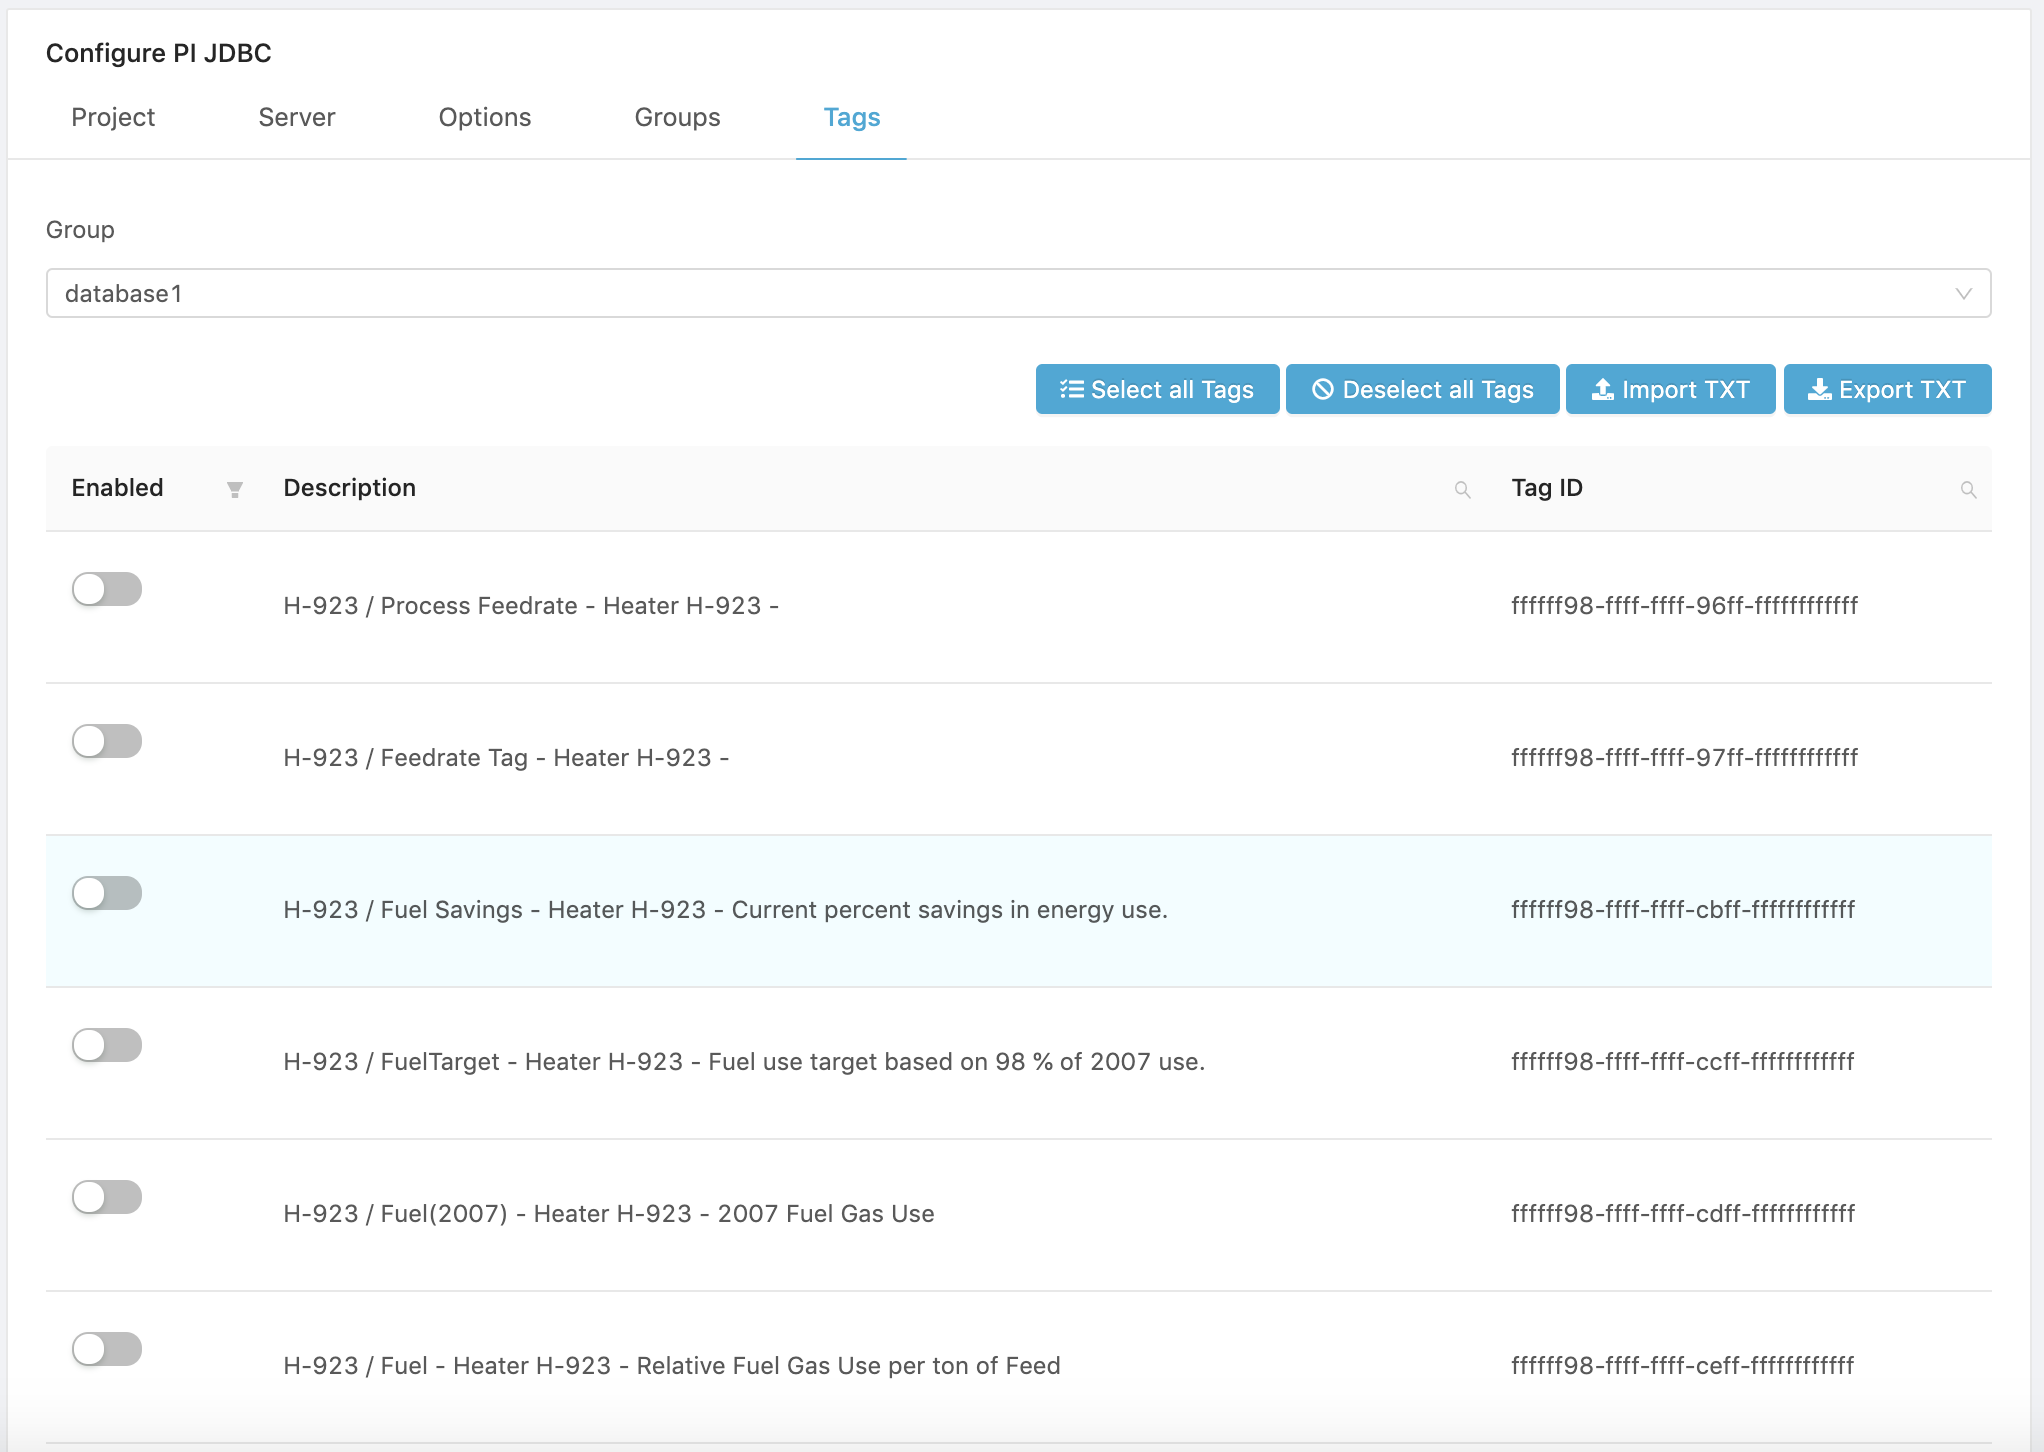
In this section, we focus on selecting Tags. To do this:
-
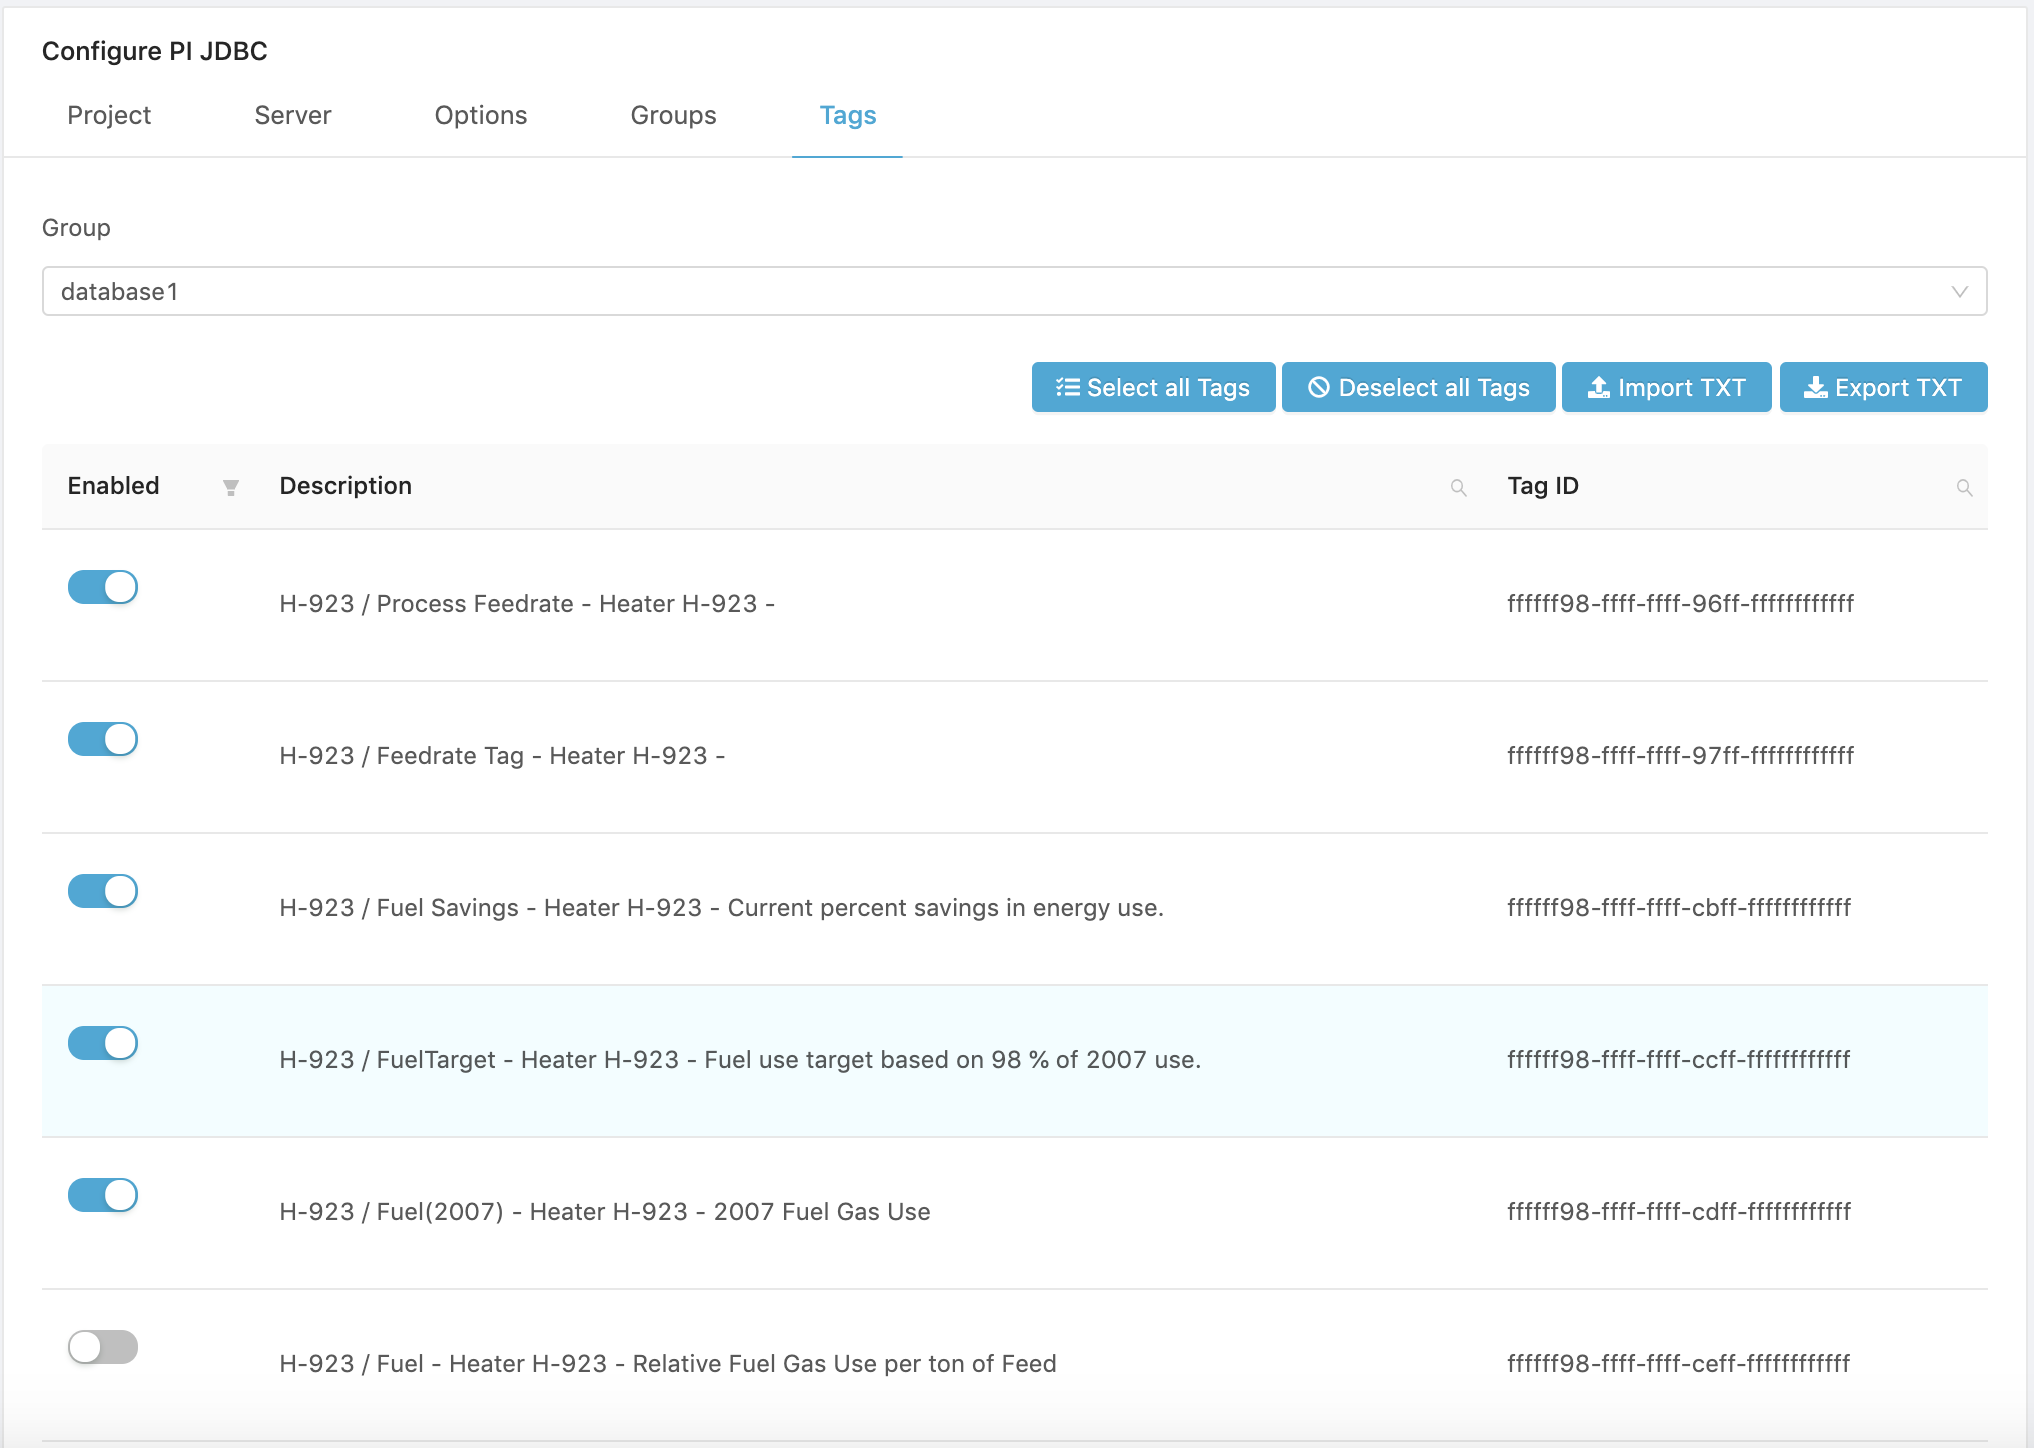
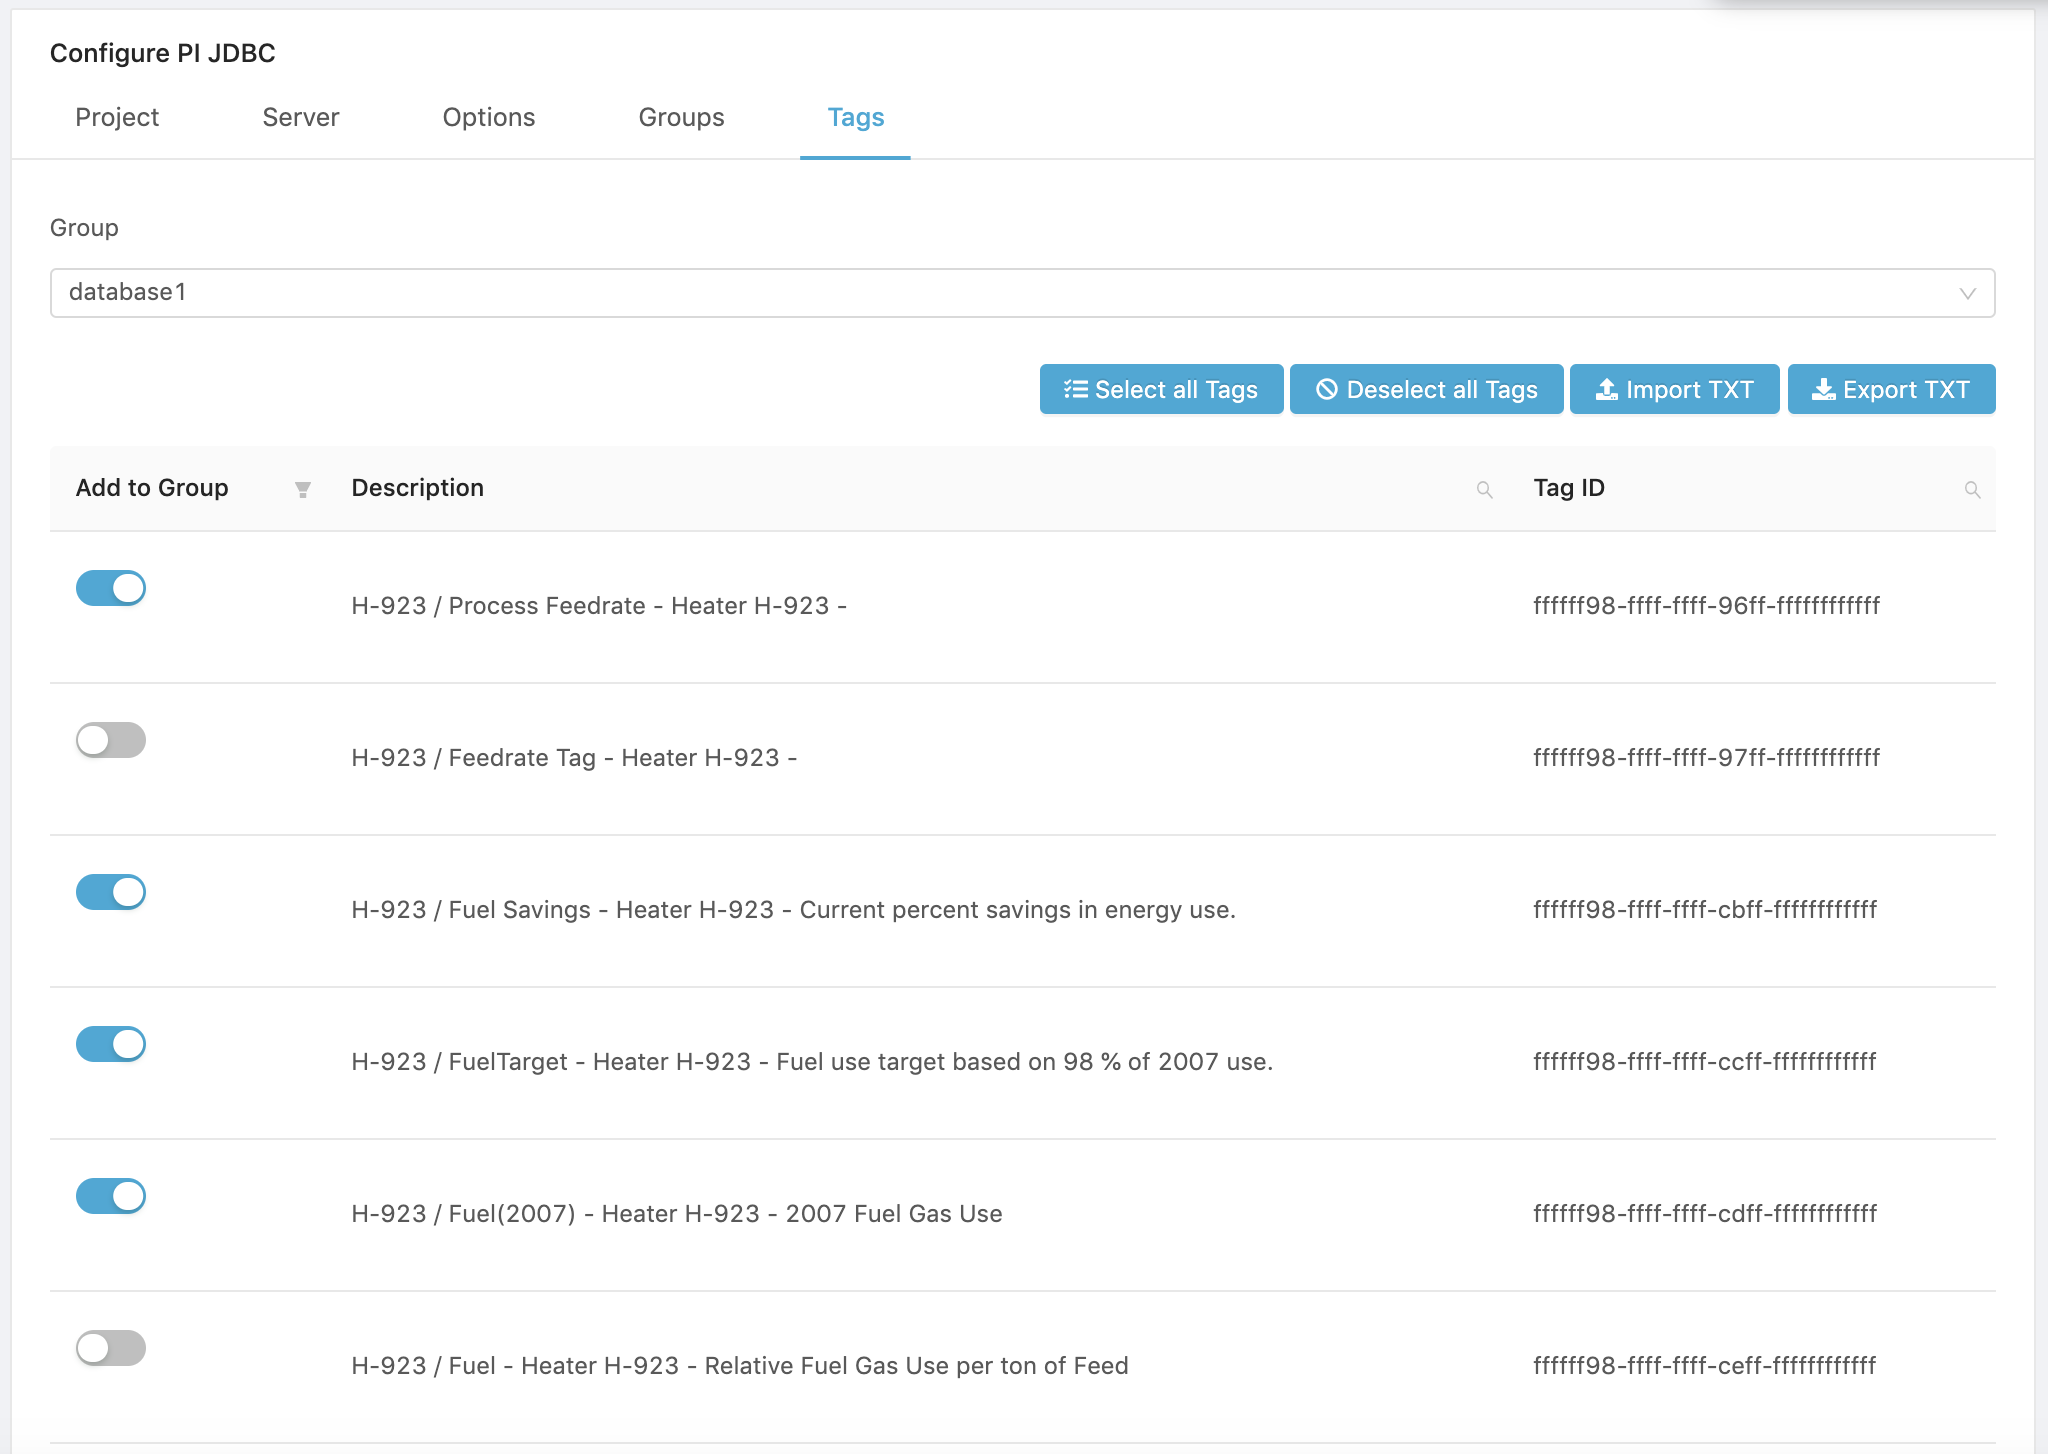
Select the individual Tags required by your application by clicking on the Selection switches.
-
You can Search for Tags by Description or tag ID using the respective Search toolbars available by clicking the ( ) icon. Selected Tags can be Deselected by clicking on them again, or by clicking on Deselect all Tags.
Below is a Tags selection example.
-
Save or Save & Start your Project since it is now configured to run.
-
The Groups tab will show the number of Tags that have been assigned to each Group.
Tags
The Tags tab displays the Tags available for the Group selected. No operations such as edit or delete are allowed on the Tags.
To remove a Tag from a Group simply:
- Select the Group.
- Deselect the Tag.
Importing Tags
You can import Group Tag configurations from a Tab Delimited Text file. The effect of importing a list of Tags is that, if the Tags exist in the Group selected, they will appear as selected.
WARNING!
Any Tags that do not exist in the Group selected will be ignored and will ont be imported.
To preserve a Tag selection, Export the list as a CSV file that can later be imported.
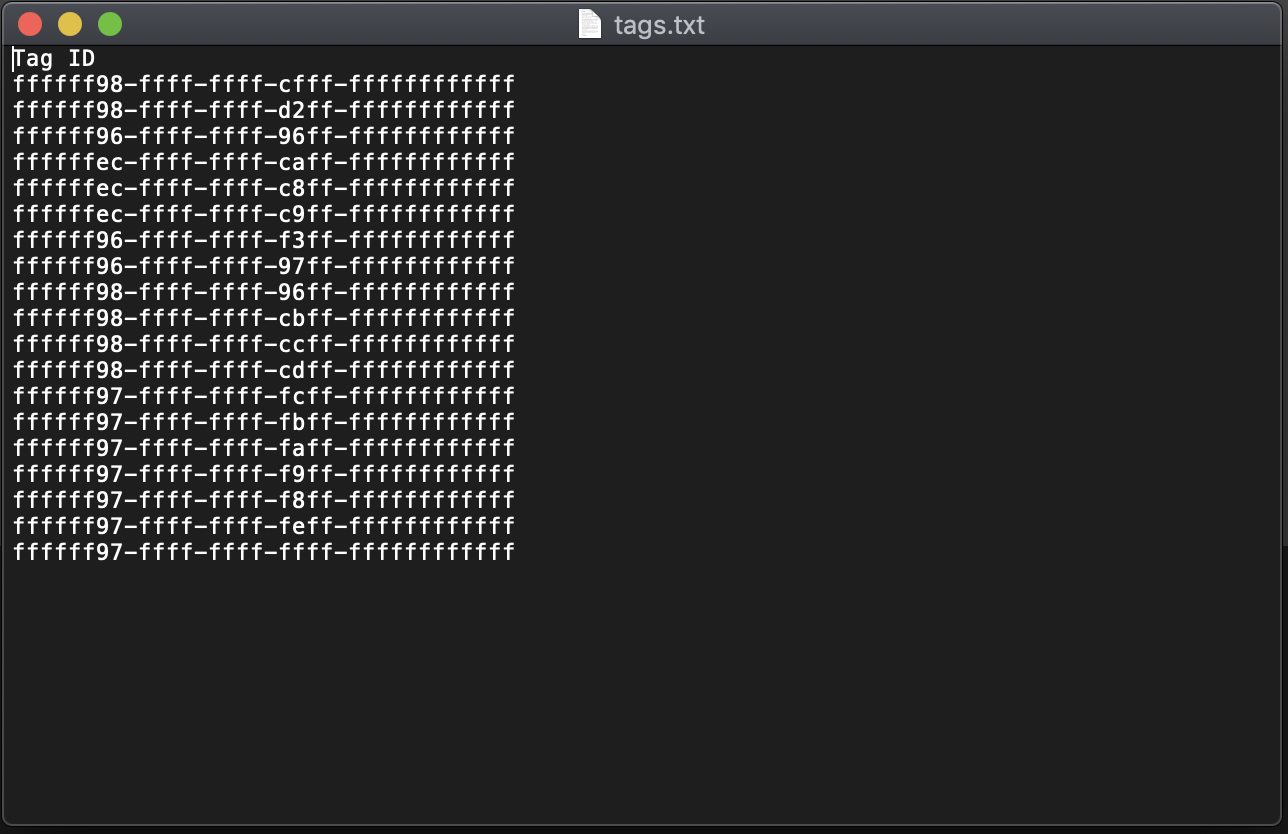
The file must conform to the following data structure and must have a header row whose values are ignored.
	Tag ID

	Where:

		Tag ID:			String. The Tag name.

	Example:
		Tag ID
		BA:ACTIVE.1
		BA:CONC.1
		BA:LEVEL.1
		BA:PHASE.1
Note that any selected tags in the Group selected for the import will be replaced by the imported tags.
To import a Tag list file:
- Open the Tags tab.
-
Select a Group.
-
Click on the [ Import TXT ] button to open the Import Tags tab and accept the Import from the dialog box.
-
Read the Instructions and click on the [ Upload file ] button.
-
Select a valid Tab Delimited Text file and complete the upload.
The text file has the tab delimited data shown below, and it was created with a standard text editor.
- Verify that the imported Tags show as selected in the Tag list.
-
Save or Save & Start to run your project.
-
To send the Tag data to the cloud, configure the IoT cloud communications parameters by creating or configuring a Message Router project.
Exporting Group Tags
You can export the selected Group Tags in a Tab Delimited Text file.
The file will conform to the following data structure and will have a header row.
	Tag ID
	tag-id1
	tag-id2
To export a Tags list file:
- Open the Tags tab and select a Group to display the Group’s Tags.
-
Click on the [ Export TXT ] button to open the Export Tags tab.
-
Read the Instructions and click on the ( Download file ) button.
-
Enter a name for the Tab Delimited Text file, or use the default and Click OK to initiate the download.
The text file has the tab delimited data shown below. It was open with a standard text editor.