3. Configuration
TwinCAT ADS Client Overview
This guide describes how to configure and use the Edge One™ TwinCAT ADS Client to communicate bi-directionally with a TwinCAT ADS PLC. It assumes that you are familiar with the product Overview and the Get-Started guide. It includes the following sections:
- Configuring the Project indicates the initial steps for configuring the TwinCAT ADS Client project.
- Configuring the Server Access describes how to configure the access to a TwinCAT ADS PLC, which acts as the server.
- Configuring Groups indicates how to configure TwinCAT ADS Groups.
- Configuring and Managing Variables indicates how to configure a Group’s variables.
- Importing nodes describes how to import Nodes from a CSV file.
- Exporting nodes describes how to export Nodes on a CSV file.
- Viewing & writing PLC Real Time Data describes how to visualize the target PLC data in real time and how to write data to the PLC.
Once the project is configured and Saved you must create a Message Router project and configure the cloud access parameters to connect uni-directionally or bi-directionally to CloudPlugs or a supported IoT cloud service.
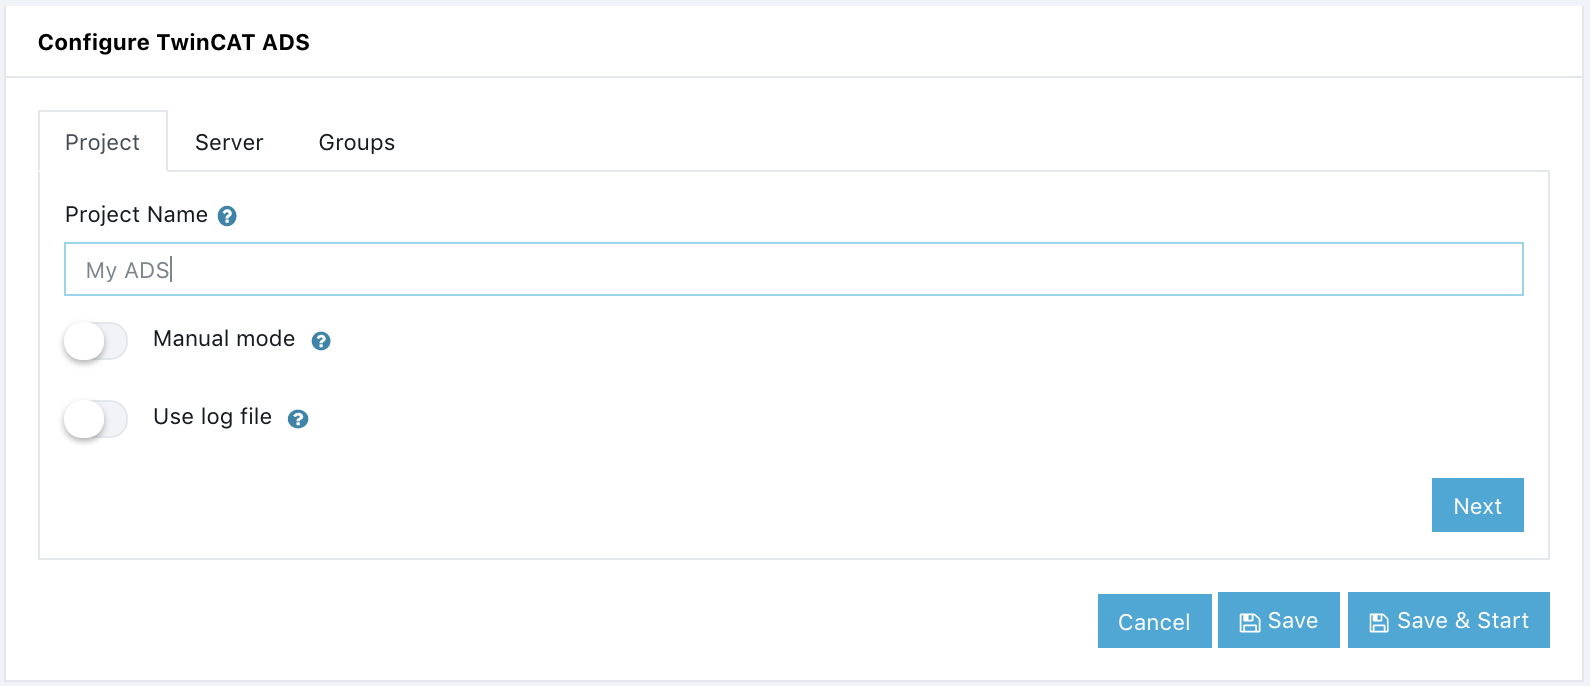
Configuring the TwinCAT ADS Client Project
- Open the ADS project you created in by following the Get Started guide.
- In the Project tab:
- Enter a name for the project.
- Select whether or not the project will be started automatically when the TwinCAT ADS Client module container is started. To start the project manually using the web interface, set the Manual mode switch to ON.
- Select whether or not to use a log file to store the project logs.
- Click on Next to open the Server tab.
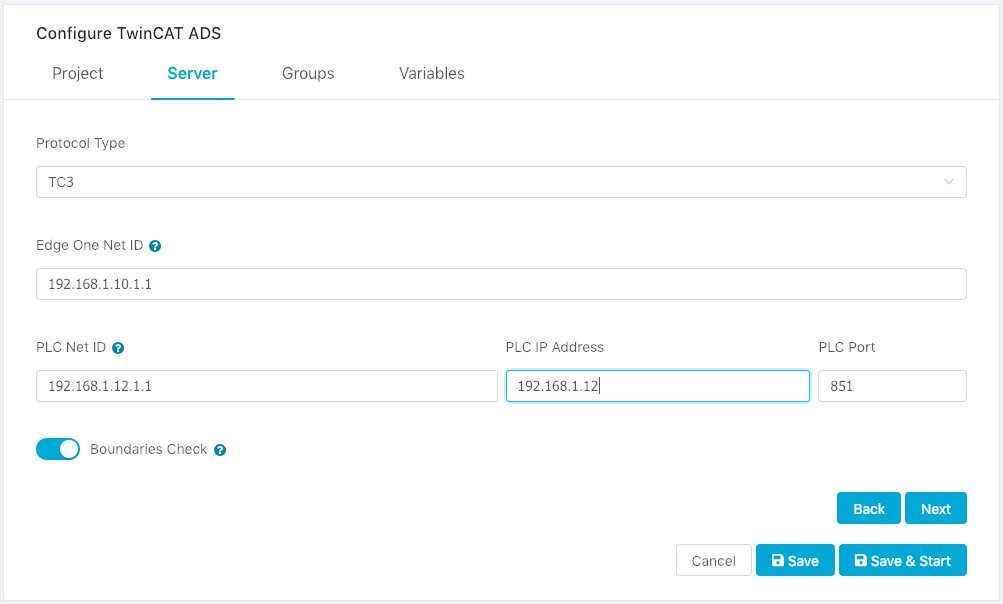
Configuring the TwinCAT ADS PLC Access
In the Server tab:
- Select the protocol type for the configuration. Options are TC2 (TwinCAT2) or (TC3) TwinCAT3.
- Enter the TwinCAT ADS Client Net ID. Typically composed of the Edge One™ IP address plus “.x.y”, where x and y are numbers between 0 and 255 (e.g., 192.168.1.10.1.1).
- Enter the TwinCAT PLC (server) Net ID. You could use the same ending numbers of the Client, or choose any number you want.
- Enter the IP address of the TwinCAT PLC. This address could be remote, if the PLC is reachable.
- Enter the port that the TwinCAT PLC is using.
- Select whether or not to check variable value boundaries on the project. Setting the switch to ON, checks the value of every variable read to make sure it is inside the boundaries determined by its data type. It is useful when users are allowed to write data into the PLC to make sure that the data is valid, but the boundary check process requires CPU resources and it is not recommended when variables are read at high speeds.
- Click on Next to open the Groups tab.
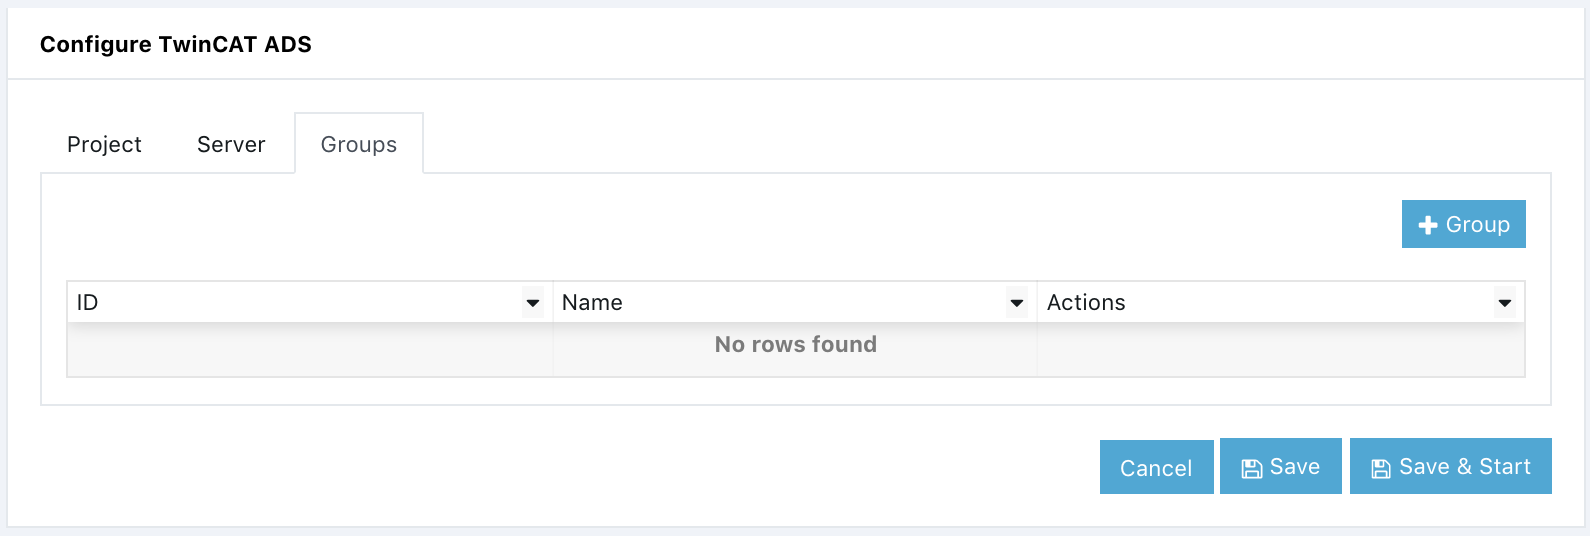
Configure a Group
To configure a Group of Variables, open the Groups tab.
- Click on the Add Group button.
- Enter the Group Name which is a reference name to easily identify the Group.
- Enter the Group ID. This is a required parameter which is used to identify the Group in an MQTT topic or channel. The Group’s Variable data is published into MQTT topics, or CloudPlugs channels with the structure Project-ID/Group-ID.
- Set the sampling interval in milliseconds.
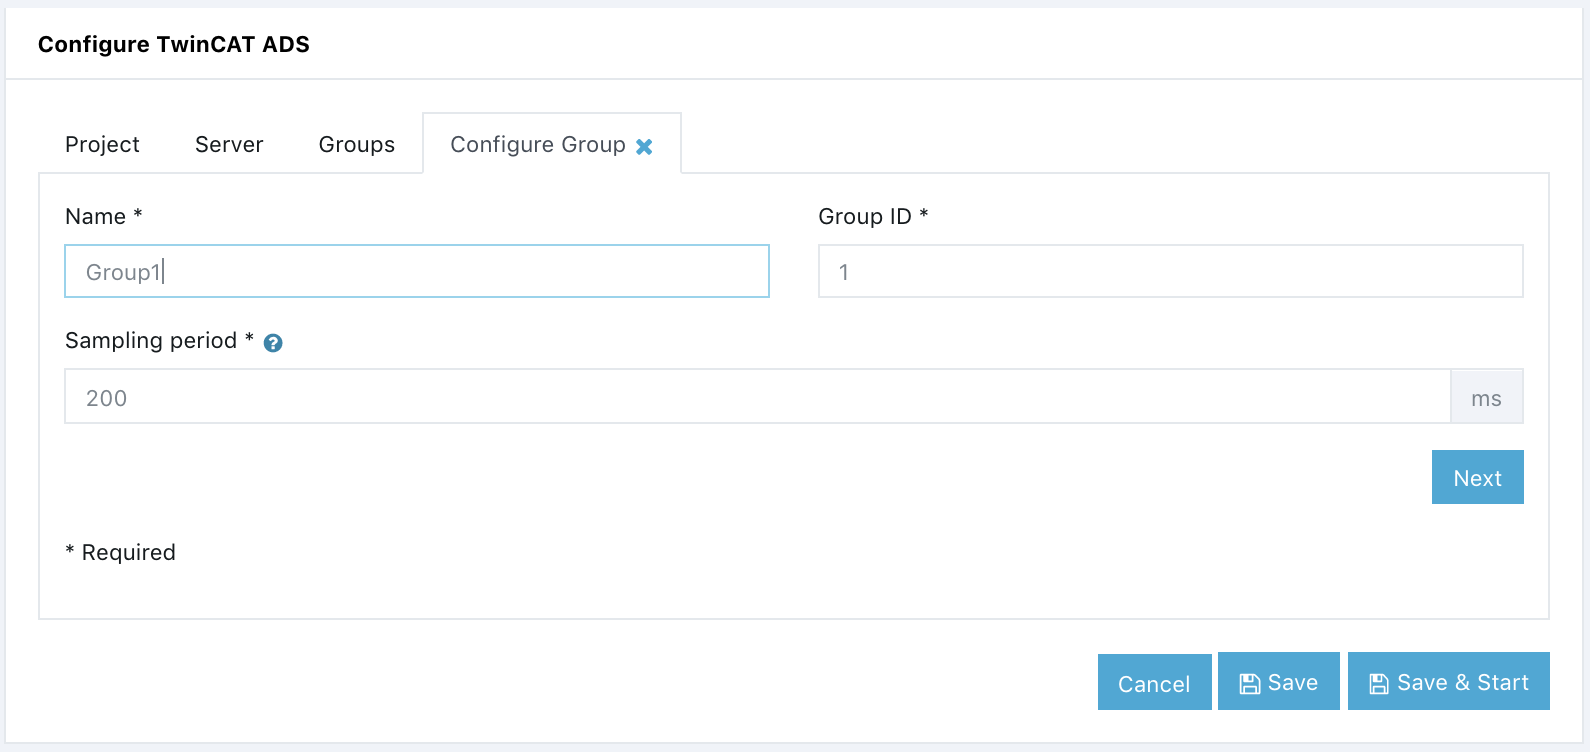
- Click Next to complete the Group creation process and to open the Groups tab.
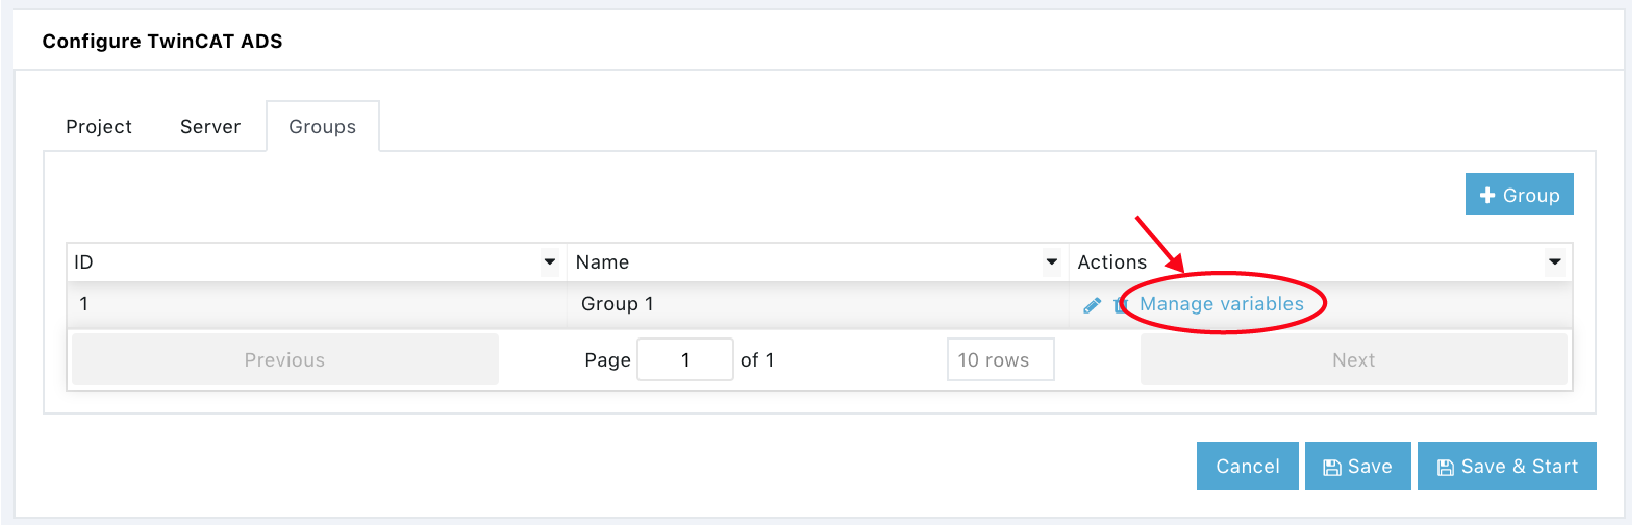
- The Groups tab displays the Groups created and allows to select and manage the Group’s Variables.
Configure the Group’s Variables
To configure a Group’s Variables, open the Groups tab.
- Click on the Manage variables link to open the Variables tab.
- There are two options to add variables to a Group:
- Add Variable, which allows to set the properties of a variable to be read from the PLC.
- Import TXT. Allows the import of valid variables from a Tab Delimited Text file.
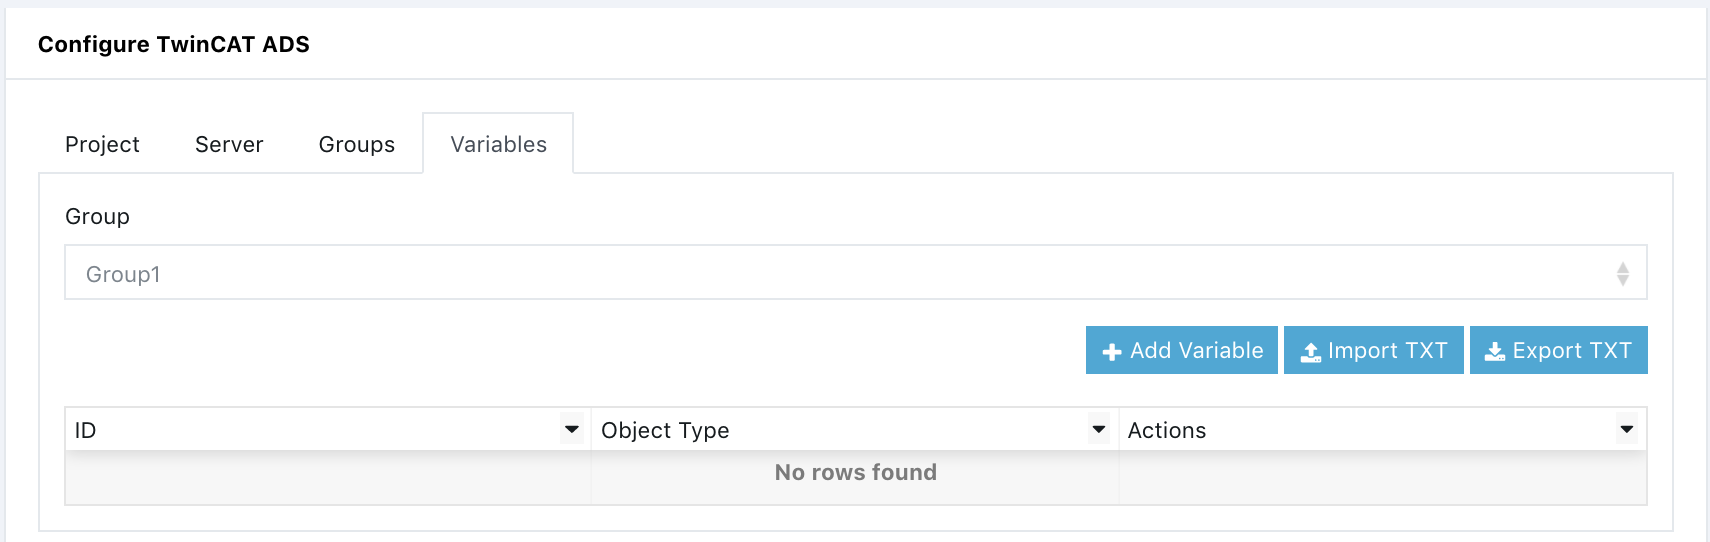
The section below describes how to add variables.
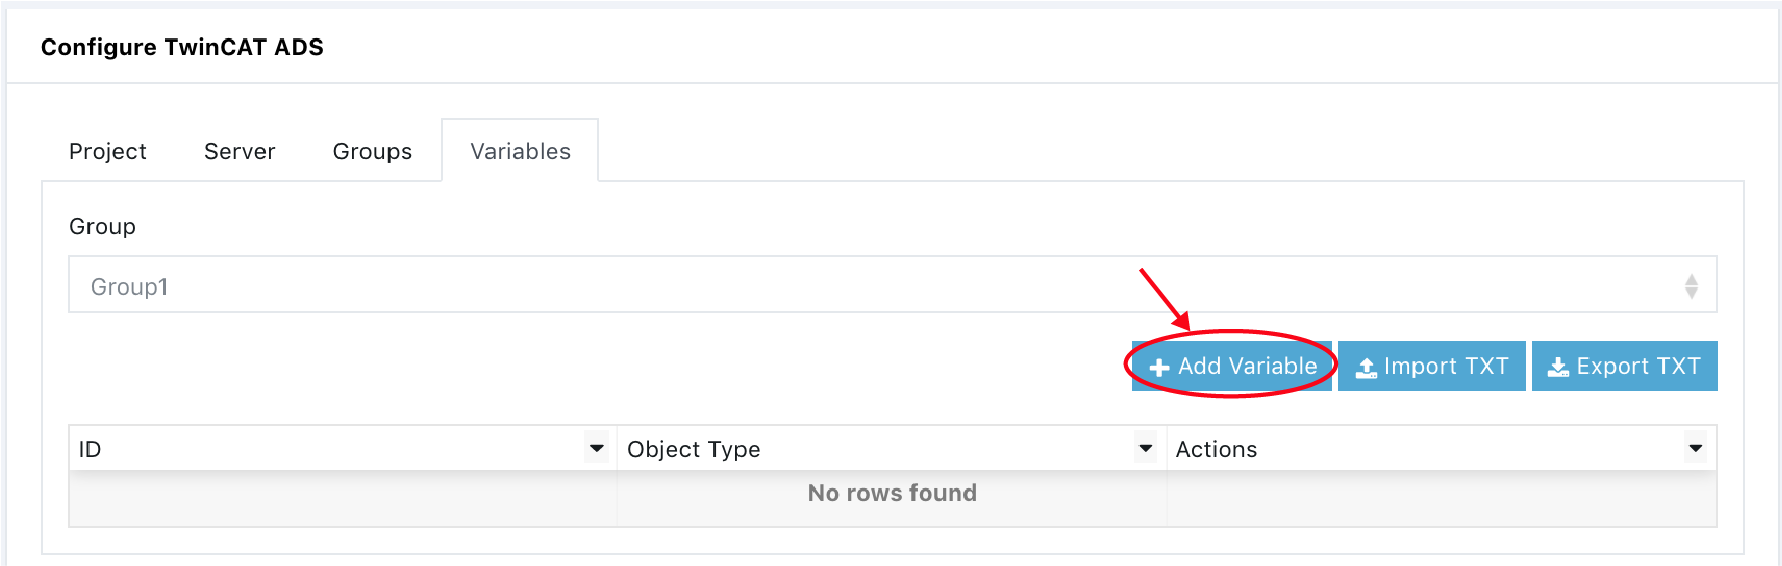
Adding Variables
To add a Variable manually:
- Click on the Add Variable button to open the Configure Variable tab.
- Enter and optional Name. The name allows the user to identify the variable in a different
- Enter the Variable ID. This is the ID that the PLC is using for the variable to be read.
- Select the Data Type of the variable from the dropdown menu. Nineteen different types are available as shown below.
| Bool | Byte | Word | DWord |
| Sint | Usint | Int | Uint |
| Dint | Udint | Real | Long Real |
| String | Time | Time of day | Date |
| Date and Time | Struct | Array |
- The resulting configuration is as follows.
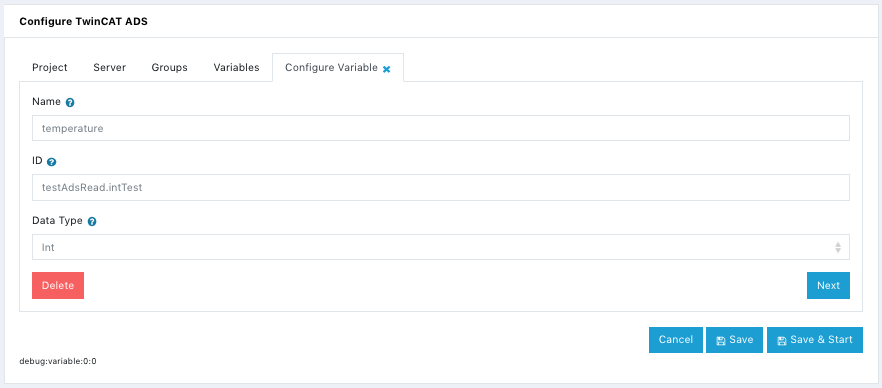
- Click on Next to open the Variables tab and verify that the variable was created.
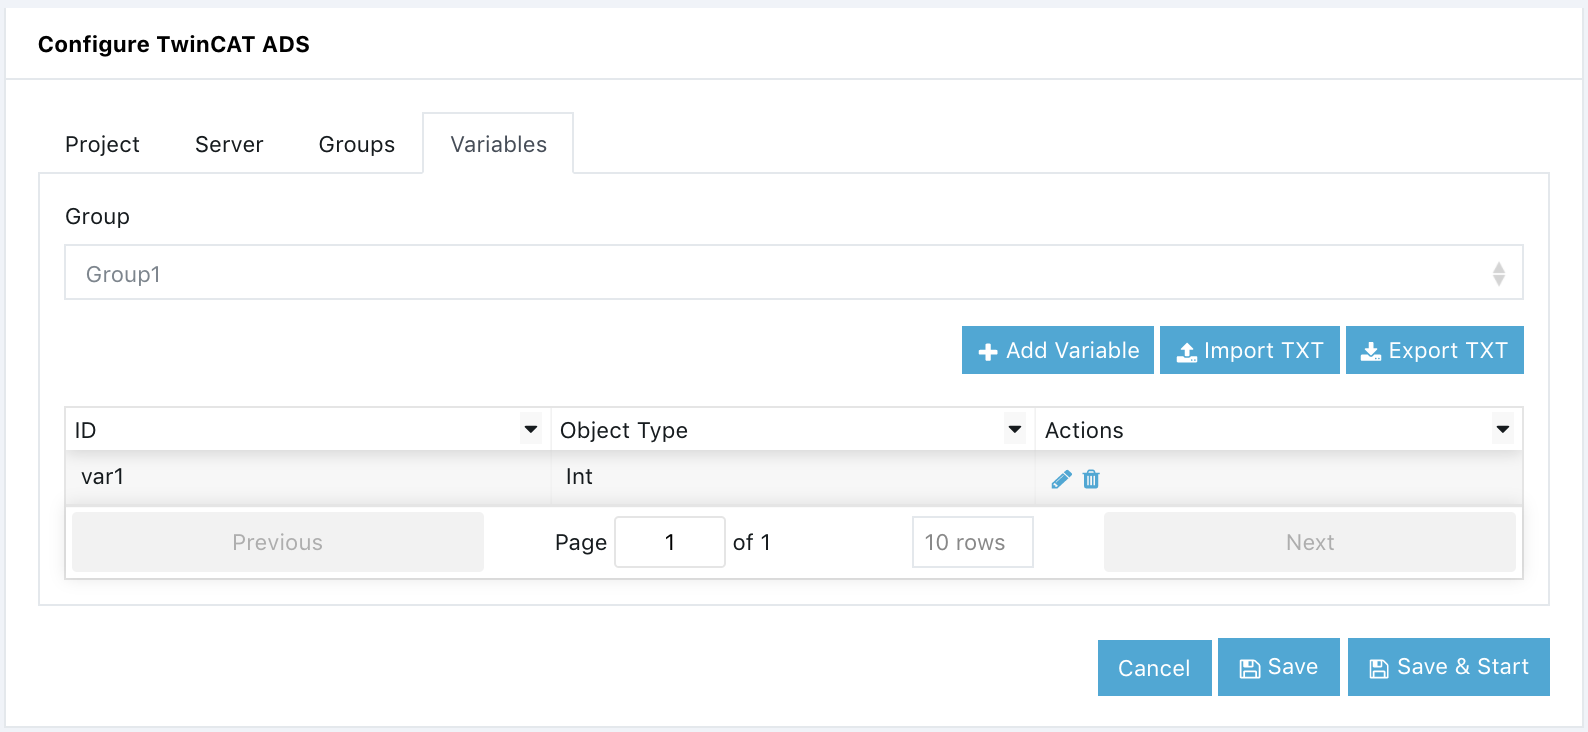
Edit Variables
The Variables tab displays the Node’s selected and allows both edit ( ) and delete ( ) operations on the Nodes.
When a Node is edited or deleted you must Save and Start for the changes to take effect.
Importing Group Variables
You can import Group Variable configurations from a Tab Delimited Text file.
WARNING!
Any existing registers will be deleted and replaced by the imported registers.
To preserve existing registers, Export them as a CSV file and add the exported data to the file to be imported.
The file must conform to the following data structure and must have a header row whose values are ignored, where <tab> is the tab character.
	Variable ID<tab>Data Type

	Where:

		Variable ID:	ID of the variable as configured in the target PLC.
		Data Type:		Type of Data. Valid values are BOOL, BYTE, WORD, DWORD, SINT, USINT, INT, UNIT, DINT, UDINT, REAL, LREAL, STRING, TIME, TOD, DATE, DT (DATE AND TIME)

	Example:
		\t represents a tab character.
		Variable ID\tType
		sensors[0].temperature\tSINT
		variables[0].pressure\tREAL
		sensors[1].temperature\tSINT
		variables[1].pressure\tREAL
Only tab “\tab” separators are supported, and there can only be one tab between each field. The import function is used for multiple modules and some of the connector variables support support value strings with commas; therefore, only Tab Delimited Text files are supported.
Note that any existing variables in the Group selected for the import will be replaced by the imported variables.
To import a variables configuration file:
-
Open the Variables tab.
-
Click on the [ Import TXT ] button to open the Import variables tab.
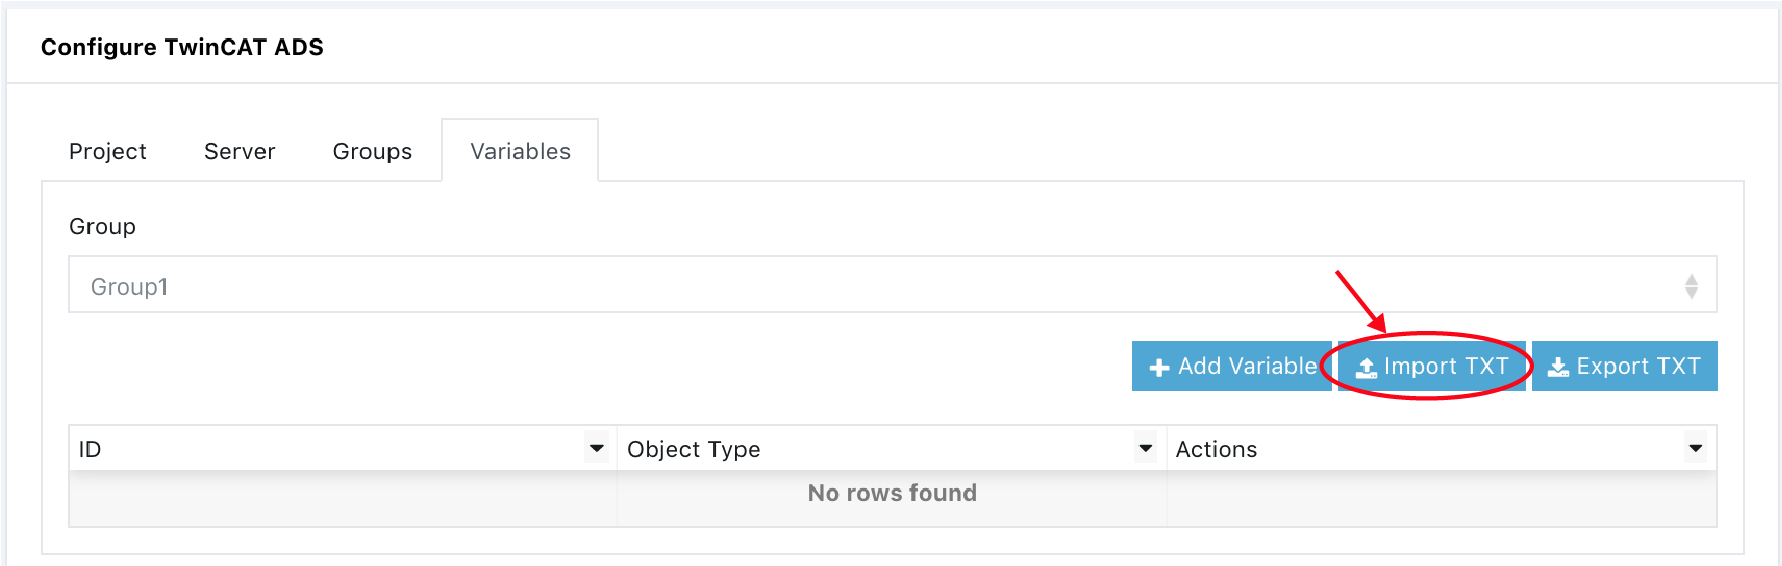
- Read the Instructions and click on the [ Upload file ] button.
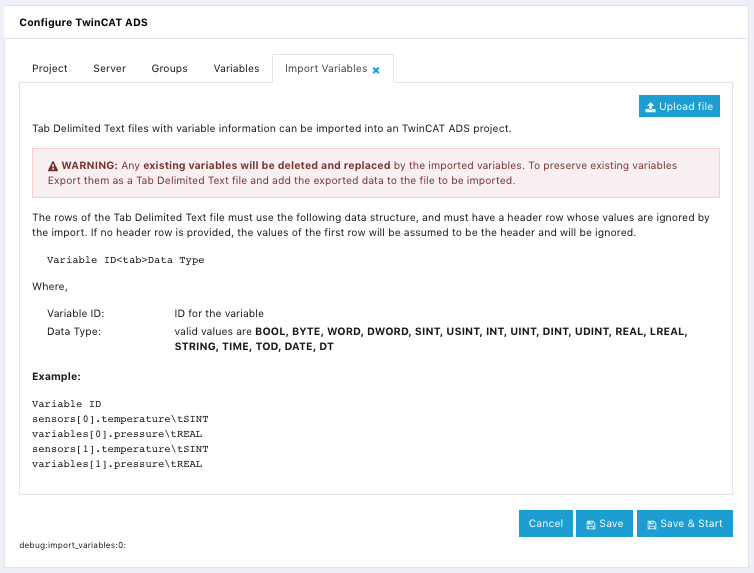
- Select a valid Tab Delimited Text file and complete the upload.
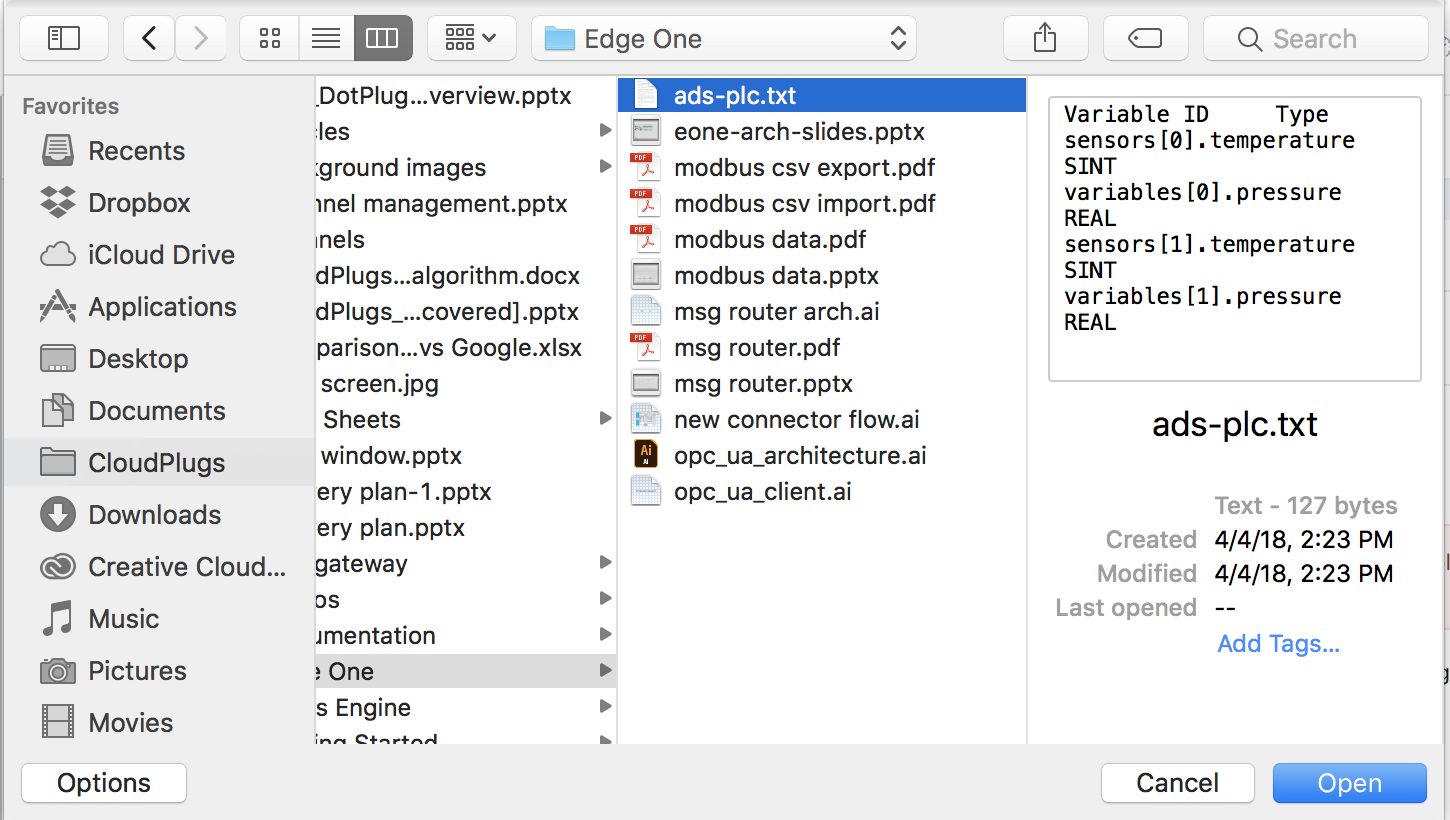
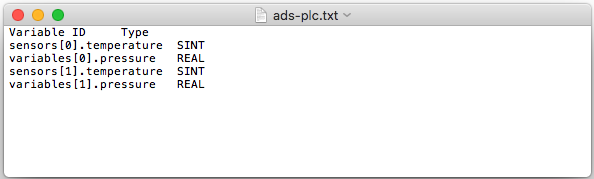
The text file has the tab delimited data shown below, and it was created with a standard text editor.
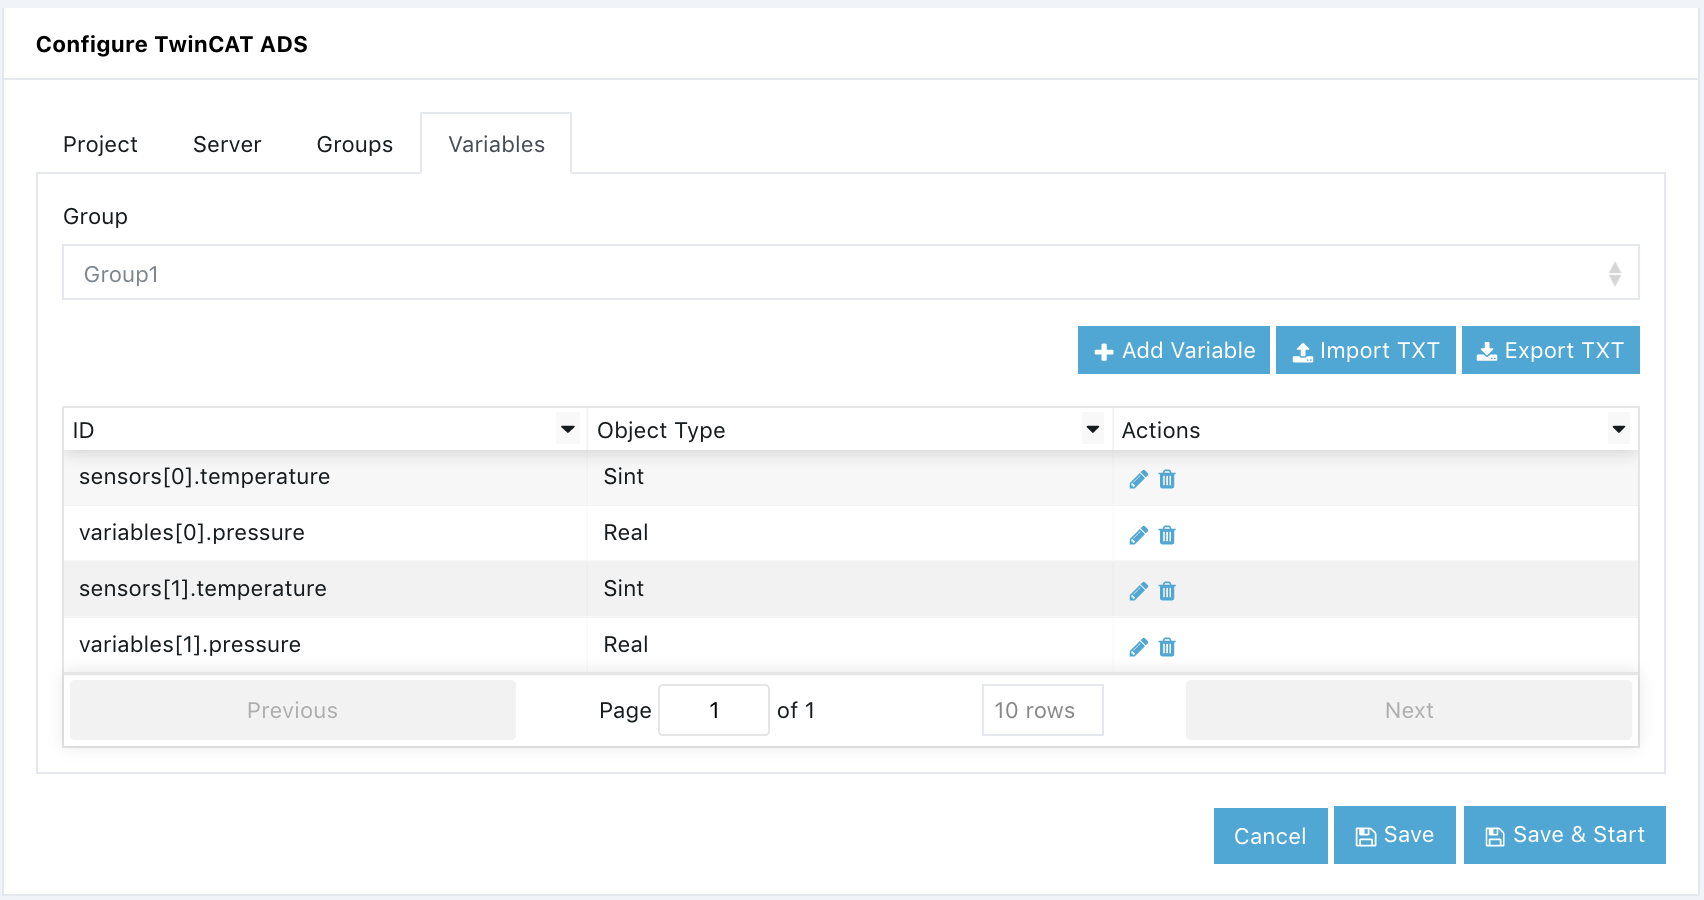
- Verify that the nodes were imported correctly by opening the Variables tab.
- Configure the IoT cloud communications parameters by creating or configuring a Message Router project.
Exporting Group Variables
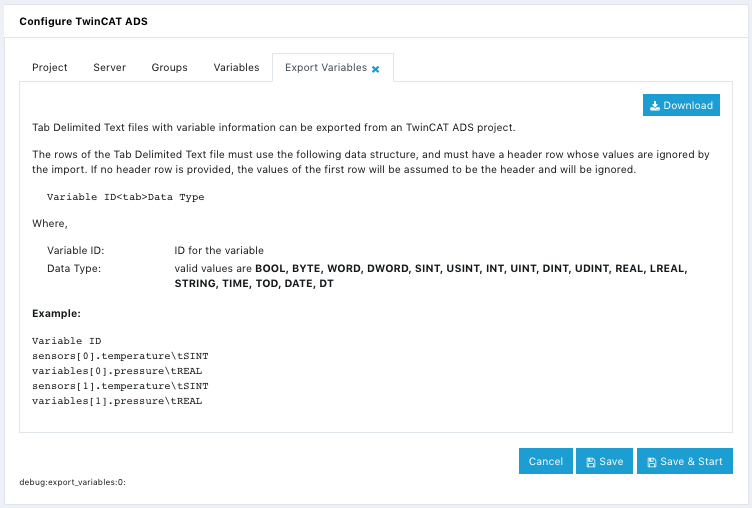
You can export Variables in a Tab Delimited Text file.
The file will conform to the following data structure and will have a header row, where <tab> is the tab character.
Variable ID<tab>Data Type
Only tab “\tab” separators are supported, and there will only be one tab between each field.
To export a register configuration file:
-
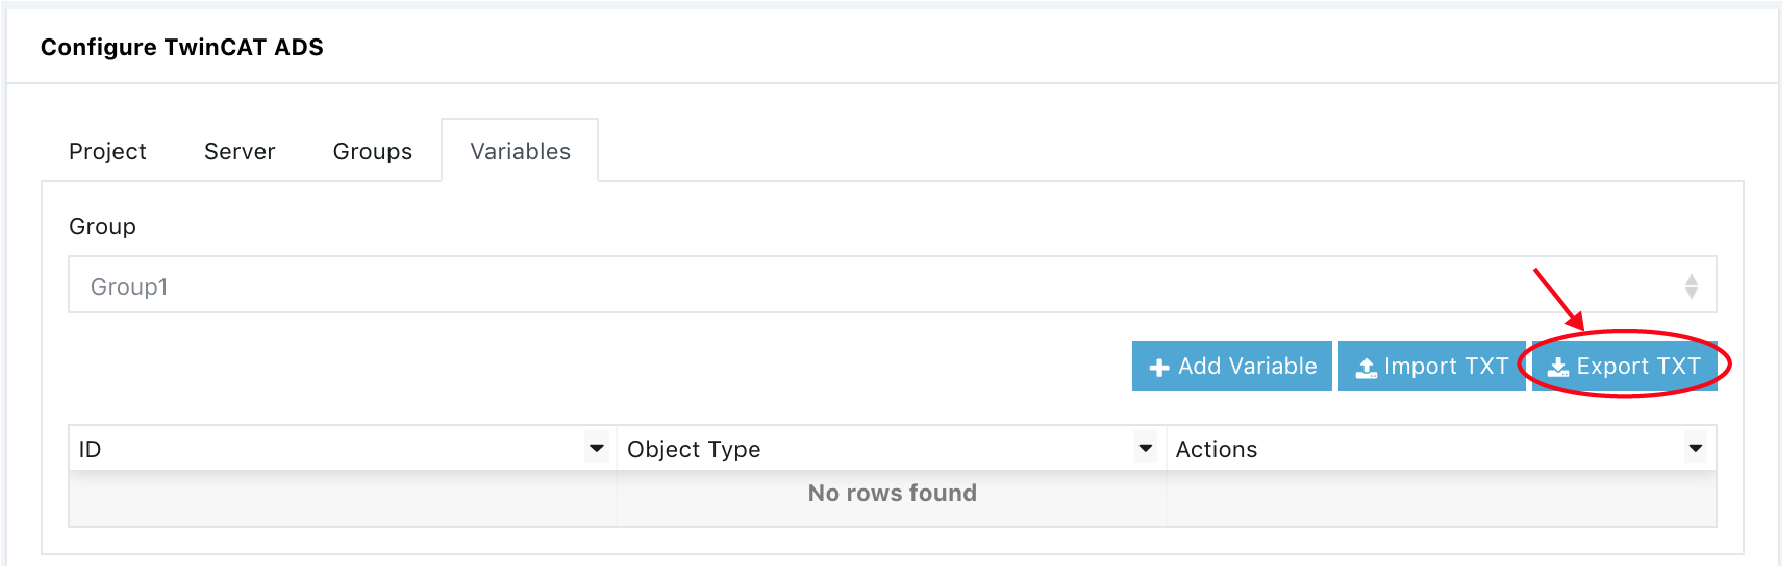
Open the Variables tab.
-
Click on the [ Export TXT ] button to open the Export Nodes tab.
- Read the Instructions and click on the ( Download file ) button.
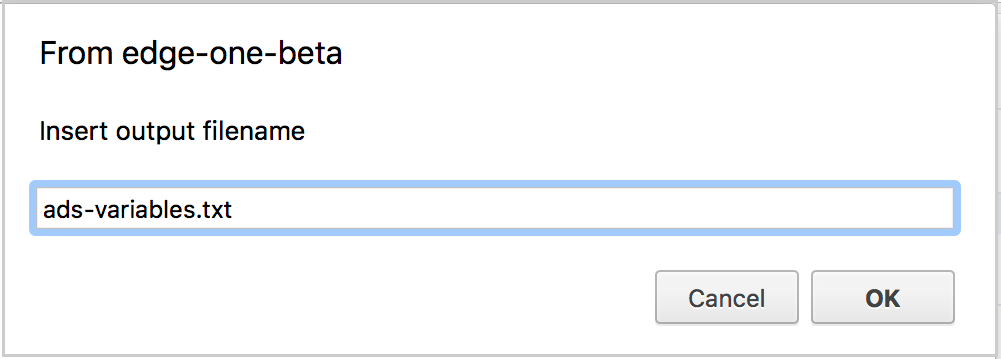
- Enter a name for the Tab Delimited Text file, or use the default and Click OK to initiate the download.
The text file has the tab delimited data shown below. It was open with a standard text editor.