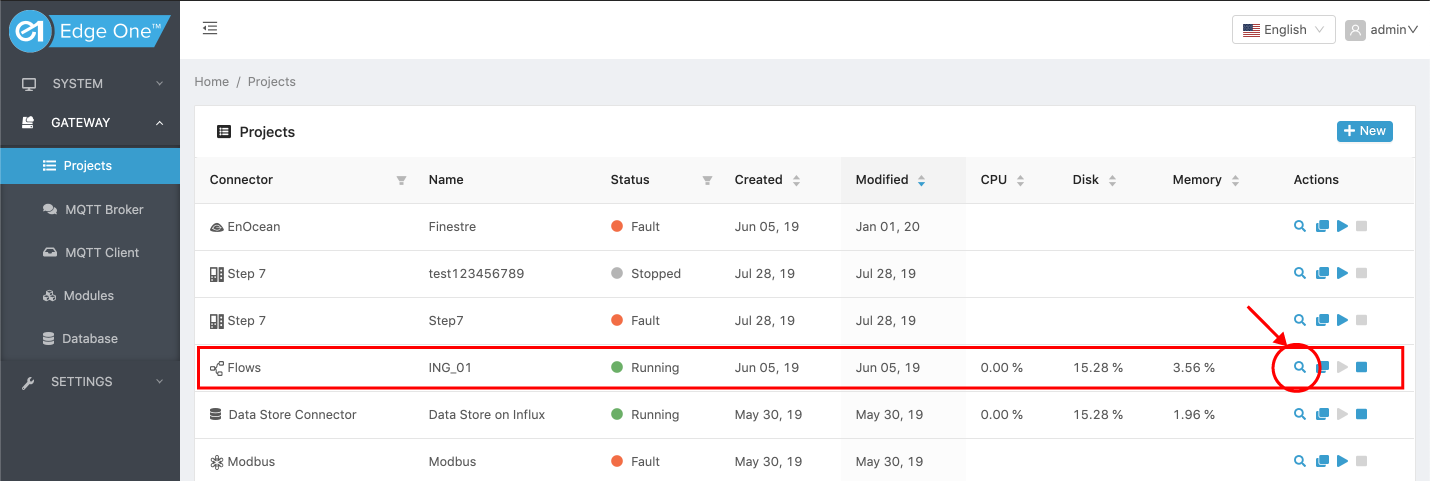
Projects Overview
The Edge One™ allows the programming of Projects, which are custom execution instances of the modules loaded into Edge One™. A single Edge One™ may execute one or more projects at a time. The following functions are available for projects:
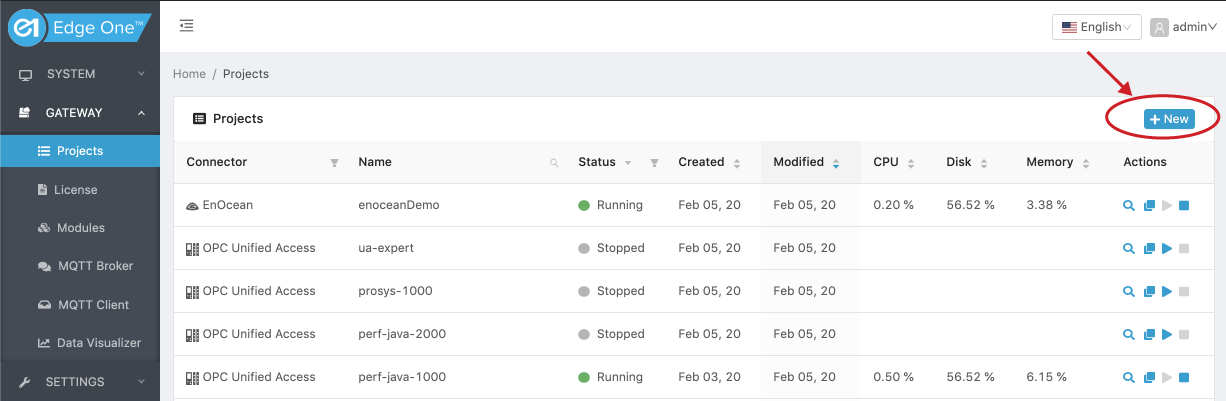
- Create ( ) or Import ( ).
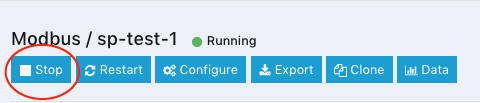
- Open ( ) and Configure ( ).
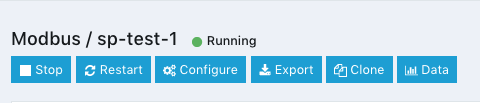
- Run ( ), stopped ( ), or restarted ( ).
- Export ( ), cloned ( ).
- Delete ( ) when the project is not running.
- Data ( ) which allows to display the project’s data and to write data into registers, variables or tags if the application module allows it. Data is only enabled when the project is running.
Other than the Create, Open and Import actions, all the actions to run, stop, clone, delete, etc. a Project are executed from the top panel of the individual project.
The Projects page includes two panels:
- The Projects list, which also includes the Add a new Project ( ) and the Reload list ( ) icons.
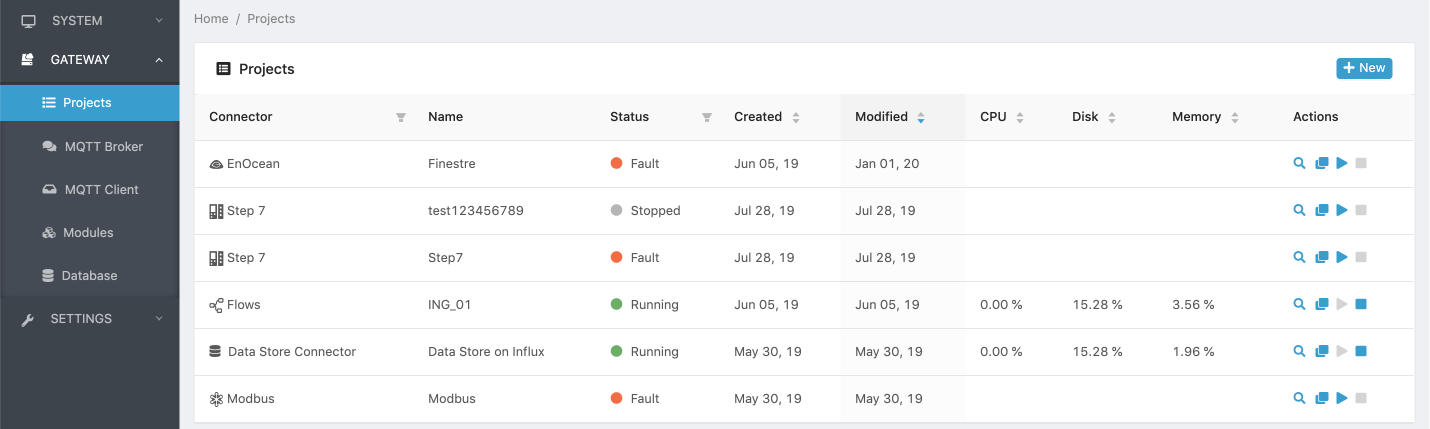
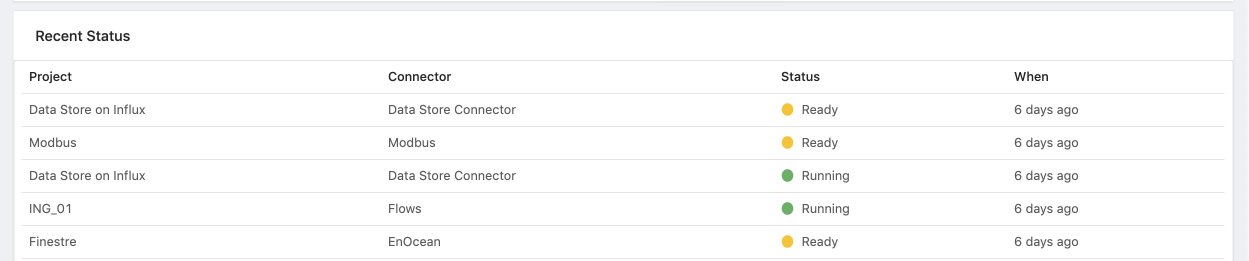
- The Status History panel, which displays up to the last 50 status change events for all the projects created in the Edge One™. The panel can be refreshed with the Reload ( ) icon.
Creating a Project
To create a new Project:
-
Open the Projects tab on the left panel menu bar of the Edge One™.
-
Click on the Add a Project ( ) icon.
- Select a Module.

-
Click ( ) Create to add a new project, or Import ( ) to import a project file in JSON format.
-
Configure and run your project following the specific module configuration instructions.
Opening a Project
To open, configure or edit a Project:
-
Open the Projects tab on the left panel menu bar of the Edge One™.
-
Select a Project from the list. Note that the list can be refreshed with the refresh button ( ).
-
To open the Project, either:
- Double click on the project, or
- Click on the inspect () icon.
Deleting a Project
To delete a Project, you must first stop it if it is running:
-
Open the Projects tab on the left panel menu bar of the Edge One™.
-
Select and Open a Project from the list.
-
On the Top menu bar of the Project:
- Stop ( ) the Project if it is running.
- Delete the Project clicking on the ( ) icon.

Importing a Project
Edge One™ allows you to import projects that have either been previously exported, or that comply with the required project JSON file structure.
Note that there is no single file format for all projects given that different modules have their own unique structure applicable to their application requirements.
Please Note:
To import a Flows project refer to the Flows Import documentation.
To import a project, other than a Flows project:
-
Open the Projects tab on the left panel menu bar of the Edge One™.
-
Click on the Add a Project ( ) icon.
- Select a Module.
-
Click ( ) Import to open the file selection window.
-
Select the file to be imported and Open it.
Exporting a Project
You can share your projects with other Edge One™’s by exporting them and then importing them. Files are exported in JSON format.
Please Note:
To export a Flows project refer to the Flows Export documentation.
To export a project other than a Flows project:
-
Open the Project from the Projects List.
-
Click on Export.
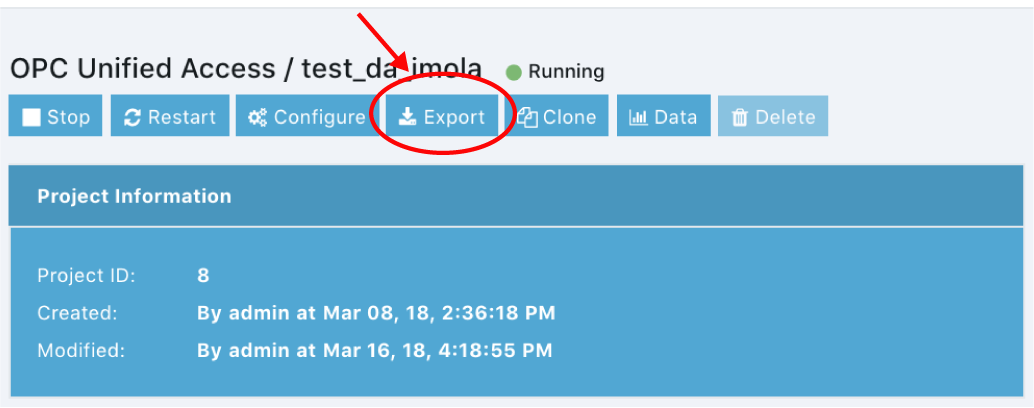
- Enter a name for the file.
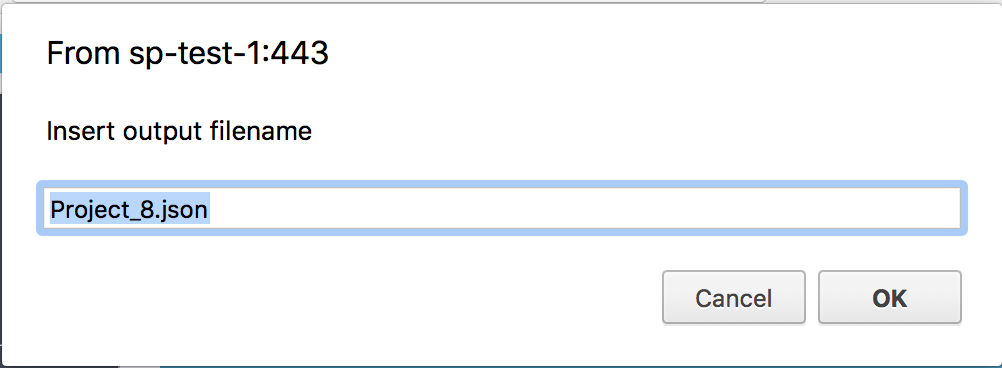
- Click on OK and the JSON file will be saved in your Downloads directory.
Viewing and Writing a Project’s Real Time Data
The Data tab allows to display and chart the real time data read by a device, as well as to write data, if allowed, into the devices registers, variables, tags or nodes.
Data is only availble when a Project is Running.
To use the Data functionality:
- Open the Project form the Project’s list.
- Click on Data.
- Select the Group (or Slave in the case of Modbus) whose data will be displayed.
- The Data table will display the Last Value of the parameters of the selected Group.
- Turn on the Chart switch to display the real time data of of oen or more parameters.
- Enter values in the New Value input fields to write data into the Group’s parameters.
