State Triggers
Overview
This guide describes the process for creating State triggers. These triggers test the published data against the State defined in the configuration. There are three action options:
- Entering the state.
- Exiting the state.
- Remaining in the state.
The State is entered as a regular string, not as a JSON. If you want to enter ON, simply type ON.
Supported actions are:
- Near real time e-mail notifications.
- Near real time SMS notifications.
- HTTP requests.
- Publish data.
- Create a JIRA trouble ticket.
Create a State Trigger
To create a State Trigger for your Production Template, Thing or Controller:
- Open the target device from its management console.
- Select General (
 ) -> Triggers (
 ).
). - Click on the New Trigger button (
 ).
). - Give the trigger a Name and set Event as Data Published.
- Enter an existing or new channel name under Channel, and enter or select a Data field if the State is published in a structured JSON data field.
- Set the Rule Type as State.
- Enter the State(s) that the Trigger will test against and select and customize the actions for the changes of state. You can set multiple actions for the same trigger and use the Special Symbols available to program the actions.
- Save the trigger.
- Save the device.
 |
|---|
Full Example
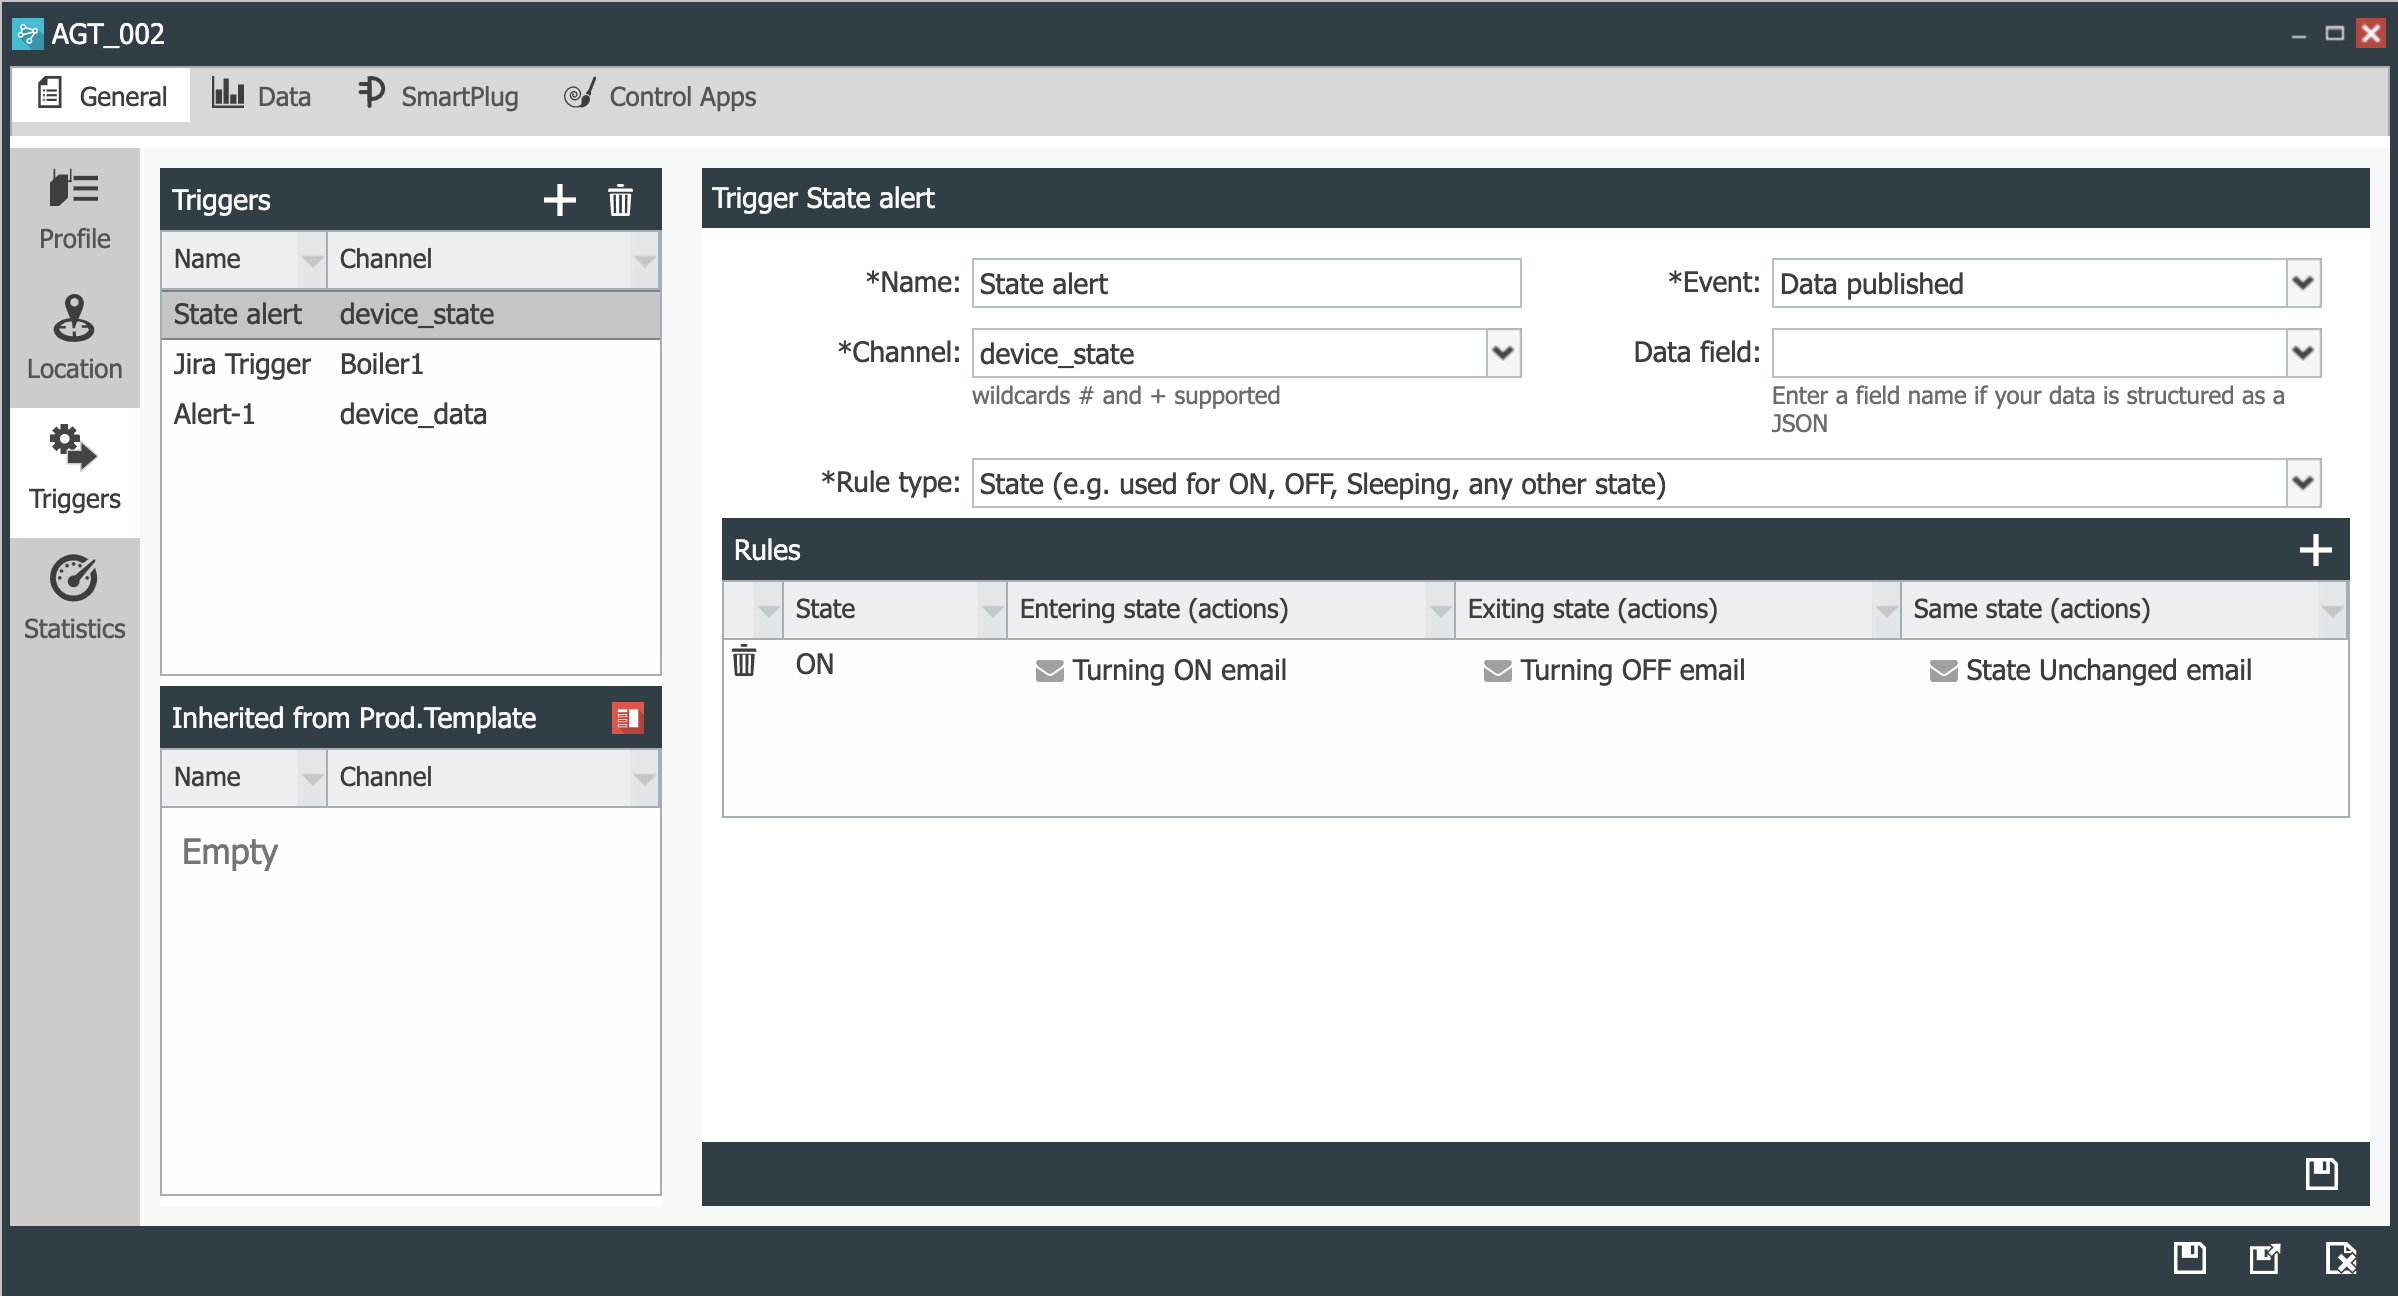
Here is a full example on how to create and test a State Trigger for a device called AGT_002 on a channel called device_state.
Follow the steps above to create a State trigger called State alert on channel device_state. We will publish single values; therefore, no Data field exists for this test.
| 1. Set the State name to ON. | |
| 2. Create and save an email notification action called Turning ON email when the device is Entering state. |  |
| 3. Create and save an email notification action called Exiting ON email when the device is Exiting state. |  |
| 4. Create and save an email notification action called State Unchanged email when the device is in Same state. |  |
| 5. The resulting rule looks as follows: |  |
| 6. Add a new rule and set the State name to OFF. Add the Entering, Exiting and Unchanged state emails and Save. |  |
| 7. Save the trigger, then Save the device. |   |
| 8. Publish the JSON “ON” on device_state. |  |
| 9. Verify that the email Device turned ON was received. |  |
| 10. Publish the JSON “OFF” on device_state. |  |
| 11. Verify that the emails i) Device exited ON state and ii) Device turned OFF are received. |   |
| 12. Publish JSON “OFF” on device_state again. |  |
| 13. Verify that the Device remained OFF email is received. |  |
| 14. Publish JSON “ON” on device_state. |  |
| 15. Verify that the emails i) Device turned ON and ii) Device no longer OFF are received. |   |
| 16. The Data view panel displays the following published data: |  |