Controllers
| Controllers are devices or applications with read-only or read-write permissions on Production Things. A web or mobile dashboard that an end user or control room operator uses to visualize data and control one or more Production Things is a controller. A web application may be the controller of multiple devices and robots in a manufacturing floor. Controllers exchange messages with Production Things using REST, WebSockets or MQTT. |
|---|
This guide describes the following Controller features:
- Controller Enrollment/Activation Parameteres.
- Controllers Management Console.
- Controller Properties Console.
Controller Enrollment
Much like Production Things, Controller devices need to enroll to CloudPlugs IoT to receive a Plug-ID and activation/connection password that are used to interact with the platform and other devices. Controllers enroll to CloudPlugs IoT with the following credentials:
- Name – optional parameter that provides a name to the Controller. You can change the Name of the controller after enrollment using the Controller management console.
- Serial number – optional parameter to set a hardware ID that the controller can enroll with. It is recommended to add a serial number to a Controller if the control application will be associated with a physical control device and you want to associate the device’s serial number with the control application.
- Thing Serial Number/Hardware ID – required. The serial number of the Production Thing, as configured in the Thing’s Production Template, that the Controller application will control.
- Control password – required. The Control password of the Production Thing, as configured in the Thing’s Production Template, that the Controller application will control.
Controllers can enroll into the platform using one of three methods:
- Using the WebSockets API.
- Using the REST API.
- Using the MQTT API.
Control and dashboard applications developed with the Control Designer are automatically enrolled using the Control Designer WebSockets interface.
Once a controller is enrolled, the platform assigns to it a Plug-ID and an activation/connectivity password that is used in all future connections to the platform.
Controllers Management Console
Controllers are displayed and can be managed from the Controllers management console. The management console allows you to Open (![]() ) and edit the properties and status of a Controller as well as
to select and Delete (
) and edit the properties and status of a Controller as well as
to select and Delete (![]() ) Controllers.
) Controllers.
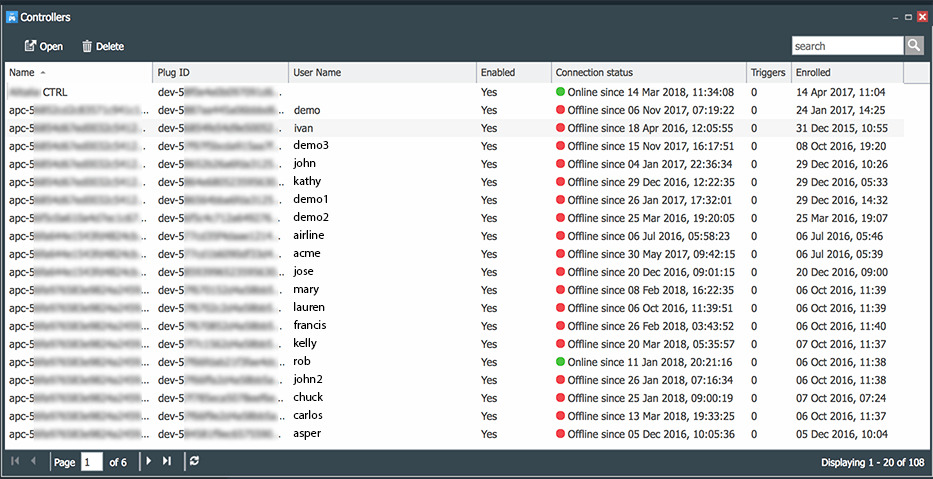
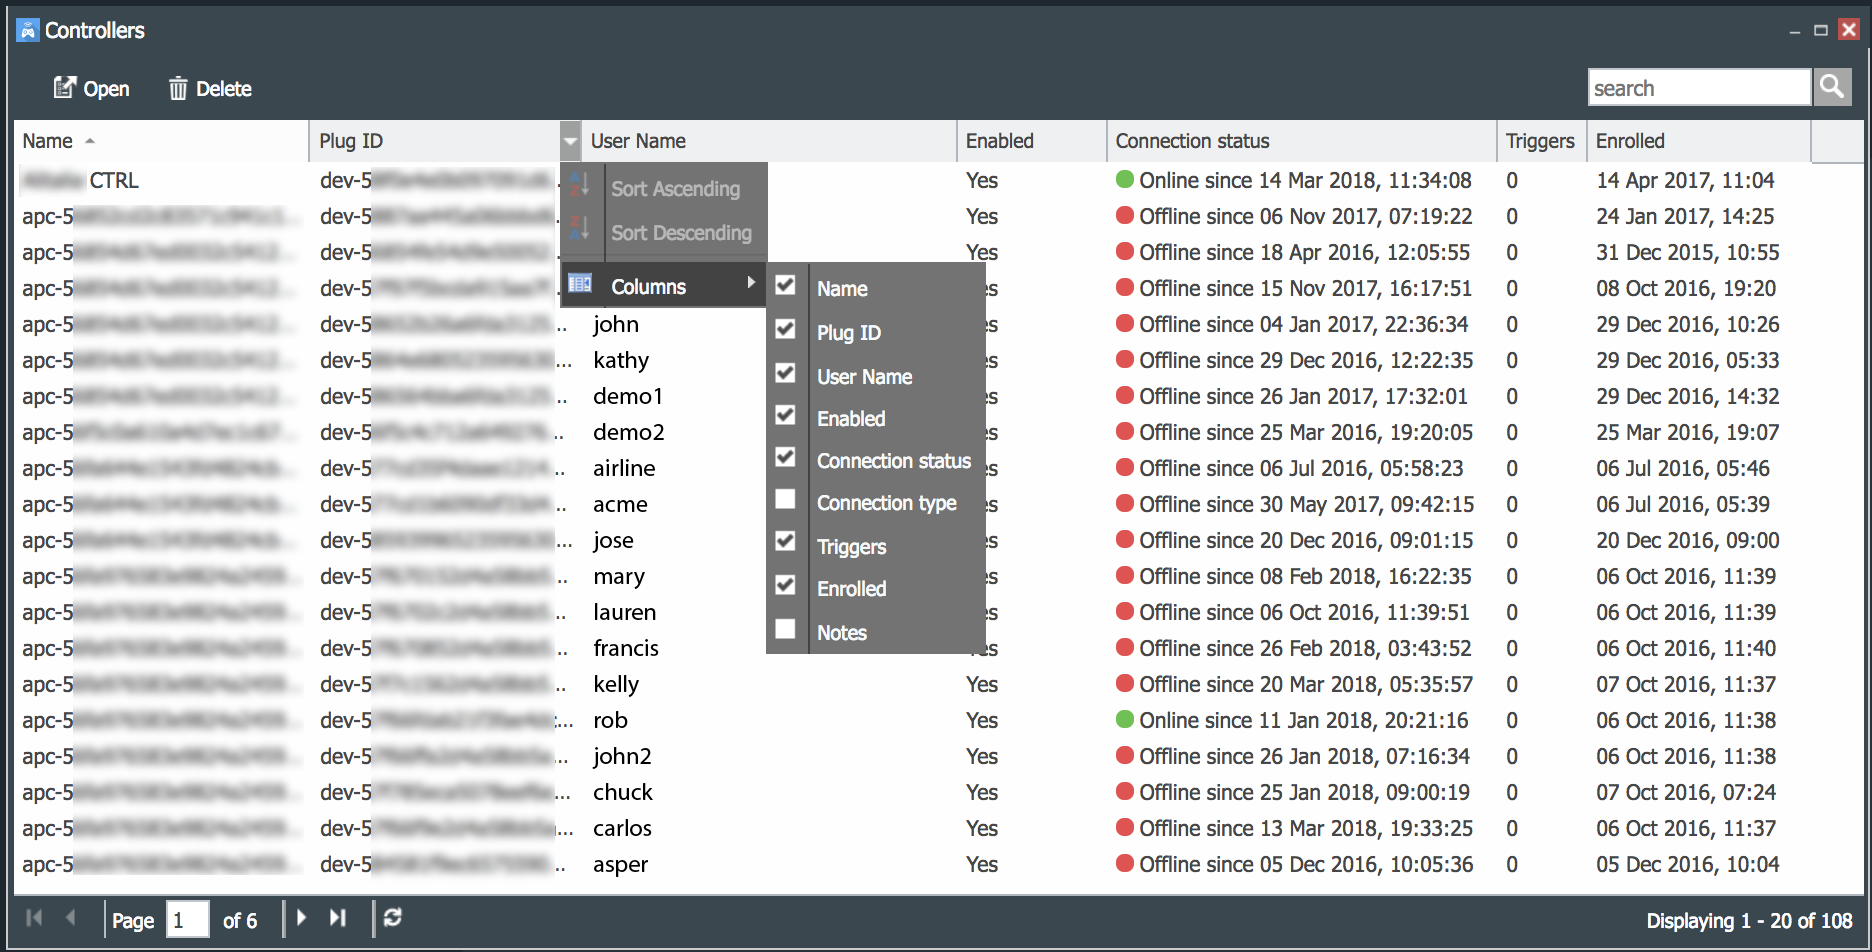
The console shows the following columns:
- Name is the name under which the controller has enrolled. You can change the Name of the controller by opening it and editing the name field.
- Plug-ID is the unique id assigned to the Controller by the CloudPlugs platform.
- User Name indicates the optional but recommended user name associated with the controller application that was set during the Controller’s enrollment with the platform.
- Enabled indicates if the controller’s communication with the platform is Enabled or Disabled. The state of the controller can be changed by opening it.
- Connection status, which indicates whether the Controller is online or offline.
- Connection Type, which indicates the protocol that the Controller is using to connect to the platform.
- Triggers indicates how many, if any, Triggers have been programmed for the Controller. They can be modified by opening the Controller.
- Enrolled shows the date in which the Controller was enrolled by the platform.
- Notes any notes associated with the Controller and they can be modified by opening the Controller.
You can select which columns are displayed through the dropdown menu for each column. Some of the columns also allow additional filtering capabilities. See the images below that show the default display of the columns as well as the dropdown column selection menu.
 |
 |
|---|
Controller Properties Console
The Controller properties console can be used to:
- Set or edit the Controller Device Profile.
- Set or edit Location.
- Program or edit Triggers. Please refer to the Triggers guide for details on how to program them.
- View traffic and storage usage statistics. Please refer to the Statistics guide for details.
- View the data published by the Controller, and to publish data as the Controller. Refer to the Device data guide for details.
IMPORTANT!
Given that there are individual guides for Location, Triggers and Publish Data which are the same for Production Things and Controllers that can be accessed through the links above, this guide focuses only on Controller specific features such as the Device Profile.
Controller Device Profile
The Controller Device Profile is accessed by opening General (![]() ) --> Device Profile (
) --> Device Profile (![]() ).
).
The window displays three panels:
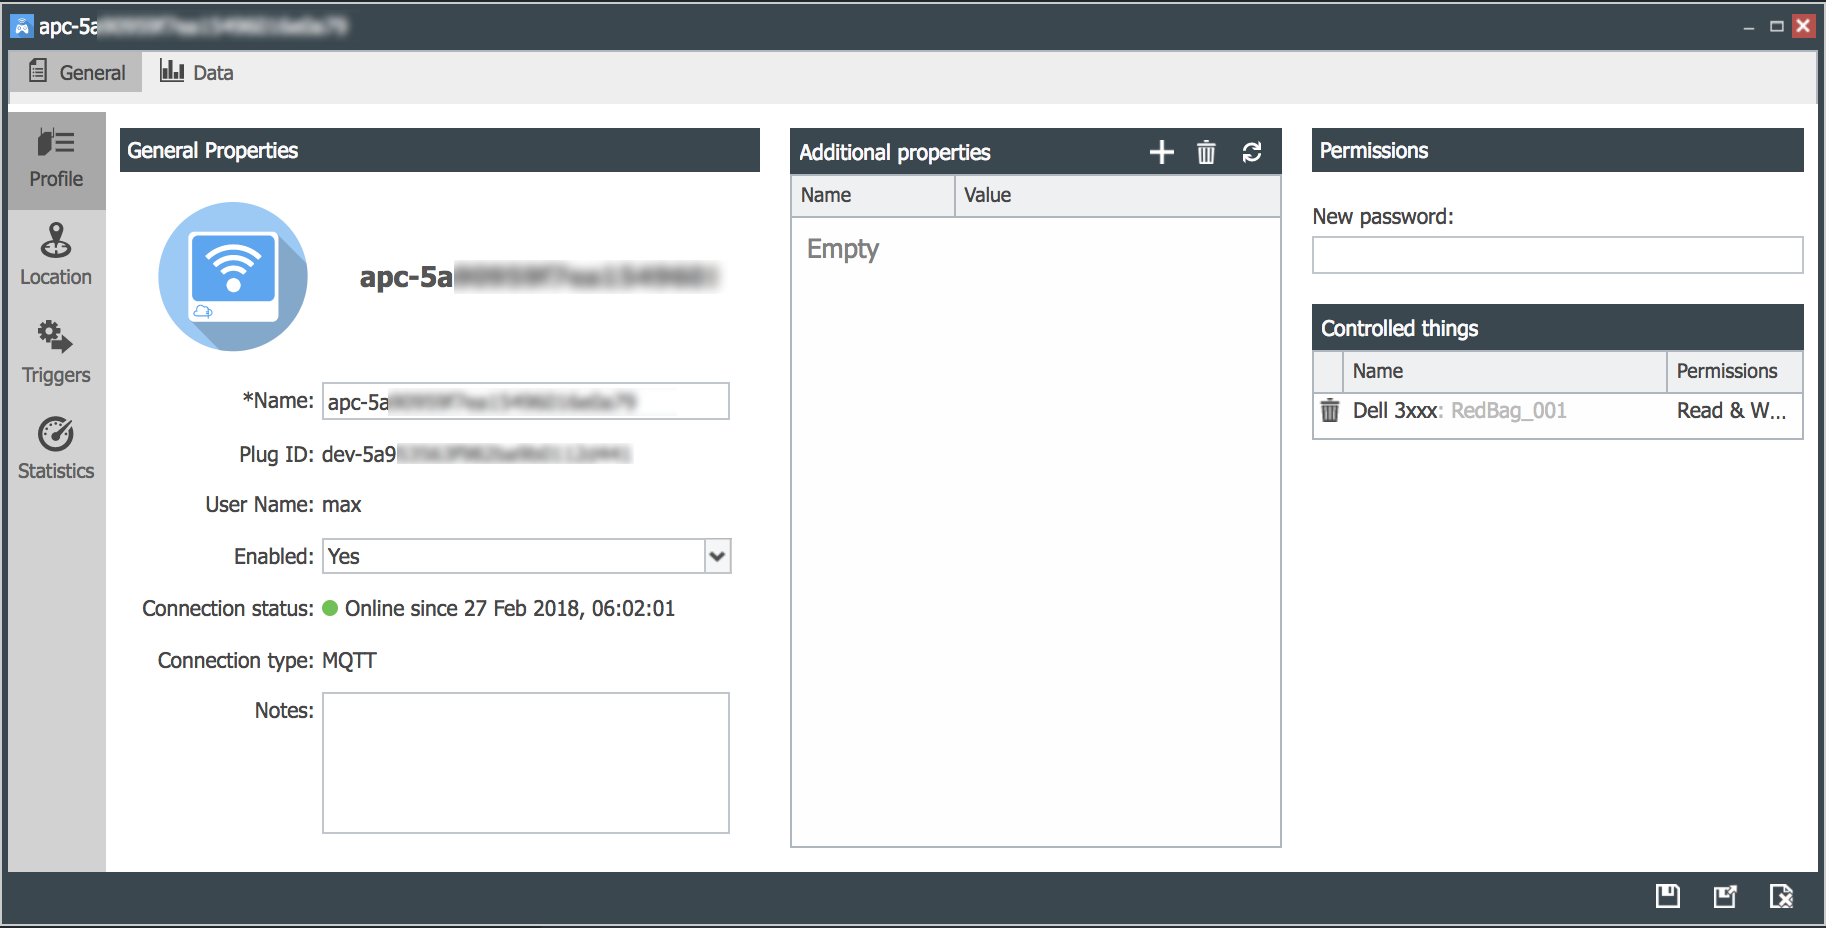
General Properties
The General Properties panel displays the Controller’s:
- Name provided either during enrollment or the name generated automatically by the platform.
- Plug-ID generated by the platform during the Controller’s enrollment process.
- User Name which is typically entered during enrollment.
- Enabled which allows you to enable or disable a Controller.
- Connection Status which indicates whether the Controller is online or offline.
- Connection Type which indicates the protocol used by the Controller for its connection.
- Notes which allows you to enter any notes related to this controller.
Additional Properties
The Controller Additional Properties consist of metadata that you can associate with the Controller. They are exactly the same as those for Production Templates and Production Things.
For more details, please refer to the Additional Properties Guide.
Permissions
The Permissions panel is used to:
- Set or reset the Controller password. Please note that if this is done, the related end user control application will only be accessible if the user enter the new password. Also note that this is not the Production Thing’s Control password which once set, never changes.
- Display the Production Things controlled by the Controller along with the Permissions granted to the Controller for each individual Production Thing.
- Remove a Production Thing from the control of the Controller. This does not delete the Production Thing. The Controller will no longer control the Production Things deleted from the list.
Permissions for the Controller are either Read only or Read/Write. These permissions are set either through the Production Thing’s Production Template, or through the individual Production Thing’s Permission’s panel under permissions for new control requests.
- Read/Write permission allows the controller to:
- Overwrite the properties of a Thing.
- Modify data already published by a Thing.
- Publish data as if it was a Thing.
- Delete data published by a Thing.
- Read only permission allows the controller to:
- Read data published by a Thing.
- Read the properties of a Thing.
- Enable a Thing to access the data published by the controller.