Programming Triggers
Overview
Triggers can be programmed in various ways depending on the type of target device.
Controller triggers are programmed using the Trigger panel ( ![]() ) of the device’s Properties Management console.
) of the device’s Properties Management console.
Triggers for Production Things can be programmed in three different ways:
- Triggers programmed in the Things’ Production Template are inherited by the Template’s Production Things. Inherited triggers can be modified in individual Things and, when saved, their Production Template trigger will also be modified. The change will propagate to all the Things belonging to the Template.
- Triggers may be programmed in the individual Production Things Trigger panel accessible through the Thing’s Properties Management Console.
- Triggers may be programmed using the Bulk Actions window accessible through the Things Management Console.
This guide describes the process for programming triggers based on:
The guide also provides an example of an Online status change trigger.
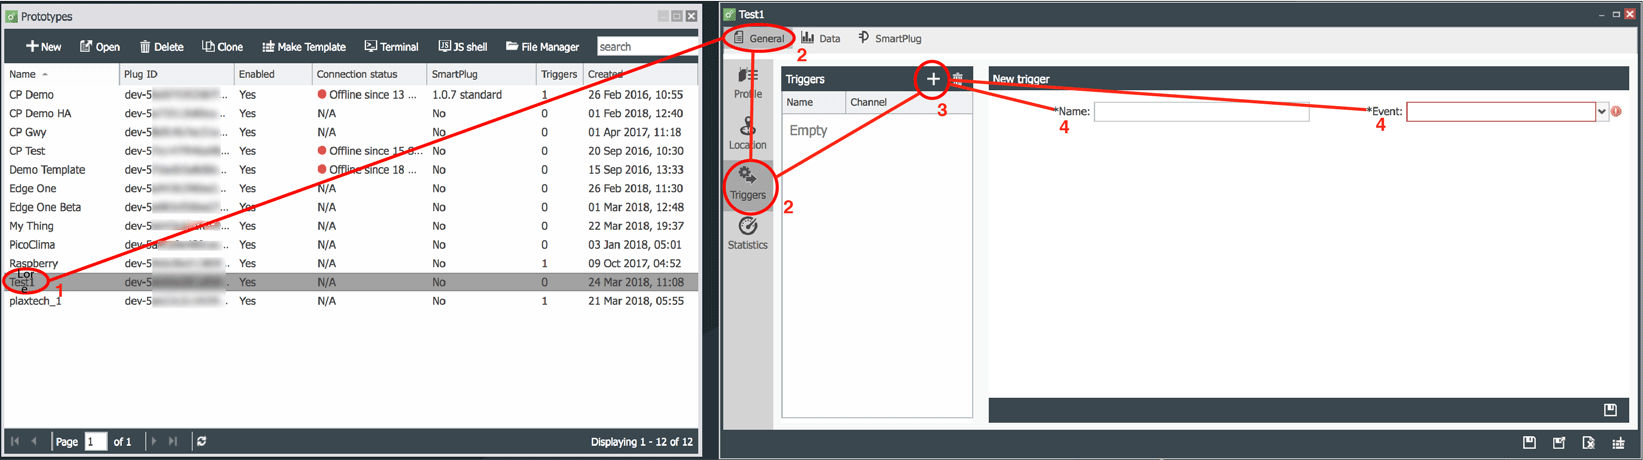
To create a Trigger for your Production Template, Thing or Controller:
- Open the target device from its management console.
- Select General (
 ) -> Triggers (
 ).
). - Click on the New Trigger button (
 ).
). - Give the trigger a Name and select the Event that will be used to program it.
Data Published Triggers
To program a trigger based on Data published:
- Give the trigger a name (e.g. Temp Alert).
- Set Event to Data published.
- Enter and existing channel name (suggestions will be offered as you type the channel name), or enter a new channel name if it does not exist yet.
- If the data published is a structured JSON, select the Data Field whose value will be used to compute the trigger.
- Select the Rule Type. The following list contains links to the various Rule Type programming and testing guides available:
- Thresholds, which allow you to set Thresholds and program actions when the thresholds are crossed.
- Location which allows you to set geo-fencing boundaries and program actions based on device location relative to the geo-fence.
- State is used to program actions based on device state changes, or when a device remains in its current state.
- Bit mask used to program actions based on the value of individual bits of the data received by CloudPlugs IoT.
- Any Data is used to program actions when any type of data is received by the platform.
- You will then program the action(s) for each trigger created.
- Near real time e-mail notifications.
- Near real time SMS notifications.
- HTTP requests.
- Publish data.
- Create a JIRA trouble ticket.
- Save the action.
- Save the Trigger
- Save the device or Production Template.
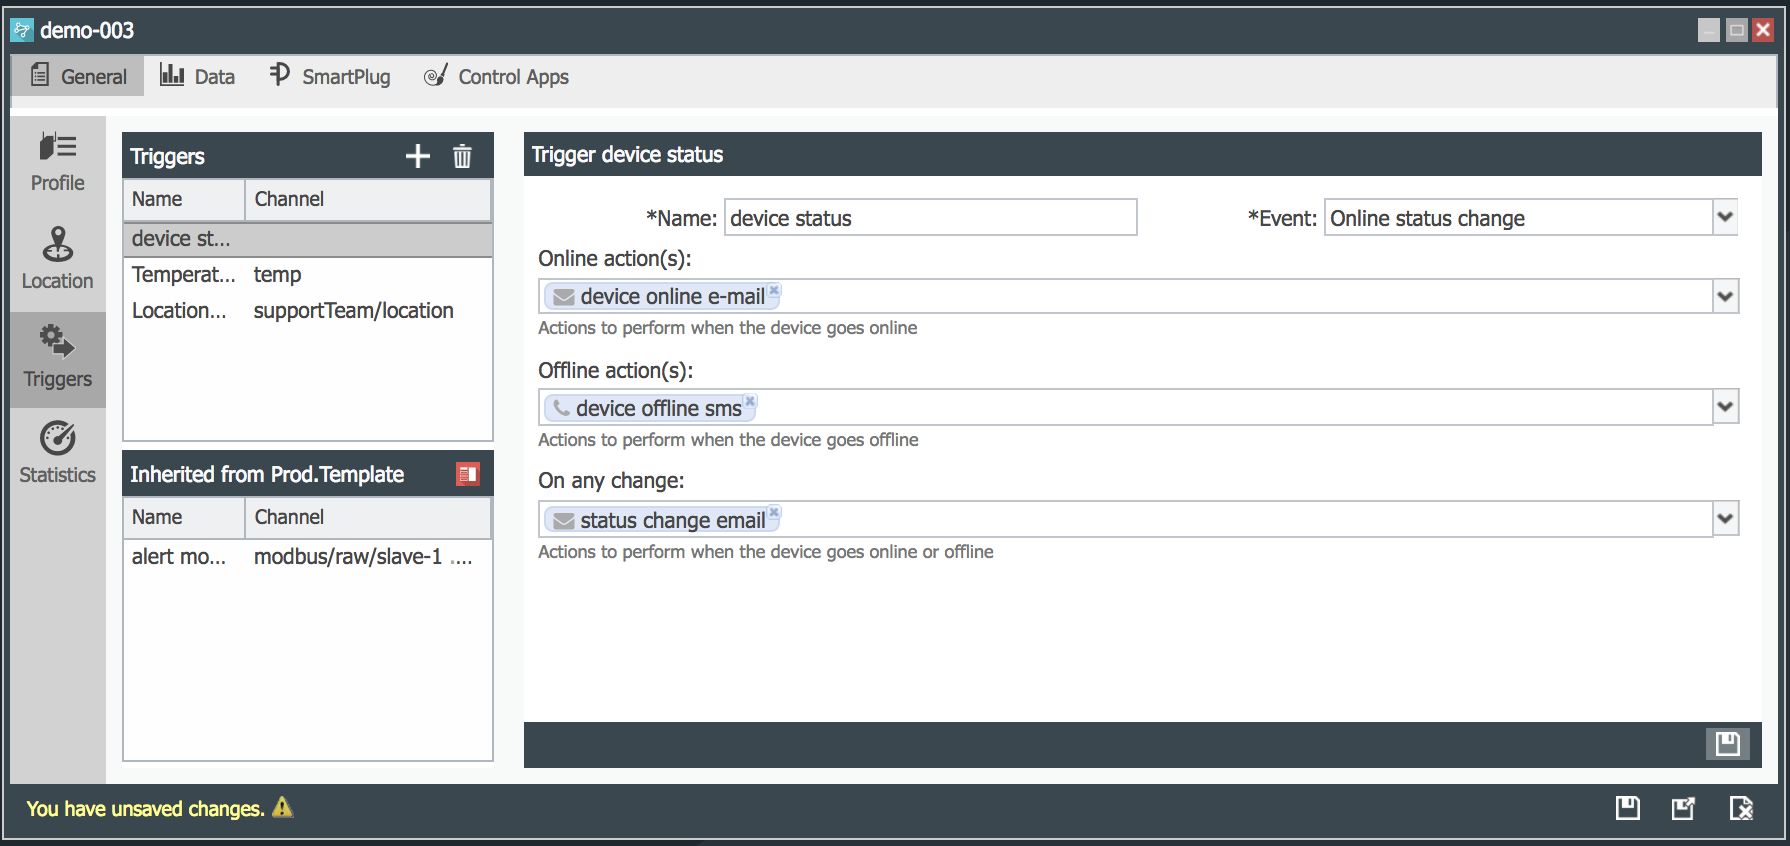
Online Status Change Triggers
To program a trigger based on the change of online status of a device:
- Give the trigger a name (e.g. Device Offline).
- Set Event to Online status change.
- Select the action(s) to be executed when:
- The device goes online.
- The device goes offline.
- The device changes state either from online to offline or viceversa.
- Supported actions are:
- Near real time e-mail notifications.
- Near real time SMS notifications.
- HTTP requests.
- Publish data.
- Create a JIRA trouble ticket.
- Save the action.
- Save the Trigger
- Save the Thing, Controller or Production Template.
Example
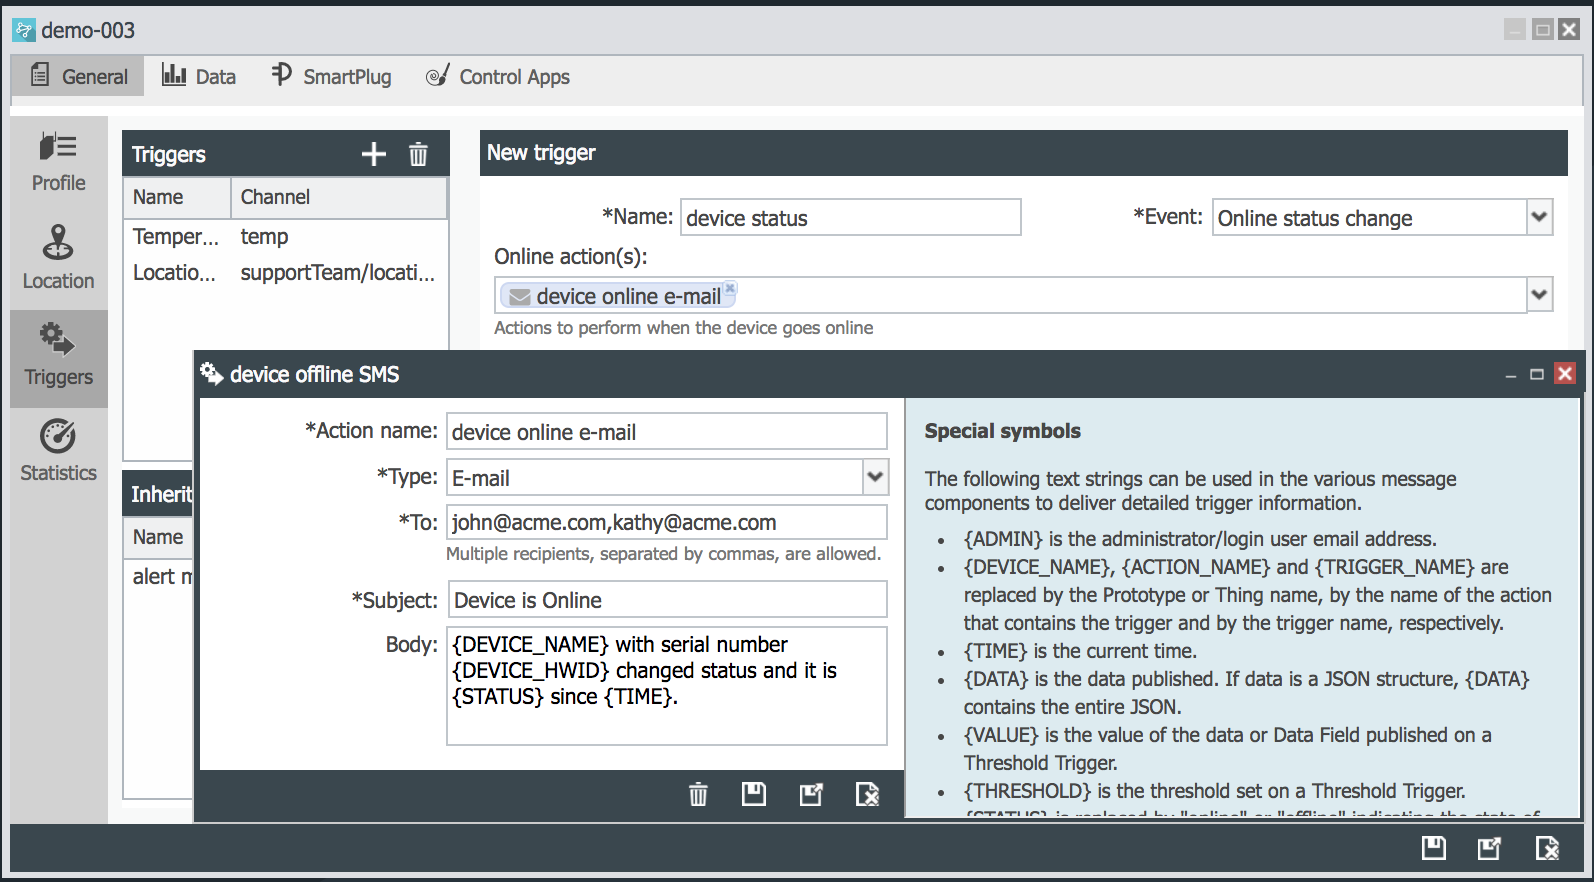
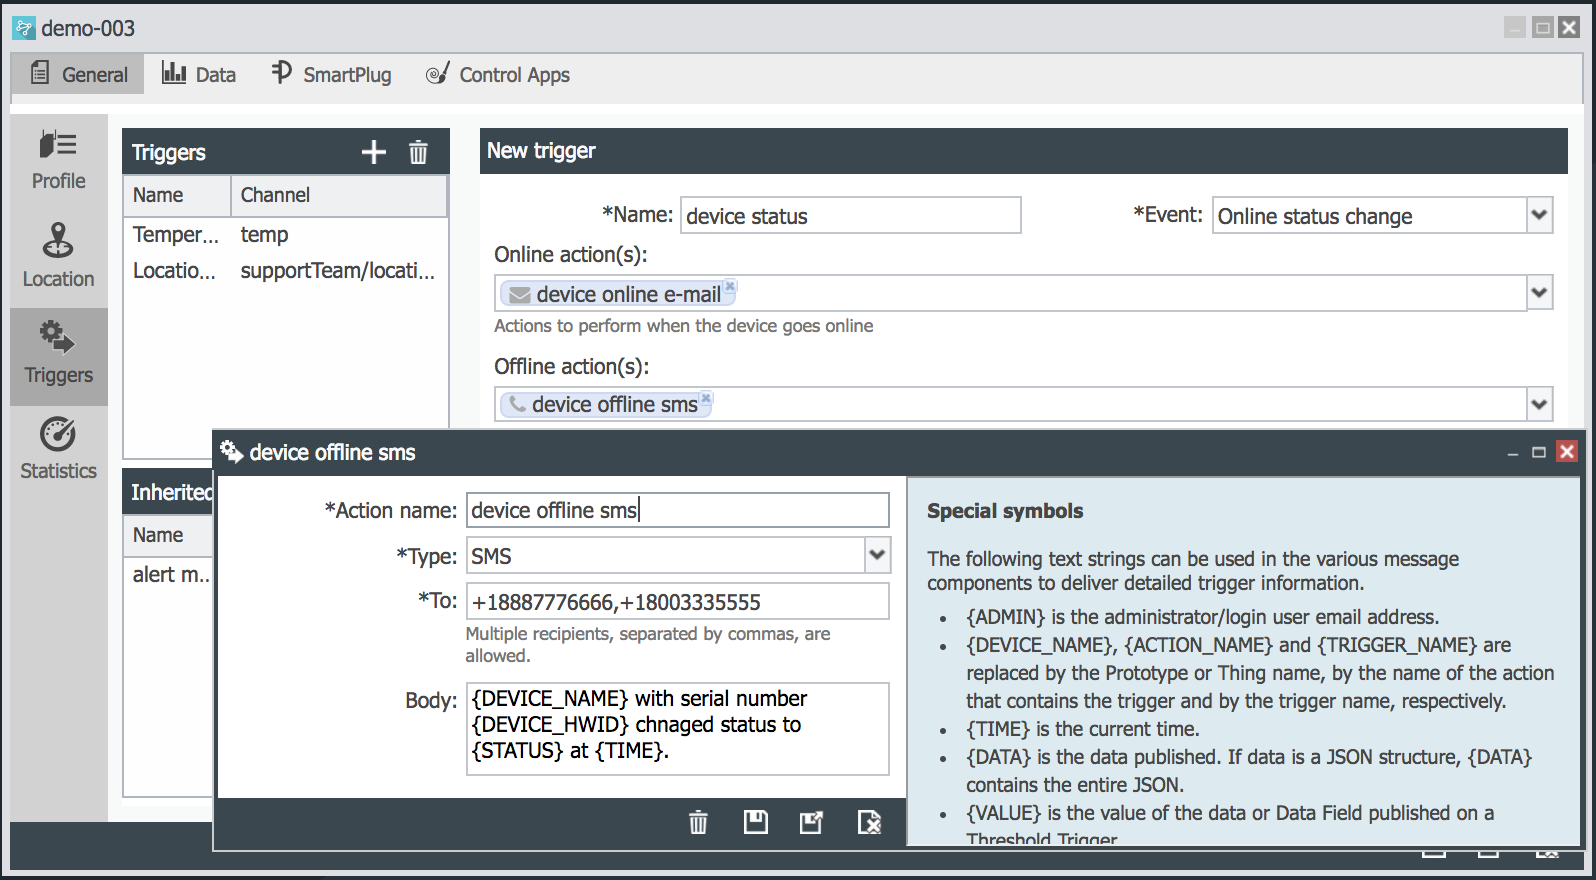
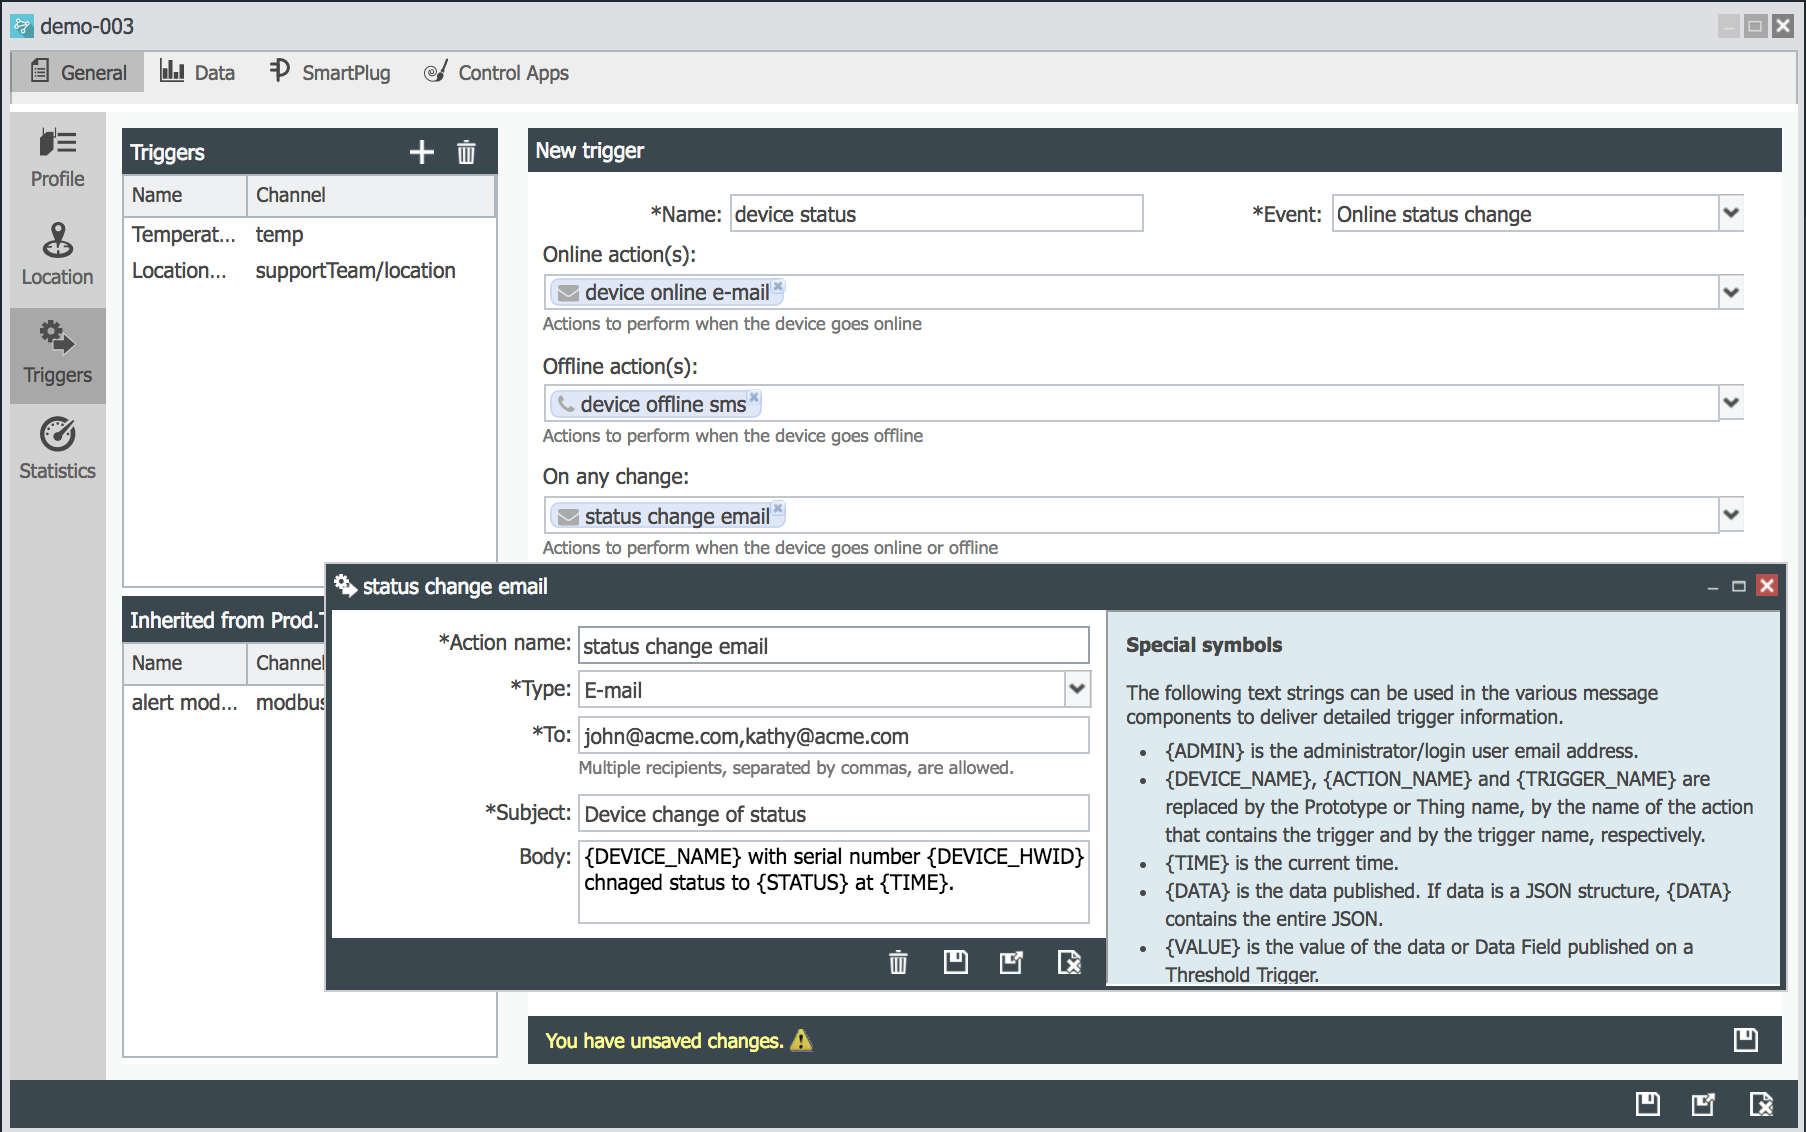
Here is an example of an Online status change trigger for a Production Thing called demo-003.
We will create a trigger that:
- Sends and e-mail to two addresses when the device changes status from Offline to Online.
- Sends an SMS to two phone numbers when the device goes from Online to Offline.
- Sends an e-mail, every time the device changes status Online to Offline or viceversa.
The following screenshots show how the individual actions are created before the trigger and the device are saved. These actions have already been saved and have been re-opened for the screenshot.
| Online action | Offline action |
|---|---|
 |
 |
| Status change action | |
 |
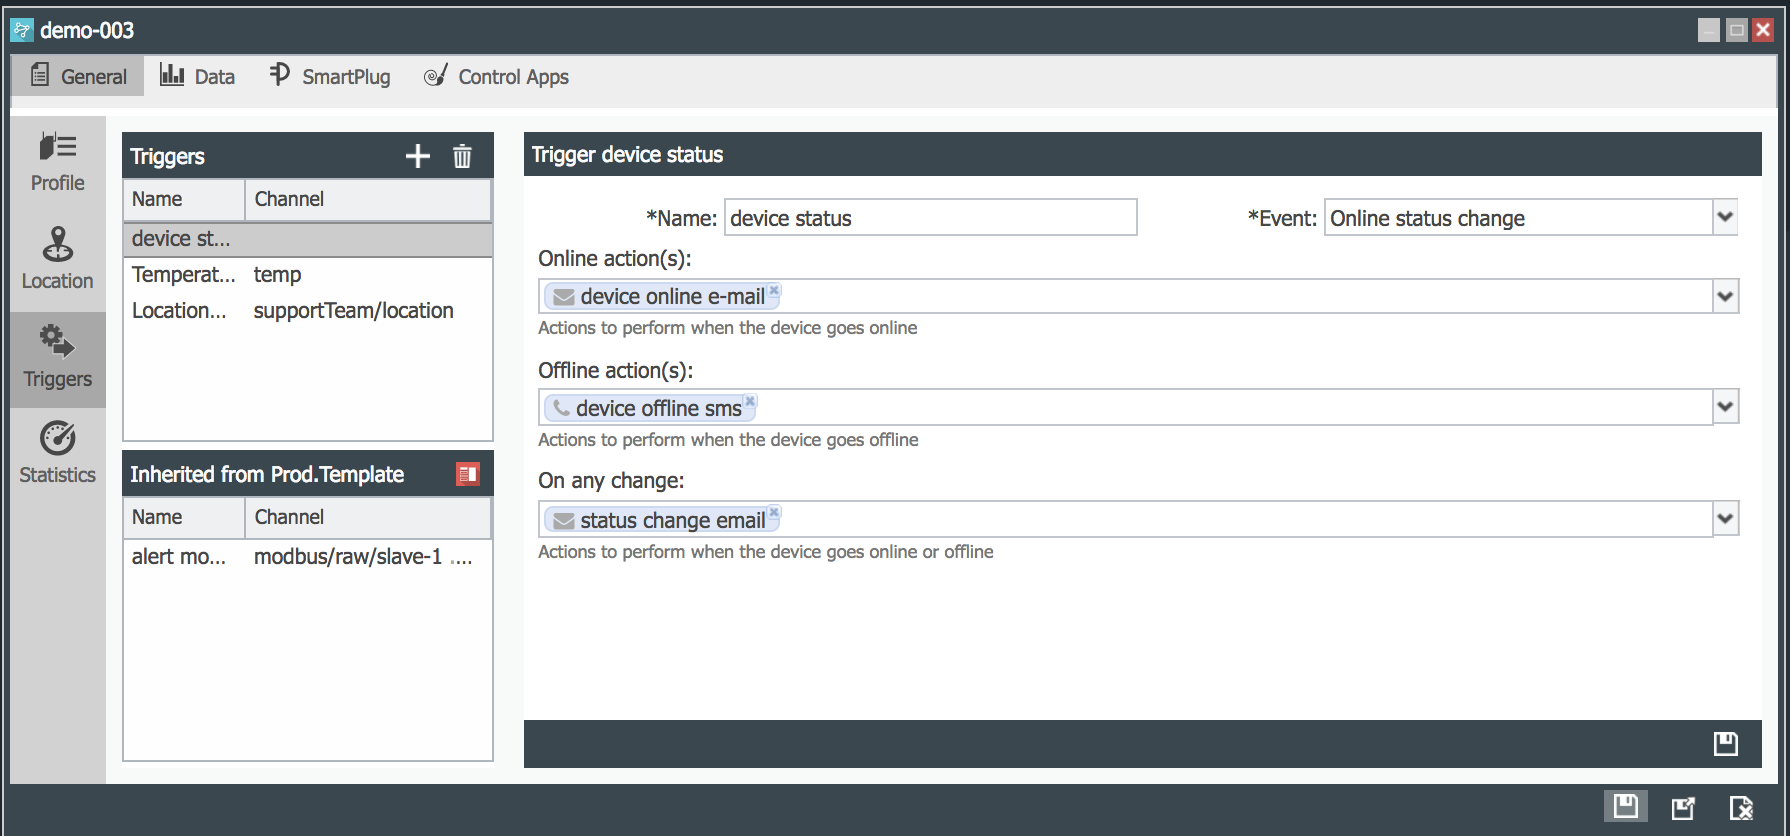
| Trigger is saved | Thing device is saved |
|---|---|
 |
 |